Simple Guide When Buying The Best Kitchen Faucet

Easy Tips for Choosing the Right Faucet

Choosing a faucet can be tricky. It may seem like a strictly functional piece of hardware in your kitchen, but the truth is that your faucet is often a major focal point to the space.

style

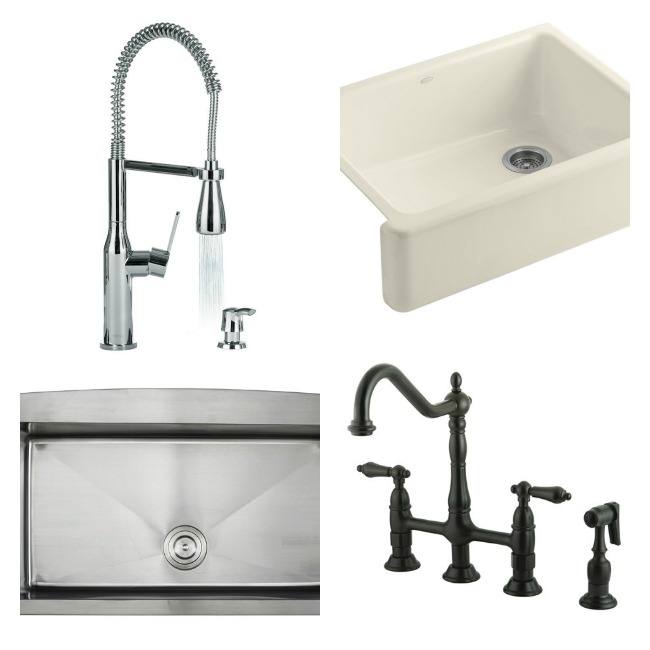
Think about your the general style of your kitchen as well as the style of the sink that you have selected. Pairing a cast iron farmhouse sink with a super modern faucet may not work together unless you are going for a very edgy or eclectic look. Similarly, a strongly modern stainless sink would not suit a traditional bridge style faucet.

Finish

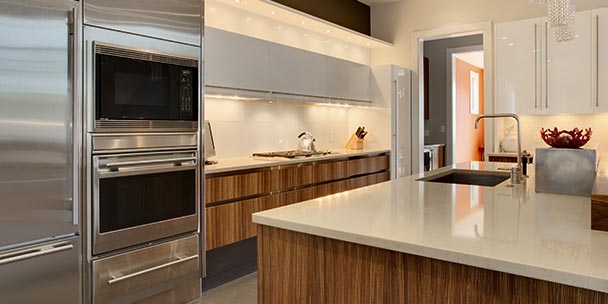
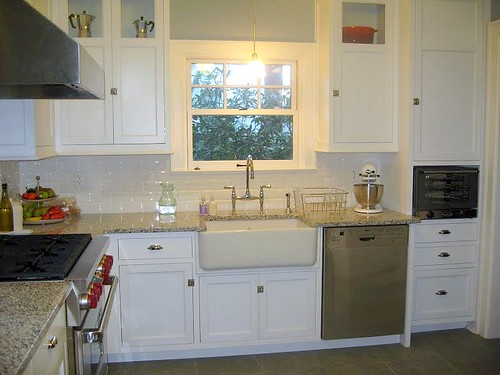
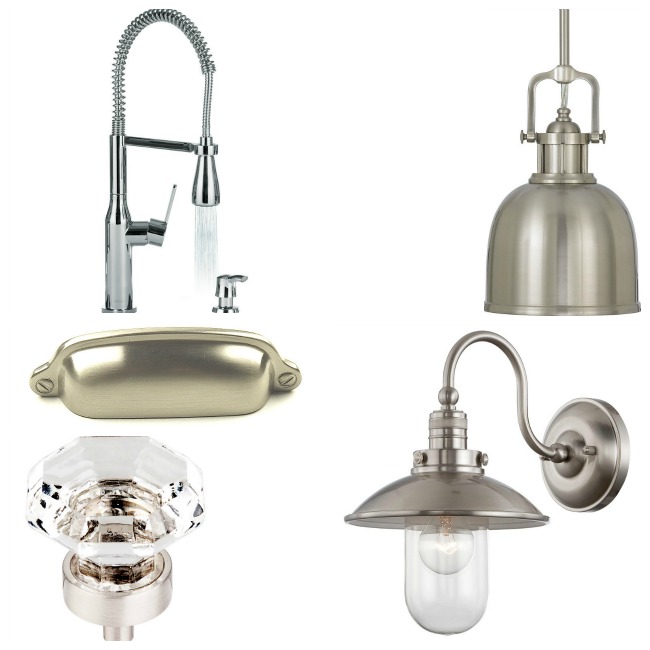
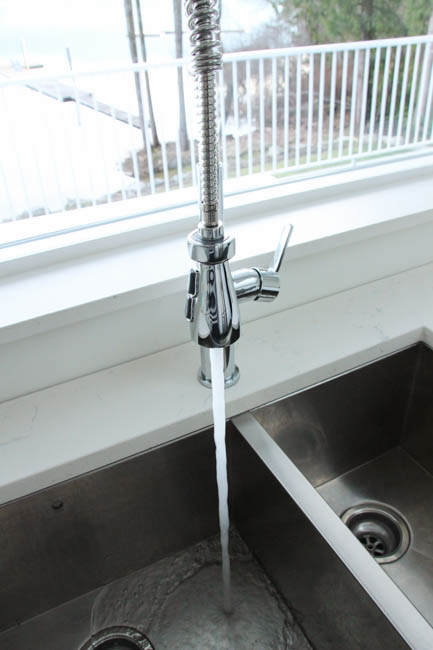
Faucets generally come in three main finishes: chrome, nickel (or other brushed metal), or bronze. Consider the nearby cabinet hardware, as well as lighting and other metal finishes in the space. It doesn’t all have to match exactly, but choose a faucet whose finish works well with the other finishes in the space. Because I chose chrome and nickel finishes throughout the space in the cabinet hardware and lighting, I selected a chrome faucet to complement these finishes

Spout height and reach

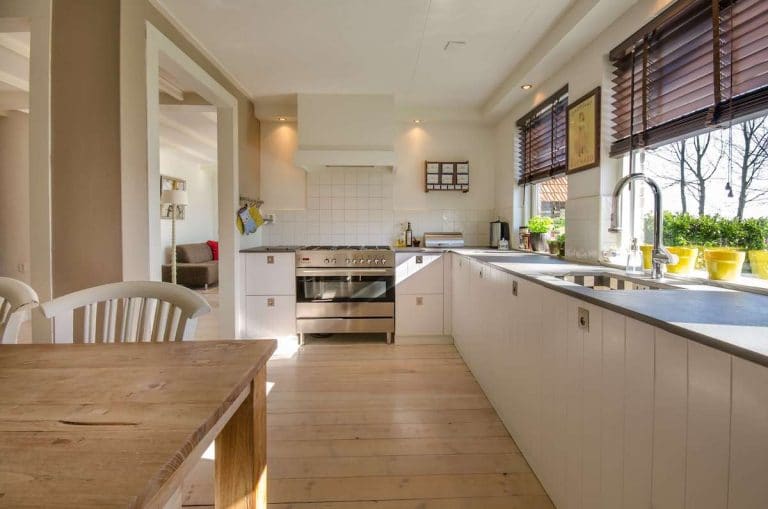
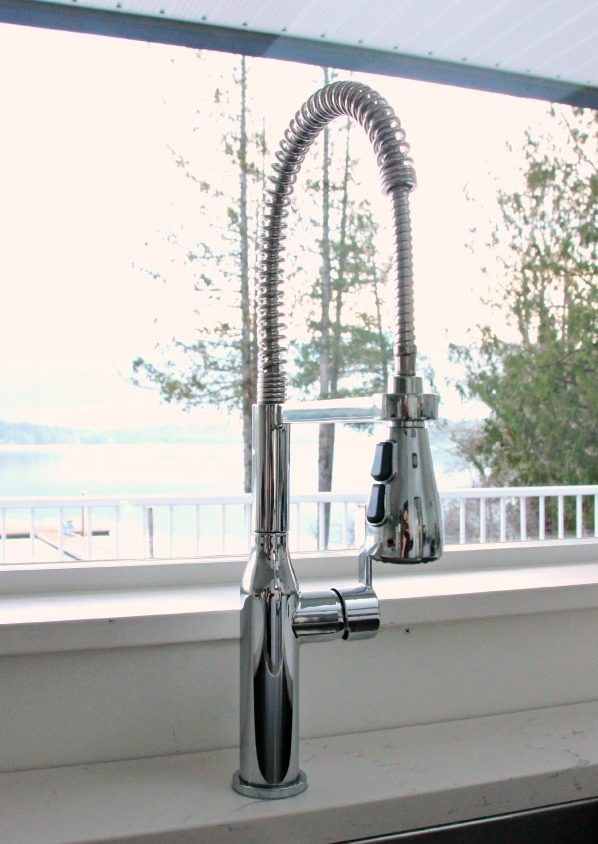
Faucets with a high arc are very on trend these days… but you need to consider the amount of space you have above your sink. If you have low cabinets or shelves above the sink, you may not wish the arc to be too high. Another thing to consider is the size of your sink…. a large sink may require you to select a faucet with a larger reach. The farmhouse sink that we selected is quite wide and deep, so choosing a faucet that had a spray option that would reach all the corners of the sink easily was critical

Sprayer options

A sprayer on a faucet is an amazing tool… a good sprayer can remove all kinds of gunk and mess for you, and it also can help to keep your sink cleaner. Often faucets with a separate side spray are not as convenient or effective as a sprayer that is built into the faucet itself. Some faucets, such as the one we chose, even have a little button on the faucet head to turn the spray on and off making this feature super convenient and easy to use


What to Look for When Searching for Your Next Kitchen Faucet

Your Kitchen is Your Command Center

Prepping for spaghetti night. Bathing the baby. Watering the plants. It should come as no surprise that you spend more active time in the kitchen than any other room in the house. And from selecting a finish to starting installation, there are plenty of things for you to consider when choosing your next kitchen faucet.

Think About What Goes on in Your Sink

When it comes to taking care of business in the kitchen, you need a faucet that’s built to handle everything you throw at it. Think about your everyday experiences and then see how the right combination of features — including handles, spout height, and sprayers — can help you create a space that works your way.

Hands-Free Convenience

Touchless Kitchen Faucets with MotionSense™ feature touchless activation, allowing you to easily turn water on and off with the wave of a hand.

Keep Everything in Reach

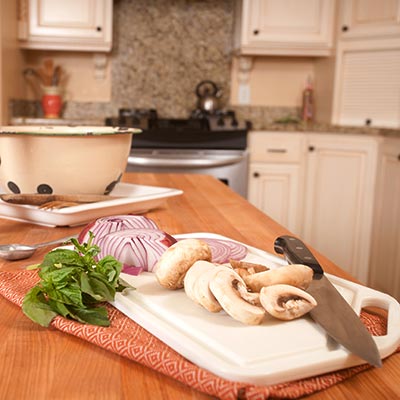
Whether you’re rinsing down the corners of your sink or cleaning fresh veggies from the garden, a faucet with the right sprayer helps make quick work of your kitchen tasks

Get Smart About Arcs

Have you ever shimmied a large pasta pot under a low spout or had your window view interrupted by a high spout? if so, then you understand how important it is to have a faucet that’s just the right height.


TIPS ON CHOOSING THE RIGHT KITCHEN FAUCET

Few people would argue that the kitchen is the hardest working (and most “hung out in”) room of the house. So when you’re doing a kitchen renovation, how do you ensure you’re making the most out of the type and placement of those relied upon faucets?  Here are a few tips on how to choose those faucets, and maximize the placement of them in various areas throughout the room

A big faucet for the big jobs

The main sink of the kitchen is often used for the “heavy lifting” of kitchen duties — washing dishes, cleaning large pots/pans and much more. We suggest putting a faucet at that sink that also serves as a statement piece. Maybe it’s a commercial-grade oversized faucet such as the Danze Parma Pre-Rinse Faucet or a tall pull-down faucet. Whatever your preference, take this opportunity to set the style of the room, which is just as important as the functionality this piece will bring to those big jobs.

Bring water to the stovetop

Pot fillers have grown in popularity in recent years and there’s no question why. For relatively little effort during a renovation (run a single cold water source to behind the stovetop area), you have the added convenience of a wall-mounted pot filler. Perfect for adding water to boiling pots, a dirty pan and other purposes, these beautiful faucets making cooking that much easier and fun
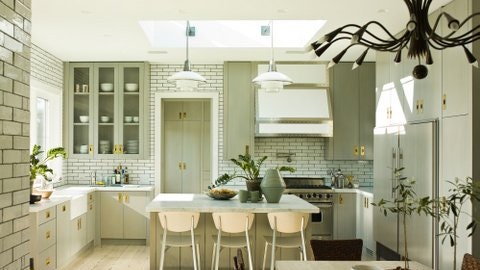
Maximize the island

More and more homeowners are adding a second sink to the kitchen by placing one within the island. For at-home chefs, this is a great way to stay connected to guests while prepping food, washing vegetables and simply keeping the kitchen duties moving. Danze offers one of the only deck-mounted pot fillers on the market — perfect for island applications. If a pot filler isn’t for you, choose a small to medium-scale faucet (maybe a pull-out or bridge faucet with side spray) that helps maximize this important area of the room’s footprint.

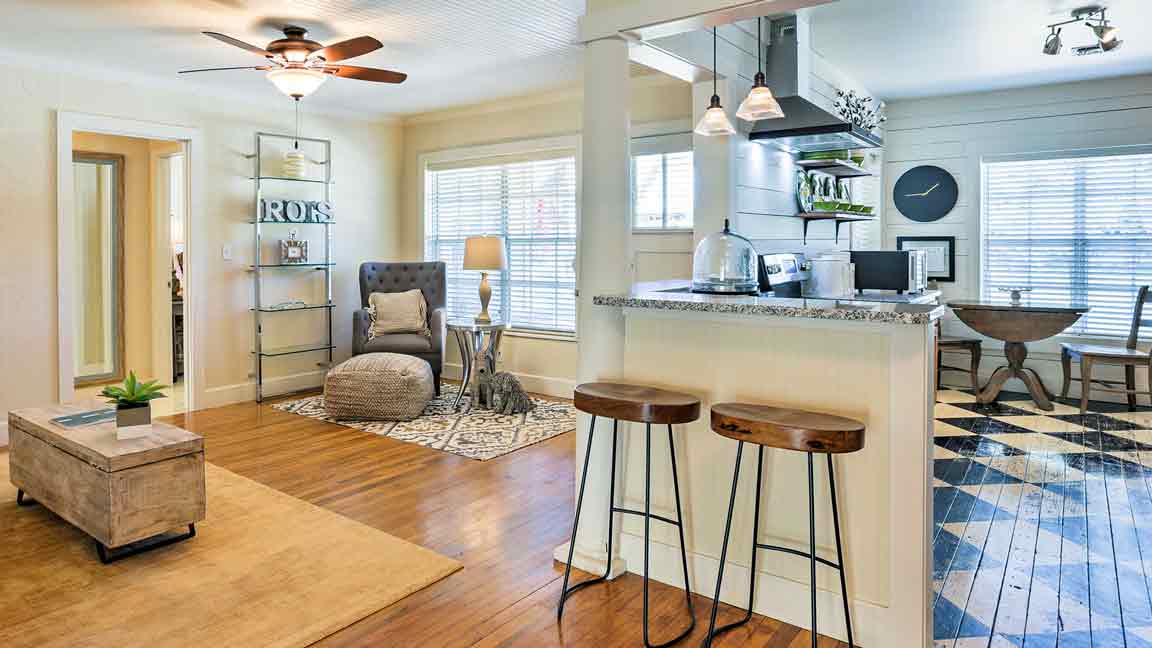
Create a convenient bar

As homeowners choose to entertain more and more at home, a secondary (or convenience) bar area adjacent to or right within the kitchen has become a popular choice during renovations. Stylish, yet modest faucets are often chosen for these sinks to stay within scale of the area, yet provide the convenience and functionality that is required once guests arrive.


TIPS FOR CHOOSING A KITCHEN FAUCET YOU NEED TO KNOW BEFORE YOU BUY

Not so fun fact – I’ve gone through 4 kitchen faucets in the last two years. It’s been a frustrating (and pricey) lesson that not all faucets are made equal. With my new kitchen renovation, I wanted a faucet that not only provided style but functionality too, here are a few things to consider when choosing a kitchen faucet.

CHOOSING A KITCHEN FAUCET

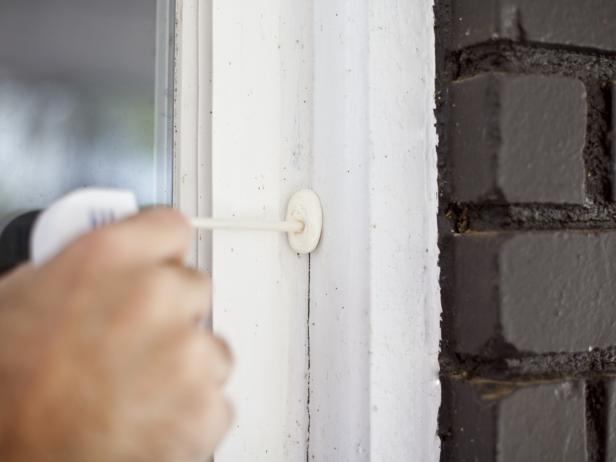
Know how many holes you have. You may need a deck plate to cover any existing or if you only have one, you may need to drill into your countertop. It’s easier to go with less than more

Keep the finish of your hardware in mind. I personally don’t believe there are any hard and fast rules when it comes to home design but, personally, I prefer my kitchen faucet to match the finish of my kitchen pulls and handles. It’s easy on the eyes and makes the decor aesthetically appealing.

Spray features. When it comes to choosing a kitchen faucet, the more spray options the better. I don’t want a trickle, I also want a jet steam so I easily clean stuck on food.

Faucet height. Most faucets are in front of a window, but if yours is below cabinets – take some measurements before you buy.

Hose length. This is a feature that I missed the first few times I was choosing kitchen faucets. Take into consideration the size of your sink (my old sink was a large one, and I couldn’t stretch the hose enough to clean the bottom corner), if there are any plants nearby you would like to easily water, or if you have coffee maker next to the sink to easily fill (I can’t be the only one who gets annoyed when I have to take the reservoir out of my Keurig each time).


Tips for Selecting a Kitchen Faucet

Height and Reach

Kitchen faucets are available in a variety of heights and reaches. You want to choose a faucet that offers the best combination for your space. If you have large cabinets over your sink, you want to make sure that the height of the faucet doesn’t make the space look overcrowded.

Kitchen Faucet Style

You need to choose a style before you start shopping for a new faucet. Take a few minutes to look around your kitchen and gauge your current style. There are some styles that you mix and match together and others that look awkward together. For example, you can add a modern shape and style faucet to your traditional kitchen, but it would look odd if your style is rustic farmhouse.

Sprayer Options

You already know that you want a sprayer to reach the gunk that lurks in the corner of your sink, but there are so many kinds. You can choose between a side sprayer and one that pulls out from the faucet. The central sprayer is easier to use and helps keep your sink area looking tidy and efficient.

Number of Handles

Most faucets come with either one or two handles. With two handles, you use one to turn on and control the flow of water while the other handle provides hot or cold water. If you choose a faucet with only one handle, water flow and temperature are controlled with a single handle, making it very convenient in a kitchen

Number of Holes

Most sinks come with pre-drilled holes in them. There are typically two or three holes, and if your new faucet comes with fewer pieces to fill those holes than your previous faucet, then the holes need to be covered. Many faucets come with bridge pieces to cover a hole, but it’s a good idea to check the packaging if you’re going to need a cover to ensure it’s in there. For example, your old faucet had a side sprayer while your new one has a pull-down sprayer. The hole for the side sprayer is now empty.

Arc Fault New Electric Circuits Interrupters

Troubleshooting Electrical Circuits

NAVIGATE ELECTRICAL TROUBLESHOOTING FOR YOUR FACILITY

Electrical control system issues usually happen with the worst possible timing. It’s wise to be prepared with a troubleshooting plan. Often, we are quick to jump directly into fixing a problem when, in fact, it would benefit us to be methodical with our process. Here, we share a troubleshooting process that can help you navigate electrical troubleshooting for your facility.

  1. Gather Information. The first step of any electrical system troubleshooting exercise involves gathering as much information about the problem as possible. Instead of immediately diving in and haphazardly attempting anything to get the equipment running, first step back and determine how is the equipment supposed to operate, what technical documentation is available for the equipment, and is there someone familiar with similar equipment who may have experienced this same issue.
  2. Understand the malfunction and the role the malfunctioning equipment plays within the entire process. When you understand how the equipment and process is supposed to work, you can better understand what part of it is not functioning correctly.
  3. Identify what can be measured so that you can identify items that are outside the acceptable range. For example, are there voltage readings or temperature readings that would help you evaluate the source of the problem?
  4. Identify the source of the problem using available data and analytical tools to isolate the defective component. This could involve isolating components and evaluating their circuit parameters or isolating the circuits by group when dealing with a complicated circuit.
  5. Correct/repair the damaged component.
  6. Verify the repair after completion. Once the repair has been performed, start the system to ensure it now runs as required. This is important because there may have been other underlying problems. For example, there may be an issue with a circuit causing a fuse to blow (such as a shorted electrical connection). If this is the case, additional troubleshooting will be required.
  7. Perform root cause analysis to determine what really caused the problem. Since one of the objectives of troubleshooting is to ensure the problem doesn’t reoccur, it is important to determine what really caused the malfunction and take action to ensure a permanent solution is found.


Circuit Breaker Trips Frequently

When a properly working circuit breaker trips frequently and there are no malfunctioning loads on the circuit, it means the circuit is overloaded. Using more than one space heater or hair dryer at the same time is a common cause of this problem.

  • After the circuit breaker trips, test for power at nearby receptacles. Any receptacle that still has power when a breaker trips is located on a different circuit.
  • Try moving one of the loads to one of the other receptacles that still have power.

Troubleshooting is the process of tracing and rectifying faults in electric/electronics circuit. 

If there is a problem in electric circuit then possible causes may be;

  1. Open Circuit– A connection may be broken i.e. open circuited. This fault can be traced with continuity test.
  2. Short Circuit– A connection that may be closed is called short circuited. This leads to flow of excessive current in circuit resulting in the damage of components. Short circuit problems are normally caused by weak/damaged insulation which can be detected by insulation test.

To troubleshoot a circuit for fault, all following things should be checked.

  • Channel resistance
  • Potential difference between two points
  • Flow of current


No GFCIs

What it means: Increased risk of electrocution in wet areas, such as baths and kitchens. GFCIs (ground-fault circuit interrupters) shut down circuits in 4 milliseconds, before current can cause a deadly shock.

level: High.

Solution: Replace old receptacles with GFCIs (about $12 each). This is a simple job that many homeowners do themselves. Electricians charge about $20 per outlet. (There will likely be a minimum job charge.) Note: As an alternative, GFCI breakers ($25) can be installed on the main panel. But then every time one trips, you have to go down to the basement to reset it.


Aluminum Wiring

What it means: You have a type of wiring, used in the 1960s and ’70s as a cheap substitute for copper, that is no longer considered safe.

Danger level: High. Aluminum corrodes when in contact with copper, so connections loosen, which can lead to arcing and fires.

Solution: Retrofit a dielectric wire nut approved for aluminum wire (a pair sells for less than $1) onto each copper/aluminum connection in light fixtures. These nuts have a special grease that stops corrosion while maintaining conductivity. Make sure any replacement switches and receptacles are labeled AL-compatible.

Plug Falls Out of Receptacle
What it means: Worn contacts in receptacle no longer grip the prongs firmly.

Danger level: High. Loose contacts can cause arcing, which can ignite dry wood and dust.

Solution:Replace the old receptacles as soon as possible. (A new one costs about $2.) Many homeowners feel comfortable doing this themselves. Electricians will charge about $8 or $10 per outlet, although there’s likely to be a minimum charge for small jobs.


Understand how the circuit works.

This consists of understanding the operation of all the components that are used in the circuit. This could include such components as: push buttons, contactors, various types of switches, relays, sensors, motors, etc.
Electrical circuits typically control or operate mechanical systems and components. You also need to understand how these mechanical aspects of the equipment operate to carry out the work.
You need to be able to determine how the circuit works under normal conditions and what effect changing one of the circuit inputs has on the circuit operation. For example, what happens to the overall circuit operation when a push button is pressed; which relays energize, which lights illuminate, does the pump start or stop, etc. You also need to be able to determine what effect a faulty component may have on the circuit operation.

How Stucco Repairs Is Done

How Much Does It Cost To Repair Stucco?

Stucco is one of the more long-lasting options as a siding for your home. However, despite its longevity, it can occasionally become damaged. Harsh weather conditions and accidents can chip, crack or warp stucco, making repairs necessary

Repairs should be done quickly to prevent damage to the underlying wood lath and prevent water penetration. Even minor cracks can lead to significant damage, so if your stucco is in need of repair, it is important to handle the situation immediately to minimize the risk of additional damage. Bonus Tip: If the crack or hole was caused by an underlying problem, be certain to fix the underlying issue before tackling the repair to prevent having to replicate the chore later.

DIY vs. Hiring Costs

The decision of whether to tackle stucco repair on your own or hire a professional to do the job depends on several factors. For instance, if the crack is a hairline crack or a small chip, you may feel comfortable using a stucco repair kit to do the job yourself. Or, if you have extensive masonry experience, you may decide to handle larger cracks and holes

Labor, Materials, and Installation

Because of the skill level required to repair and match the repaired material to the existing stucco, many contractors consider stucco repair to be a virtual art form. Labor costs are generally figured in one of two ways, either by the hour or by the square foot.

Labor Costs

Nationally, contractors charge anywhere from $40 to $50 per hour to repair stucco, or from $60 to $120 per square foot. The two main reasons for these costs are the complexity of the repair and the fact that it takes time, as it involves waiting for each coat to cure before proceeding to the next step.


Stucco Contractors, A Few Hiring Tips

If you have a larger project, then you will likely be interviewing several stucco contractors. Narrowing down which ones will make sure that your project turns out the way you want it to can be somewhat confusing, not to mention the different bids you’ll be getting, recommended repairs needed, texture and color samples, etc

References:

Ask to see a couple of jobs that the contractor has done in the past. Try to get some more recent jobs, within the past month or two, would be better and will show that they are still doing good work and people are still hiring them.

Stucco Supply Yard: The staff will know virtually every plastering crew in your vicinity and can make excellent resources. Just call and ask for 3-5 recommended plastering contractor’s that they know do good work

Local Online Communities: These are a great place to get recommendations from actual people and can be found on sites like Facebook, various forums, etc. Try typing in “(your city) online community” into a search engine like Google and see what pops up.

General Contractors: General contractors will hire a stucco crew to complete any stucco homes that they are working on and will only hire the best contractors for their jobs. Ask how long they have used them for and if you can look at some of their previous work, this is a HUGE benefit for you.


TIPS TO FIND THE BEST STUCCO REPAIRS

HOW TO REPAIR STUCCO CRACKS

Small, thin cracks in your stucco can be easily fixed with exterior latex paintable caulk. Choose a caulk color that is close to your stucco color. You may not find an exact match, but something close to it. If need be, you can touch up the caulked area with an exterior paint that matches your stucco color. Use a utility knife to cut the nozzle at a 45-degree angle, and place it in a caulking gun. Puncture the internal foil patch at the base of the nozzle with a nail or other slender sharp object. Hold the caulking gun at a 45-degree angle parallel to the crack being filled and pull the nozzle along the crack. Don’t push it. Position the nozzle opening so that it forces sealant onto the crack. As you finish applying each bead of caulk, release the trigger and pull back on the caulking gun rod to stop the flow of caulk and relieve the pressure inside the tube. Releasing the trigger alone will not stop the caulk from flowing out of the nozzle. Let the caulk set for the manufacturer-recommended amount of time.

Repairing Stucco Cracks

Cracks in stucco are a common problem. Stucco, after all, is not very resilient–it’s made of cement. So when a house settles over time or shifts because of heavy winds or earthquakes, the stucco siding cracks. The proper way to repair these problems depends upon their size

Hairline Cracks

Very fine, hairline cracks are very easy to fix. If they are super-thin, a coating of acrylic latex paint that matches the siding will probably do the job. If they are a little too wide for paint to fill the crevices, fill them with latex caulking compound first. Allow this to dry thoroughly, then paint the surface with acrylic latex paint.

Stucco can and should be sealed properly to prevent moisture intrusion.

If new, stucco can be sealed with a clear concrete/ masonry sealer, which will penetrate into the stucco and stop moisture entrance. These are typically silicone type sealers. While effective, these finishes will usually need to be redone every 4-5 years. Redoing sealing on a regular basis is what prevents deterioration and damage, which can lead to the need for full replacement.

Common Causes of Stucco Water Damage

Stucco damage is often caused by water. If you noticed that your stucco walls have blistering, staining, or mold, you could have water damage. Stucco siding is vulnerable to a multitude of issues that can cost you thousands of dollars. Here are the four common causes of stucco water damage.


Home Tips: Repainting Stucco

The stucco on my home’s exterior looks faded. What can I do to make it look new again?

Stucco, like many surfaces, can fade – especially when it’s exposed to direct sunlight. But, making it look new again is easy. Quality paint can revive the look of your stucco, giving your home a fresh, new appearance

What if I want to completely change the color of my stucco?

No problem. Just like any surface (for example, wood siding), stucco can be repainted to suit your color preferences. If you want to achieve a darker shade than your original stucco color, and the surface is in good shape, quality paint can probably provide the coverage you need in one coat. Painting a lighter shade over a darker tone may require two coats. When selecting a new color, don’t forget to coordinate with other exterior colors on your home such as shingles and trim.

There are so many exterior paint products on the market. How do I know which one will be the best for stucco?

Most exterior paint products are formulated for application on a variety of surfaces, from wood siding to brick and stucco. The knowledgeable sales people at Sherwin-Williams can tell you about products like Duration® Exterior Coating, and SuperPaint® Exterior Latex Paint. Just tell them a little about your home’s exterior and your goals, and they’ll help you select the coating that will best suit your needs.

Which are better, latex- or alkyd-based products?

Acrylic latex products perform the best on stucco. Most do-it-yourselfers find that latex products are easiest to use because they are easy to apply and they clean up with soap and water Acrylic latex paints also offer good gloss and color retention as well as good coverage that dries fast.

Do I need a primer?

If the surface of your stucco is in good shape with no exposed substrate, possibly not. However, if you need to make a lot of repairs, using a primer will make your finish coat look great and provide the beautiful, long-lasting results you expect. Ask the experts at Sherwin-Williams to help you pick the right product for the job.


STUCCO REPAIR COST GUIDE

There are many factors to consider when weighing stucco repair costs after discovering damaged stucco siding on your home. While certain approaches may cost you less money in the short term, they could leave you vulnerable to future damage, more costs and more headaches down the road.

WHAT IS STUCCO REPAIR?

Stucco repair usually refers to re-sealing the stucco around windows, flashing and joints, or removing certain “chunks” of damaged stucco and installing new stucco in its place. Compared to a stucco remediation job, in which the all the stucco siding is removed and replaced, stucco repair is more of a quick fix.

WHY WOULD I NEED TO REPAIR STUCCO?

Stucco failure usually results from water invading a home’s exterior walls, causing damage to materials under the siding. Usually, failed stucco is a result of the original siding installation being done improperly, without the necessary moisture barriers in place. The first sign of serious problems is usually “tears,” the greenish-black stains that appear to be “crying” on your exterior walls—especially near windows—that indicate moisture intrusion. Other indicators of stucco problems include musky odors near the stucco, large cracks and missing chunks of stucco.

TUCCO REPAIR COST FACTORS

Price is often a homeowner’s first worry, but when you’re weighing different stucco repair costs and options, it’s important to see the full picture. The money you spend now could pay off in the long run.

INSPECTION COSTS – An inspection is a crucial first step in diagnosing the problem. Moisture meter readings involve inserting small probes in suspicious areas of your walls to determine the amount of moisture in the wall cavity. After the reading is complete, holes are caulked over and resealed.

Two Electrical Options For Outdoor Electrical Lighting

Garden Lighting Guide

Garden lighting guide – how to choose lights for your outdoor space

Well-planned lighting can really enhance your outdoor space, increasing visibility in changing weather and creating atmosphere to extend your hours of enjoyment.

Getting started – make a lighting plan

Lighting can make or break your garden, so take time planning exactly what kind of illuminations you want and where.

Identify key features

Sketch a rough plan of your garden, marking all the key features. Identify which features you want to enhance – a pond, a tree, steps – and any that you might want to keep in the dark, like an old shed.

Think about how to create different lighting effects

Outdoor lighting should be fluid, with different types of lighting creating different effects across your garden

Downlighting is good for illuminating doorways, or throwing light onto a patio or decked area. Smaller downlights can pick out particular plants or features, while the smallest downlights attached to the bottom of low-level hardscaping like benches and windows define areas with a subtle, attractive glow.


What is Security Lighting & Why is it Important?

Outdoor lighting adds beauty and dimension to a home. Lighting is also an integral part of an effective home security system. Outdoor security lighting discourages would-be intruders from targeting your home by increasing the risk of being caught. The best lighting design allows physical detection and facial recognition, minimizes hiding spots, and increases your sense of safety.

You don’t have to light your home like a Christmas tree to feel safe. Over-illumination can draw unwanted attention to valuable items in your home or business and can cause light pollution. In this guide, we offer an overview of security lighting and simple tips to help you identify potential safety and security risks, select the best security lights, and determine their placement to ensure your safety and security.

THE PURPOSE OF OUTDOOR SECURITY LIGHTING

Andrew Coleman, a lighting designer for McKay Landscape Lighting in Omaha, NE, reveals the purpose of residential outdoor lighting is threefold. First, it must be aesthetically pleasing to the homeowners. Second, it must help the residents safely navigate the landscape and the perimeter of the home, and allow them to identify obstructions and potential hazards such as a change in elevation. Third, it must provide security by discouraging trespassers. A well-lit home is less likely to be broken into, he says.

TYPES OF SECURITY LIGHTS

When shopping for outdoor security lights, choose fixtures approved by the Underwriters Laboratories (UL) for wet or damp locations. These luminaries feature weatherproof designs and finishes capable of withstanding the elements such as humidity, rain, and snow

Flood Lights

Flood lights distribute a wide cone of light and are ideal for illuminating large spaces. The versatile fixtures come with one, two, or three adjustable heads for precise illumination.

Landscape Path Lighting

Landscape path lights are ideal for safely illuminating frequently used paths and walkways. The light fixtures are also suitable for illuminating trees and other architectural elements around your home


How to light your outdoors

The perfect plan

Before you start, it’s a good idea to make a plan. Begin by thinking about how you use your outdoor area and what the different lighting requirements are for each space. Perhaps you entertain a lot and would like a well-lit area, maybe you want to highlight a statue or water feature, or you may wish to create a relaxing atmosphere

Layer your lights

For spaces that have multiple uses, consider light layering. By layering your lighting you’ll be able to easily change the mood from tranquil to party with the flick of a switch. Whatever lighting style or mood you’re trying to achieve,

Ambient lighting

Ambient lighting should light up the entire space. In an outdoor area this could include a ceiling light, the light from a ceiling fan, a large spotlight, several downlights or well-spaced wall lights. Include a dimmer switch if possible for complete control.

Task lighting

Task lights do just what their name suggests – they illuminate areas where you are performing a specific task. For example, this may be a clip on BBQ light, down lights above a servery or a pendant hanging over a dining table.

Accent lighting

The role of accent lights is to provide a bit of theatre. These lights highlight the features that you want to stand out and can make a space feel warm and inviting. Accent lights could be used to focus on trees, a path or steps, an architectural feature or something in your garden like a pond. Think fairy lights, party lights, Japanese lanterns or decorative string lights (these come in all shapes and lengths).


All About Landscape Lighting

From selecting the best outdoor lights to setting them up, our experts share how to brighten up the outside of your house

You’ve pulled out all the stops to make your house and yard look first-rate. So why let that hard work disappear at nightfall. With a flick of a switch and some strategically placed outdoor house lights, you can roll back the darkness and put it all on display? Done right, landscape lighting makes the best of what you’ve got by highlighting your home’s architectural features and drawing attention to prized plantings and trees.

What is the Best Landscape Lighting?

Most landscape lighting today is low voltage, and with good reason. Unlike 120-volt systems, it’s safer to work with and less costly to install. And though low-voltage lights receive one-tenth the power, thanks to a step-down transformer, there’s no limit to the effects they can achieve, from ethereal moonlight beamed down from a tree canopy to a subtle glow that washes over a low garden wall. More than just picking the right hardware, a pleasing lighting scheme is also about artistry.

What’s in a Low-Voltage Outdoor Lighting System?

Landscape lighting typically relies on stepped-down power from your house.

Key Questions Answered

DIY or Hire a Pro?

Homeowners can put in a simple system in a weekend. For the most stunning effects, go with a landscape lighting specialist familiar with the various fixtures and ways to arrange them.


Tips for Protecting Outdoor Light Strings

Using outdoor light strings has become one of the most popular ways to illuminate outdoor spaces. You might have patio lights strung across your backyard or use dozens of Christmas light strings to build incredible displays during the holiday season. When installing your light strings, you should always make sure that they are as protected as possible from anything that can cause damage or electrical shorts. There are many ways to do this, so we will cover the most important tips. In this first part, we’ll discuss what strings and components are safe for outdoor use, when to cut light strings, and how to keep connections safe.

Use Outdoor Rated Strings

Before ever placing any light string outside, you should always check to make sure that the string is safe for outdoor use by looking at the safety rating. Rope light, patio light strings, and many Christmas light strings are safe for both indoor and outdoor use. Designed with sturdier materials, these lights can withstand the weather conditions. Some Christmas light strings, however, are only rated for indoor use. Using these lights outdoors can cause them to fail prematurely or even short out if they are exposed to water.

Don’t Use Old or Worn Strings

When was the last time you bought new light strings for your Christmas displays? If it’s been a while or your lights get stored in a hot attic for 10 or so months out of the year, chances are you might need some new ones. When you first get your lights out you should use testers to check for damaged sockets, bad bulbs, or blown fuses and make any necessary repairs. Strings with worn or brittle wires should be immediate thrown away as these lights can potentially pose a fire hazard.

Use Outdoor Rated Bulbs

While the majority of C7 and C9 bulbs are safe for outdoor use, the same cannot be said for other types of bulbs used in patio light strings. Incandescent bulbs are safe for outdoor use as long as they are protected from direct contact with water. If used in an open area, the lights should be taken down immediately after an event. Where and when LED bulbs can be used depends on the safety rating. Damp location rated bulbs can be used where moisture is present, but should not come in direct contact with water. LED bulbs with this rating should not be used for permanently installed light strings. Wet location rated bulbs can come in direct contact with water and can be safely used in open areas.

Only Use Outdoor Rated Extension Cords

Like the light strings themselves, extension cords must also be rated for outdoor use. Outdoor extension cords have thicker insulation designed to withstand wetter and rougher conditions. In order to verify if your cord is outdoor rated, you will need to check the ratings code stamped directly on the cord. Made up of letters, this code is used to describe what the cord jacket is made of and the conditions it can withstand. An outdoor rated cord will have a ‘W’ listed in the code.

Safe And Natural Ways To Get Rid Of Wasps

Ways to Keep Wasps Away From You

Aside from different nesting preferences, the main difference between bees and wasps is that bees feed their larvae pollen, while wasps — a category that includes yellow jackets and hornets — nourish theirs with insects. That means that wasps are actually great to have around the garden because they control nearly all types of pests.

Clove-Geranium-Lemongrass Oil Blend

Research published in the Journal of Pest Management Science found that a combination of clove, geranium, and lemongrass essential oils successfully repelled wasps. You can try applying these oils by mixing several drops of each with water and dish soap in a spray bottle and coating areas on the outside of your home where wasps like to build nests: under eaves, porch roofs, and other ledges and crevices.

Plain Soap and Water

According to Chris Walker, an eco-friendly wasp removal expert in Southeastern Pennsylvania, you can tackle small hanging nests with a mixture of about two tablespoons of dish soap in a spray bottle filled with water.

Peppermint Oil

Peppermint oil may also be effective at repelling wasps, according to the same study from the Journal of Pest Management Science. You can try applying it as described above, or you can purchase EcoSmart Organic Wasp and Hornet Killer, which is mint oil-based, to target established nests

Wasp Traps

Wasp traps work by luring the insects inside a container with some tempting treat, like sugar water, and then preventing them from escaping. You can make one yourself in about five minutes by sawing the top off a two-liter bottle and inverting it inside the bottom, or cutting a small hole in the top like this.


Wasps: DO’s and DON’Ts

Wasps’ behaviour changes in late summer as their preferred food shifts from sugars to proteins. Because of this, you will more likely encounter them wherever food is consumed outdoors and around garbage collection areas.

If you notice large numbers of wasps in your home or garden, there is likely to be a wasp nest nearby. It may be in your house, in your garden or very close by. A mature nest in summer/autumn can contain thousands of wasps. When they do attack, most wasps, yellow jackets and hornets are aggressive and will sting REPEATEDLY

Should I remove wasp nest myself?

It is important to treat a wasp nest as soon as possible. Removing a wasp nest is a complex process and requires professional help. To avoid the risk of painful wasp stings (and possible allergic reactions), we strongly advise you not to try to remove a wasp nest yourself. Remember, you could cause serious injury to yourself or others if you provoke the wasps in the nest.

Paper wasps: This is an open nest with hexagonal cells. It usually has an umbrella shape and may contain fewer than 100 paper wasps.

Hornets: A hornet nest has a football shape surrounded by smooth walls.


How to Get Rid of Wasps

Wasps are a frightening pest for many people. Setting up their nests near homes, they fly swiftly around doors and entryways and pack a powerful sting if they feel threatened.

Yet not all wasps sting, and they are a beneficial insect in some ways. Without wasps eating insects, there would be a gaping hole in the food chain. With about 30,000 identified wasp species, some are more common pests for humans than others. All this makes it important to know what kind of wasps are causing you problems before you attempt to get rid of them — or even they are wasps at all. Learning more about bees and wasps is key in safely ridding your property of an infestation.

Differences Between Bees and Wasps

Bees have robust, rounded bodies made up of one section, whereas wasps are slender and have a tapered waist area that connects their thorax to their abdomen. Bees are hairy, while wasps are more smooth and shiny. Bees feed on pollen, while wasps feed on insects. If you see something buzzing near a flower, it’s more likely to be a bee than a wasp. Honeybees die after stinging, whereas wasps can sting and fly directly away.

Physical Characteristics of Wasps

Wasps all grow up to about 1.5” and vary in size by species. However, their bodies are all composed of a head, thorax and abdomen separated by a tapered waist. They have one pair of wings, one pair of antennae, and six legs. All female wasp species have venom which they inject into their victims when stinging them. Only females can sting, and their stingers are located at the very end of their bottom half. This stinger also doubles as a reproductive organ through which the wasp can lay eggs.


How to get rid of wasps: quickly and sting-free

Learn how to get rid of wasps and you’ll be able to avoid the most annoying of garden visitors. Wasps start to build their nests in spring, so if you’ve noticed lots in your garden then now is the time to get rid of them. By summer, they could have built up a nest that you’ll need to call in the professionals to deal with.

As is the case with most household pests, a wasp infestation can be pretty unpleasant, especially because of the risk of them stinging you. Luckily, there are a few things that can be done to ensure your wasp enemies stay away.

HOW TO GET RID OF WASPS

If there’s one thing guaranteed to ruin every garden sunbathing session/BBQ/afternoon siesta, it’s pesky wasps. Numbers of these annoying insects start to rise in the spring and peak in summer, which explains why we’ve started to notice so many of them in our gardens. Unlike bees, wasps don’t die once they’ve stung you and can sting many times, it means you need to be extremely careful when trying to get rid of them

Shut your bins: Open bins will attract greedy wasps looking for a sweet meal. Keep you bins away from the house if you can and make sure the lids are always on properly.

Protect your home: Keeping your windows and doors shut will stop wasps entering the house. If it’s too hot and you don’t have an air conditioning unit, consider investing in a fly screen for your doors


tips for waging war on wasps

Orange Crush is a good bait for wasps at this time of year, as well as cream soda. He says anything syrupy sweet works.

Toward fall, wasps will be out for blood. “As we get closer to cold weather they’re going to switch over the proteins,” said Sherwood. He finds the raw blood from ground beef attracts wasps well.

Wasp traps do work, to a point. Commercial traps and homemade traps, like the ones made out of pop bottles, work to stop wasps from sharing your picnic. But they don’t kill the colony.

Paper bags and products made to look like wasp nests will deter wasps, but they must be put up in mid-March when juvenile queens are looking to nest.

Insecticidal foam commercial products work to kill a nest. You spray some foam to plug up the opening where wasps come in and out. Then you stick a straw in the nest and pump it full of insecticide.

What You Need To Understand About Your Custom Home Builder

HOW TO CHOOSE A HOME-BUILDING CONTRACTOR

How to find a certified Green Builder?

It’s not common to find a reliable ‘green home listing’ or ‘green pages’ in specific regions, so choosing a quality general contractor with experience building efficient homes can be tricky. Here are some tips of where to look, what to look for, and what to avoid

There are no certified ‘builders’, only certified buildings;

Any builder who has successfully navigated a performance-rating system would be knowledgeable in the area of green home building, so is a good bet when searching for a contractor who knows how to correctly weather seal & air seal windows and doors, for example, which is an essential part of building a more efficient home.

What questions to ask when choosing a Green builder?

Below are a few good questions to start with, and many of the answers you should hear from candidates are hyper-linked.

The answers you receive will quickly indicate the type of builder you are speaking with; either they will redirect, dismiss or dodge the question, or they will answer with confidence. If you are told any of the following – ‘you want your walls to breath’, ‘you don’t want a house to be too airtight’ or ‘building code is all you need‘, then you will know you are dealing with a base-level builder who wants to stay the course, not a player in the higher league of performance building.

Architects, designers and technologists:

Another avenue is to begin with a home designer who has a experience with performance homes, since they may have local builders they can recommend. The same goes the other way; if you find a builder you really connect with, ask if they have preferred designers they can recommend


How to Pick the Right Custom Home Builder for You

Setting out to find a new home has its challenges, especially if there’s no new homes on the market that totally satisfy what you’re looking for in a new home. If this is the case, then finding a custom home builder to create your perfect home is a great approach for you

So how do you find the custom homebuilder that will bring your dream home to life? It’s imperative to find the right custom builder as this person or group will be charged with creating the home you’ve always wanted in precise detail. With that in mind, it’s best to have a detailed list of things to consider while selecting a custom home builder.

Determine what you want in a custom home

The first part of the process is to jot down exactly what you want in your custom home. It can range from having a different layout for one or two rooms in the home or having a more intricate home plan

Make list of potential builders

Once you’ve outlined the home that you want built, it’s time to put together a list of potential builders that you want to contact. Reach out to the homebuilders association that is local to you – or in the location you’d like your custom home built in — for a list to choose from. There is also the Homeowners for Better Building (HOBB), which is another resource for finding custom home builders. NewHomeSource.com also has landing pages for each custom homebuilder it works with to make your custom home building process a breeze

Contact custom homebuilders

At the outset when you begin to make contact with custom builders, note how accessible they are. It’s important that the builder needs to be available whenever you have questions or concerns before and during the process of construction. While they’re not supposed to be at your beck and call, returning phone calls and emails in a timely manner is important. If your builder seems to take too long to get back to you even on minor things or doesn’t respond at all, that’s something that should be a disqualifier.


How to choose the right builder for you

When you decide to build your next home, rather than buy it, there’s one thing you simply have to get right: choosing the builder.

Picking the right builder has the potential to make or break the entire experience for you, so it’s something you don’t want to rush

Check their folio

You’ve no doubt got some idea about the type and style of home you’re hoping to build, so it’s important to find a builder whose skills best align with your plans. Paxino says this part of the process is usually easy, as most builders will have their projects displayed on their websites, or they will be able to provide you with a catalogue of homes they’ve built previously.

Find or ask for references

Some of the best information to assist you in selecting your builder can be gleaned by speaking to people who’ve dealt with them before. “You might be skeptical about who they’re going suggest – whether it’s their brother or someone they know,” Paxino says.

Go the extra mile

You’re going to be paying your builder hundreds of thousands – possibly millions – of dollars to construct your home, so a few hours spent doing some extra reconnaissance will be more than worth your while

Let’s talk costs

There’s no point in gathering building quotes first, Paxino says, because many of the builders may not be appropriate for your project. So do your research first, narrow the field, and only then start asking for prices from the builders who’ve made your cut. And remember: cheapest isn’t always best.


Tips for Choosing Your New Home Builder

Choosing the right builder for your new home is a big task. They’re going to be in charge of a major construction project for you – and that’s a big undertaking. The builder you select needs to have all the tools necessary to build you a home that will last.

They Hire the Right Team

When you build a house, you’re bringing together all these different pieces and fitting them together like a puzzle. The right builders finds the right pieces to make that happen. They choose the best electricians, plumbers, welders, and contractors to make your home safe and strong. The sub trades they choose have a direct effect on the quality of the finished product

They Talk, and They Listen

The most important thing you can do in any project, whether it’s a full build, or a small renovation is to communicate with your team. Good builders will keep the lines of communication wide open and transparent. You want to know if there are delays in the project, and why. A good builder will tell you these things – and how they plan to fix them.

They Chase Outside Certification

Each builder has their own set of standards when it comes to construction – but the truly great ones will qualify for third party certifications that let you know that their homes are built right.

Holmes Approved Homes

Not just any builder can join this program – it’s actually Mike and his team that sources us to join the program! With a Holmes Approved Home, you’re buying a home that was built using the best techniques, practices, and technologies. Not only that, all Holmes Approved Homes go through a third party inspection provided by Mike’s own team of home inspectors, that let you know that you’ve got a home that was built right, from the ground up


Choosing A Builder

The common mistakes that can cause heartache

Do you plan to build your own home? Perhaps you’re looking to renovate or extend your existing home. Either way, there are many ways to make the right and wrong decisions when choosing a builder.

Get some advice

When choosing a builder, a good place to start is by asking any family and friends that have hired a builder to construct their home or renovate. Chances are you probably would have heard the stories, whether the experience was amazing or a nightmare. Be wary of going through friends of friends because they may not necessarily be builders you can put a lot of faith in. The builder may feel like they’re “doing someone a favour” and, because of that, they may place a lower priority on the job and take longer to start work.

Licences and insurance

Whether you’re going through a home builder or you’re designing your own home or renovation works with help from an architect, it’s important that you choose a builder that is licenced, registered and insured. You should be wary of builders that either refuse or don’t make it clear upfront that they are legally permitted to be involved in building and construction.

Experience and skills

Really question whether they have the skills you need. If they only have experience in renovations and extensions, they’re not the right choice for your home. It’s also important to note that builders who have only built residential properties in the past may not necessarily have a good grasp of the complexities of extensions and renovations.

Portfolio and references

First of all, check out their previous jobs and, if possible, have a physical walk-through of a home they’ve built. Even consulting an engineer to walk through the property may be worth the cost if you’re serious about choosing the right builder. Builders may be quick to offer you the contact details of a handful of selected clients but they may just offer a biased opinion. It’s best to ask to speak with their most current clients, particularly those in the middle of the building stage

Tips To Choose The Best Metal Roof

Metal Roofing Learning Center

Where to Find Metal Roofing Contractors

So you might be asking yourself: Where do I even start looking for contractors? Many home/building owners just turn to the internet, which is a great place to start. But there are many more options and avenues to check with as well,

Ask for referrals – If you have a friend, family member, or neighbor who recently had a metal roof installed on their home or business building, they are one of the best places to start. Ask them who they hired as their contractor, but also ask who they didn’t hire and why

Reach out to roofing organizations and associations – Any discipline or line of work has its own organizations and associations dedicated to education, training, advocacy, etc. Contacting one of these organizations that work with metal roofing contractors, such as the National Roofing Contractors Association or a local Home Builders Association, can help you find credible businesses available for hire.

Call an architect or builder – Architects and builders have extensive experience with roofing contractors, as they work with them on a regular basis for their own projects. If you know of any architects or builders present in your area, give them a call and ask about the roofing contractors they use or would recommend

Ask the manufacturer of the metal roof – One of the best ways to ensure the metal roof you want to purchase gets installed correctly by a good contractor is to contact the metal roof manufacturer. Manufacturers are often well connected in the roofing industry and can point you in the direction of contractors who have recently done good installation work.


CHOOSING A METAL ROOF

There’s a lot to be said for a metal roof’s snazzy looks and top-notch performance. The right roof can liven the home’s curb appeal and provide years of superior low-maintenance protection. Today’s residential metal roofing comes in a wide variety of styles and designs. Metal roofing materials are not only light weight but can be very energy efficient. And unlike asphalt roofs, which require re-roofing every 15 to 20 years, metal roofs won’t decompose. These roofs can withstand rain, fire, earthquakes and hurricane-force winds.

Although the initial investment in a metal roof is steeper than most other roofing materials, over time a metal roof can save a great deal of money and hassle. This is because there is no second investment in roof replacement, or the labor that comes with it. Metal roofs are practically maintenance-free, requiring only the occasional rinse with a garden hose. And most metal roofs come with a 30- to 50-year warranty. Insurance companies in certain states, like Texas, even offer discounts of up to 35 percent to homeowners with metal roofs

When selecting a metal roof, first make sure the product’s design is an appropriate match to your home’s construction. Most metal roofs require solid decking. Many systems are frequently installed over existing shingle roofs. Some can be installed over lathe boards or over wood shingles on lathe. Some new products can even be installed over existing slate and asbestos roofs

Next, choose a material that complements the décor of your home and neighborhood. You can find quality metal roofing with just about any appearance, whether it’s standing seam or a facsimile of shake, slate, tile or standard shingles. Some of today’s metal roofs are coated with a granular texture to look like traditional asphalt shingles.

Metal roofing is fabricated from a wide variety of metals, including galvanized steel, galvalume steel, aluminum, copper and zinc alloy—even stainless steel. The metals differ in properties, and the type used sometimes depends on the design of the roofing panel. Consider all the available options


TIPS TO GET THE BEST PRICE ON YOUR NEW METAL ROOF

When it’s time for a new roof, you want the best price, but no one wants to sacrifice quality. Metal roofs are a great choice, simply by virtue of the many, many options for style, color, profile, and thickness – more than any other kind of roofing you could buy. All of these choices mean something very important: because no manufacturer or supplier could have every option available all the time, many metal roofs are actually made to order. And that means there can be big savings when you buy existing inventory, which happens to be our number one tip to saving money on your new metal roof.

Ask about existing inventory

It’s not an uncommon scenario for a metal roof manufacturer to make more material than he sells in a given period. When that happens, the clock is ticking on the value of that stock. Once it’s been sitting around for some time, the manufacturer or wholesaler is ready to move that inventory – fast. Buying from a metal roof vendor’s inventory is always a smart way to get a better price because you aren’t having them make new material. How do you do it? Easy. Contact a supplier directly and ask about their current inventory. You can also subscribe to blog updates (available here via the link to the right) to stay in the loop for blow-out flash sales and promtions

Be ready to buy immediately

A manufacturer’s desire to discount inventory metal roof material isn’t something that lasts. Our second tip for getting the best price on a new metal roof is to take advantage of this static inventory as soon as you can. Buyers who are ready to order right away always get the best price. If you’re just shopping, you simply don’t have as much leverage when it comes to price. If you find inventory of metal roofing that’s the right price, buy it! Otherwise, you’ve wasted all the effort you spent finding that great deal

Make a plan with the installer.

You could spend almost as much on installation labor as the metal roof itself, so make a plan for installation from the beginning. When we’re contacted by someone who has an installer lined up, and just needs some direction on the best metal roof option, it’s really ideal. Things become a bit more complicated when someone knows they want a metal roof, but has no plans for who should install it. We do maintain a network of metal roof installers, however, and we’re happy to make recommendations

Order everything at the same time.

Metal roofing is one of the only roof materials in which all of accessories (drip edges, valleys, hips/ridges, etc.) can be made of the same material as the main roof. While it’s not mandatory to order all of the accessories to match your new metal roof, ordering these pieces at the same time can save aggravation and money later. You’ll definitely pay more to have these pieces matched after, instead of buying them before. Understanding exactly which accessories you need, and then ordering them at the same time, is a great way to trim some fat


Things To Look For In A Metal Roof

We hope that this finds you well and enjoying a good summer. We’ve been very busy, and it looks like this will be yet another record-breaking year for the residential metal roofing industry. If you’re shopping for a metal roof, we have put together the following “Top Six” list of things to look for in your metal roof. Not all metal roofs offer these features, but we think you will agree they are very important.

Kynar 500® or Hylar 5000® PVDF resin-based finishes. Available in many colors and even multi-hued shades, these coatings offer the best combination of durability and fade resistance. Additionally, many people choose metal roofs in order to avoid the streaking and staining that attacks granulated-surface shingles.Kynar 500® or Hylar 5000® PVDF resin-based finishes offer the best resistance to streaking and staining.

“self-Cleaning” Valleys. Although you may not often think about it, a lot of debris ends up on your roof. As things like tree leaves, pine needles, seed pods, ice, and snow travel down your roof, they end up in any valleys your roof may have. Many metal roofs have “closed” valley systems with hidden waterways to channel water off of the roof. These hidden waterways, however, will clog up with debris and then the water path is blocked and bad things (leaks!) happen. “Self-Cleaning” valleys carry the water and debris on top of the roof and can’t clog

Premium Certified Products. The Metal Construction Association has developed a Quality Certification Program which recognizes products and manufacturers that meet high levels of standards in terms of raw materials and processes. We strongly encourage products and manufacturers that are part of this program.

Special Flashings. Many roofs have areas which require special care. With metal roofing, you can’t just depend upon sealants in those areas like is often done with temporary roofing materials. If your roof has dead valleys, skylights, chimneys, flared gables, or other unusual things, make sure that you understand exactly how these will be handled by your contractor.


Guide to Metal Roofing

With so many roofing materials available, homeowners have more opportunity than ever to find a roofing upgrade that perfectly matches their home. Narrowing down your options means taking the time to find a material that offers the ultimate combination of function and style.

Residential metal roofs are steadily gaining popularity with homeowners across the country, and once you understand the benefits of this material, it’s easy to see why. Thanks to their durability and potential energy efficiency, metal materials like steel and aluminum have become an excellent option for homeowners looking to upgrade or replace their current roof.

The Pros and Cons of Metal Roofing

Metal may prove to be the right fit for your roof renovation, but it’s important to closely consider the pros and cons of this roofing material before making your decision.

The Benefits of Metal Roofing

Many homeowners are opting to invest in modern metal roof setups, hoping to take advantage of the many benefits this material offers. From energy efficiency to fire resistance, style upgrades to durability, metal roofing can be a fantastic addition to your home.

Metal roofing can be treated with special paints and granular coatings that reflect solar energy while re-emitting any solar radiation that was absorbed. This may help lower energy use by reducing the need to run the air conditioner

Choose The Best Colour For Your Exterior Painting

Exterior Painting Tips and Techniques

Painting the exterior of your house is a huge job. But the rewards are great too. With a minimum investment in tools and materials, you’ll save thousands of dollars, extend the life of your siding and trim and increase the value of your home. Best of all, you’ll make it look like new again

While you may spend a substantial amount on tools and paint, the same job done by a pro could easily cost many times more. The savings come at a cost, though. A good paint job requires countless hours of careful preparation. Plan to devote an entire summer to prepare and paint even a medium-size house.

In this article, we’ll show you how to apply the final coats of paint (we used acrylic latex) for a durable, professional-looking finish. Preparation is a separate topic covered in other articles. Completing a top-quality exterior paint job requires more than patience and perseverance. You’ll need a sharp eye, a steady hand and a bit of practice to paint crisp, straight lines. In addition, you’ll need the strength to move and set up tall ladders, and the confidence to work from them once they’re in place

Buy high-quality painting tools

Applying topcoats (the final coats of paint) doesn’t require much equipment beyond what you’ve already accumulated for scraping and priming. We recommend buying at least two top-quality synthetic-bristle brushes for applying the latex paint: one 4-in. straight-bristled brush for large areas and a 1-1/2-in. angled sash brush for detail work.

3-step brush technique

Paint stores can help with colors and quantities

Choosing exterior paint colors that complement the architectural details of your house and fit the character of your neighborhood is the first step to a great paint job. Check out bookstores and libraries for books on the subject. You’ll find brochures at the paint store with collections of historic colors. Many paint stores have designers on staff who can help you choose colors, or you could hire a designer or architect.


Steps to a Perfect Exterior Paint Job

Old wood siding, fast becoming a dinosaur in new construction, regularly needs the protection of a new coat of paint. A professional will charge you between $4,000 and $6,000 to paint a 2,000-square foot, two-story house. But you can do it yourself in a few weekends for the cost of paint and supplies.

A good paint job can last 10 years. The key is proper preparation. Here are 10 steps to take to make sure your exterior paint job looks great, adds value to your home, and lasts a long time

Get the Lead Out

Do-it-yourselfers are not obligated to follow EPA regulations for lead-safe practices, as professional paint contractors must. But if your home was built before 1978, when lead paint was banned for residential use, you should protect yourself and your neighbors from airborne lead particles

Wash the Exterior

Mildew thrives under fresh paint, which won’t adhere well to dirty, grimy, spore-sporting exterior walls. So wash your home’s exterior before painting. Use a mix of water and a phosphate-free cleanser such as Jomax House Cleaner ($15 per gallon) and Mildew Killer Concentrate ($8.50 for 32 ounces)

Scrape off Loose Paint

Once clapboards are dry, remove loose, flaking paint. A handheld scraper is usually the best tool for the job, though you can also use a hot-air gun or infrared paint stripper. Never use an open-flame torch, which can easily start a fire and is illegal in most states unless you have a permit


How to Properly Paint Your Home’s Exterior

Pressure-Wash Walls

To ensure best coverage, remove dirt and dust buildup from house using a pressure washer. TIP: Work your way from top to bottom of house in a smooth, controlled manner, overlapping each stroke by 8 inches

Repair Damaged Surfaces

Walk around entire perimeter of house taking note of damaged surfaces such as: wood, masonry, metal, siding or stucco. Apply epoxy filler to cracks or holes using spackle knife. Once dry, lightly sand using medium-grit sanding block.

Remove Loose Paint

Once exterior is dry, walk around perimeter of house taking note of any loose or chipped paint. Place drop cloths along ground, then remove chipped and loose paint using paint scraper or medium-grit sanding block

Caulk Trim

Fill any gaps between house and trim around doors and windows using exterior caulk and caulk gun. If house has mixed materials such as siding and brick, add caulk along surface where different materials meet

Prime Stains

Examine exterior for any stains or visible wood knots. Apply one coat of stain-blocking primer to area using paintbrush.


Tips That Make Painting a House Faster and Easier

Paint Your House the Same Color or Darker

You create more work for yourself when you choose to change your exterior house color, and it significantly increases the amount of work when you go lighter. With one-coat-painting, the old color will still show through in some areas. When you paint the same color, though, those thin areas blend in

Wash Your House Quickly and Painlessly

It’s hard to imagine a house that does not need to be washed down prior to painting. Just run a white t-shirt across the side of your house and witness years or even decades worth of accumulated gray soot and dust. Even in the most desperate of painting projects, it’s still recommended to wash down the house.

Prime Only Problem Areas, Not the Whole House

While the entire house could benefit from a full coat of primer, prime only the problem areas, meaning things like raw wood and dried wood filler.

Shrink Your Prep Time

Prep work can equal the amount of time spent painting. Taping and covering will quash the enthusiasm of even the most patient homeowner. Doing a fastidious job on a house with many features can suck up an entire day’s work and more.

Scrape Only the Bare Minimum

Scraping paint isn’t such a time-waster on its own. The problem, though, is that it’s like opening a Pandora’s Box. You scrape that little dime-sized flake of paint, and it leads to more and more and more


EXTERIOR HOUSE PAINTING TIPS

Choosing Exterior Paint Colors

To select the best exterior paint for your home, consider colors the best complement your home’s architectural detail. With the popularity of home decor websites, it’s easy to find examples of your home’s style and paint schemes that will work for you. Some paint manufacturers also offer online tools that let you upload an image of your home and virtually test different paint colors. Once you’ve narrowed down your color choices, purchase the smallest amounts possible and test them on your exterior walls.

How Much Paint do I need?

To find out how much paint you need, take approximate measurements of your house, noting the size of various surfaces, such as wood trim around doors and windows. Take this information to your paint store, where the staff will be able to help you calculate the amount of paint you’ll need

How to Choose Exterior Paint Finishes

Buy the best paint that you can afford, as it will last longer and cover more easily. Paints with light sheens, such as satin or eggshell, are easier to clean and more resistant to fading than flat or matte paint. Water-based latex and oil-based alkyd are the two main types of paint for exteriors. Acrylic latex paints are the most common choice, but oil paint is good for wooden steps and porch floors, as well as steel and wood railings

Get the Right Painting Tools

While most professional painters now use paint sprayers for their speed and ability to coat evenly, the quickest and most effective way to apply exterior paint yourself is with a paintbrush and a roller. Standard 9-inch rollers are best for large, flat areas. Brushes are most effective for narrow surfaces, edges, and trim, or you can use a short, smaller diameter roller to get into small spaces

Prep the Exterior Surface

Paint won’t adhere well to rough or problem surfaces, so be sure to clean, dry, and sand, scraping off any peeling paint. Rotten wood will deteriorate even under new paint, so this wood should be replaced, or if the rot area is small, you can apply a wood hardener followed by a wood filler before prepping and sanding the area.

Find The Best Tips To Vacation Rentals Cleaning

Vacation Rental 101: Housekeeping

The number one cause of vacation rental guest complaints is cleanliness. When guests pay hundreds or thousands of dollars to stay in your home, they expect it to be immaculate. If it hasn’t been cleaned before their arrival, they’re understandably going to be upset. Fortunately, it’s an easy problem to avoid. You just need a quality housekeeping service that understands why cleaning to vacation rental standards is different than what’s required for a typical house cleaning.

WHAT MAKES A VACATION RENTAL CLEANING DIFFERENT

A vacation rental cleaning goes above and beyond what you’d expect from a typical house cleaning. Your housekeeper needs to be ready to provide a higher level of service, and handle tasks like

IF YOU’RE THINKING ABOUT DOING IT YOURSELF

The first decision you need to make about cleaning your vacation rental is whether you’re going to do the work yourself or hire a service to handle it for you. Doing your own cleaning is an easy way to cut down on management costs and increase your income. But it only makes sense if you live locally and can afford to treat your vacation rental as a full-time job

Even if doing it yourself seems like an attractive option, ask yourself an honest question: Can I commit to deep-cleaning the entire property more than once a week?

In high season, you might have “quick turns” where a guest checks out at 10 a.m. and the next guest checks in at 4 p.m. In that window, you’ll need to provide a thorough cleaning. If you can’t guarantee you’ll be ready and willing to do that, you need to hire someone who can.

IF YOU’RE THINKING ABOUT HIRING A CLEANING SERVICE

Working with a cleaning service is a great alternative. If you don’t want to handle the cleaning yourself or you don’t live near your rental property, it’s helpful to have a trusted housekeeper who will visit your home on a regular basis to keep things in great shape for guests


VACATION RENTAL CLEANING:THINGS TO BEAR IN MIND

When starting your vacation rental business, you’ll likely be thinking about what furniture and decoration you’ll include to make it truly dazzle on your website or any other advertising channel you plan to use. There are other tasks, however, which while maybe not as fun, they’re just as (or even more) important than others: vacation rental cleaning and maintenance.

PRIORITIZE

What should you clean most frequently? Easy: everything that’s on display. Even if you’re not going to have guests in the next few days, you need to assure that whatever people can see from the outside is absolutely spotless. This includes the garden, windows and anything else of this nature. Once inside, you need to go over all the basics such as floors and other surfaces that guests will notice upon entering your property.

MAKE A LIST FOR GUESTS PRE CHECK-OUT

Don’t be afraid to ask guests to perform a few simple vacation rental cleaning tasks before they lock the door and leave your property after their stay. But be careful not to overwhelm them with too many tasks that will make them feel like they are working – or worse – doing your job for you.

CHARGE A DEPOSIT WHICH INCLUDES A CLEANING FEE

It’s always recommended to charge a security deposit to cover any possible damages to your property. So, why not add an additional cleaning fee? This amount will be charged to your guests in case they don’t leave your home in the good, hygienic conditions you lay out in your house rules.

TURN TO THE GREEN SIDE

Why not help the environment at your rental, too? Planet earth will thank you, and you’ll earn brownie points from your guests for worrying about the environment and actively doing something to protect it!


CLEANING APPS FOR VACATION RENTAL BUSINESSES

Despite the increasing number of travelers who are choosing vacation rentals as a more homely alternative to hotels, their expectations don’t differ when it comes to cleanliness.

Some of the most common negative reviews of vacation rentals and other alternative accommodation derive from the guest’s dissatisfaction of cleanliness standards. In other words, as a host, you need to start considering the value of professional cleaning services for your vacation rental because what you might consider sparkling clean in your own house simply won’t cut it with guests.

CLEANING SERVICES FOR VACATION RENTALS

In order to suit different owners’ needs, there is a huge variety of cleaning services that you can request for your vacation rental. These can range from simple, ordinary tasks like making the beds, changing towels and cleaning toilets to more specific and tricky ones like cleaning mirrors and fixtures or removing carpet stains.

TURNOVERBNB

TurnoverBnB allows owners to create automated cleaning schedules and enjoy completely hands-free management. In fact, thanks to its integration with major booking platforms like Airbnb, Booking.com and HomeAway, owners can automatically schedule turnovers based on bookings and available time between one guest checking out and the following checking in. Owners can easily manage and communicate with existing cleaners or use the marketplace feature to find professional vacation rental cleaners in their area. The platform also provides automated payments and record tracking of completed jobs

PROPERLY

Two key strengths of the Properly app are visual interaction and real-time management. Owners can create visual instructions with a photo-based cleaning checklist to be as clear as possible and ensure the final result matches their expectations


Vacation Rental Cleaning & Maintenance Tips

What does it take to get a 5-star review? It might be a lot easier than you realize!

Did you know that most negative reviews are written by guests dissatisfied with a messy, poorly cleaned vacation rental? Surprised? Hopefully not, a well-cared-for vacation home goes a long way to ensure guest satisfaction, rave reviews, and loyal direct bookers. Doable, right? Absolutely. As long as you understand that maintaining a vacation rental is much more demanding than the upkeep of your own home.

How it’s Done in Park City

Park City-based homeowner, Rina Slade knows what it takes to keep her vacation homes spick and span no matter how tight the turnaround or how untidy the guest. While she herself owns only one vacation rental, she helps manage the vacation homes of a few friends – with the help of her crew, a local couple, Susie and Luis

Maintenance & Cleaning Tahoe Style

We also spoke with Lake Tahoe Accommodations’ Lisa Calderon, who manages over 100 vacation rentals in Tahoe. Lisa’s head of housekeeping, Blanca has a team of 14 house cleaners who do their best to maintain tight check in/check out cleanings. While not everyone has over 100 properties to manage and may not necessarily need 14 house cleaners, Lisa and her crew have a few tricks up their sleeves when it comes to staying on top of a hectic schedule and still managing to come out of checkout with rave reviews (and everyone’s sanity!).

Keep Backups of Everything

Lisa sets her crew up for success by keeping backups of everything. This includes sheets, glasses, toiletries, silverware and anything else you can think of. This keeps the team prepared for anything that may come their way…broken glasses to stained sheets…you name it.

Consider Value Adds to Sweeten the Deal

Rina suggests sending the guest a pleasant welcome letter that includes restaurant and activity recommendations plus all of your contact information should the guest need to reach you. Lisa swears by welcoming guests with a tote bag and a bottle of complimentary wine. She is known by guests for going above and beyond for those who book her rentals and her rave reviews certainly reflect tha


Vacation Rental Cleaning Guide with Checklist: Everything You Need to Know

Getting bookings to your vacation rental is often the easy part, but if you want to maintain your success or grow it, you will need to do more than publish a listing and leave a key under the mat. Your properties need to shine!

Put your best foot forward right from the start by establishing and following a detailed clean routine, striving to make every open door a “wow” moment. A fine-tuned cleaning routine with attention to detail is a sure-fire path to achieving the standard that will keep the masses praising, and confidently booking, your properties all year long

But there’s a lot more that goes into vacation rental cleaning than an outsider might think. First, you have to find and hire a team of housekeepers and onboard them to ensure they will achieve your standards. The next task is more challenging: replicating that signature quality again and again while managing your entire property operations. On top of it all, you need to have a strategy around charging cleaning fees on channels and how best to collect them

Recruiting Your Cleaning Crew & Local Team

Depending on the size of your inventory, you may need one cleaner or a whole crew. Determine your needs based on the number of homes you manage, your average occupancy rate, and the timeframes of your check-in/check-out policies. When looking to hire, there are a number of online services to help you find the ideal candidate. Some are free to advertise on, while others charge a fee for listing

Establishing standards for cleaning

Good, bad, or otherwise – guests know exactly what to expect when booking with brands on both ends of the spectrum, from Hilton and Hyatt, to Motel 6 and TravelLodge. You are a brand as well, whether you manage one home or 1,000, and that brand should carry a standard, too! What can your guests always expect, without fail, when they book a stay with you?

Kitchen Remodelling Methode Will Make Your Kitchen Nice

Tips for Remodeling Your Kitchen

Smart Planning & Organization

Before you begin remodeling your kitchen, determine how and where you will use your kitchen items. For instance, store breakfast bowls and food near the breakfast table. Keep plastic containers and wraps in a handy place near your work surface for wrapping leftovers. Locate flatware and dishes near the dishwasher to ease the process of unloading

Design Wide Walkways

Create paths throughout your kitchen that are at least 36 inches wide. Also, walkways in the cooking zone should be 42 inches wide for kitchens with one cook, and 48 inches wide for configuring the area for two cooks. When you are in the design/planning process, adjust peninsulas and kitchen islands accordingly.

Plan the Correct Height for the Microwave

The best location and height for a microwave depends on the primary chef and the degree of kid-friendliness that you desire in your kitchen. For adults, the microwave should be roughly 15 inches above countertop level. For kids, you might consider a below-countertop setup for safety and suitability.

Stay Clear of Corners

For appliance and cabinet doors to be fully functional, make sure you plan enough space for clearance and swing direction in your redesign. Keep appliances away from corners and ensure that doors do not bang into each other when opened at the same time.

Determine the Function of an Island

When you plan a kitchen island, remember that form should follow function. If you want to eat and cook on kitchen islands, make sure you plan enough space to separate the cooktop safely from the dining area.


The Ultimate Kitchen Remodeling Guide

Set Your Budget Before You Remodel a Kitchen

As you go about planning the new kitchen, be realistic about the cost. Large renovation projects often end up taking more time and money than you plan for, so it’s a good idea to aim for a conservative budget beneath your max budget to ensure there are extra funds if your project goes over. A good rule of thumb is to add another 10 to 20 percent for unplanned expenses. The more financial cushion you have, the better. You don’t want to be scrambling for an additional loan mid-project, or worse, end up with a half-finished kitchen because you ran out of cash.

Do Some Research

Visit kitchen showrooms and home stores to figure out the cost of items, and then figure out what you need and what you can afford. Attending a neighborhood home tour is a great way to connect with other homeowners and observe their kitchen layouts and renovations

Consider “Hidden” Costs

Remember to factor in the cost of labor and materials as well as taxes and any shipping or delivery costs that might come up. These can add up very quickly, so it’s important to take them into account when you’re setting the budget. Also, consider if there are any steps along the way that you would like to perform yourself. Even taking on just a few tasks can save you a significant amount of money.

Aim for Quality

Always buy the best quality materials you can afford. When it comes to kitchen renovations, you want to have high-quality, functional items, both for your own use and for potential resale value. High-quality cabinets, countertops, and appliances will also last much longer so hopefully you will never have to repeat the renovation process again while you are living in the home.

Evaluate Your Needs vs. Wants

Be practical and don’t buy unnecessary items. It can be tempting to buy all sorts of gadgets and fancy appliances, but it’s better to go with the reliable basics that you know you’ll use. Remember, with every new appliance comes a slightly higher utility bill. They also add to your upkeep responsibilities and require time and money to maintain.


Tips for Renovating Your Kitchen from Design Pros

Function First

“Think about efficiency. About how you actually use the space,” Gambrel says. “If people have all the room in the world—like when they’re planning a kitchen in a new home—they think more is more. So they make the distance between the island and the countertop broader. But that is not efficient.” This kind of thinking, Gambrel points out, often makes cooking and cleaning more difficult. Yes, you want your kitchen to feel open, airy, and inviting, but you don’t want to have to walk 15 feet from your fridge to your range. But what’s the best way to set it up?

Light Up Your Life

Lighting: one of the most important things to consider when renovating or building a new kitchen. While lots of people go with recessed lighting in their kitchen, Gambrel recommends surface-mount fixtures that are attached to your ceiling on a grid: “The bulb is below the height of the ceiling, so you get a more even light and it’s not as surgical as recessed lighting. It’s also very beautiful.” He also loves hanging bigger light fixtures over islands, another functional decorative opportunity. And don’t forget that cabinets can block light from falling onto your countertops. “Planning for some under-cabinet lighting is important,” Roberts adds. “Make sure you have a switch and some power outlets dedicated to that.”

Your Stove Is Your Statement Piece

“Your stove is the designer handbag of the kitchen,” Roberts eloquently explains—a comparison we majorly dig. “It’s the most visible and the most used appliance.” Both designers believe that if you replace and upgrade only one thing in your kitchen, let your stove be that thing. Stoves come in a myriad of styles and colors, giving you a range (heh, heh) of options. Also consider getting a hood for your range—an addition that’ll help with ventilation and also make a statement. “If you have a big budget, you can have one made in metal like bronze or nickel,” Gambrel says. “If not, you can buy a hood along with your stove, then have your contractor build a frame around it in plaster or stucco. It’d be great for any kitchen.”

Consider Your Countertops

“Countertops need to be 24 or 25 inches, and it’s best to have a little bit of an overhang, so dripping tomato sauce will fall onto your floor instead of onto your cabinets,” Roberts says. Even aside from their function, countertops are a huge part of the kitchen, and they should align with your style. “Solid surfacing like Corian is great,” she says. “They can be repaired and they can be installed in such a way that no leftover food can be stuck in the seams.” But when it comes to natural countertops, Roberts says that nothing compares to marble. “It wears naturally, and there’s something beautiful about that because it’s a natural material. Hundred-year-old marble counters in an old Italian-villa kitchen—there’s nothing like that beauty. You can see, after 100 years, where people have been working on that counter.”

And Your Cabinets

Cabinets are just cabinets, right? Wrong! They’re another opportunity to inject your style and make your cooking process more efficient. For example, you might want to forgo cabinet doors altogether. “Personally, I__’d rather have my dishes and serving pieces on open shelves,__” Gambrel says. “I can see everything, and make it more stylish that way, and I can organize olive oil and spices in a more artful way.” Gambrel also notes that an open cabinet can quickly transform the spirit of your kitchen, making it more airy and interesting.


Kitchen Renovation Guide including Tips, Tricks, and Advice

Avoid adding square feet to your kitchen by expanding

Adding a room or even a small bump out to increase the size of your kitchen will be costly and complicated (permits, foundation work, framing, etc.)  Instead, see if you can find additional space in an adjacent closet, hallway, sun room, etc.  Large, open, kitchens are the current fad, but that may not always be the case (especially when you go and sell in twenty years).  Plus, you don’t need a huge kitchen to cook great food and you’ll avoid being a slave to your general contractor for 6-12 months.  Kiplinger Magazine even offers the same advice!

Splurge on cabinets and flooring

If there are two elements of your kitchen that will take the most abuse it’s your floor and cabinets.  Opt for solid wood cabinet faces and full plywood box construction.  Also, look for drawers that have dovetail joinery and bulky mechanical slides (I like the Blum line of mechanisms and hinges, some Ikea cabinets even use Blum hings!).  I’ve found that it doesn’t really matter who the cabinet company is, but very important if they incorporate the above construction and design items into their product.  On the flooring side, avoid hardwood floors (it just doesn’t make sense in a room that will see tons of foot traffic, spills of all sorts, water, etc.)  Instead opt for a Porcelain tile or possibly a natural stone surface (though the latter will require sealing).  Hardwood floors are nice to stand on because they give a little and help with back pain, but it’s no substitute for the resilience of a solid, and indestructible, tile surface.

High end appliances don’t always perform better

It’s a fact that a $10,000 Viking stove will not boil water faster than a $500 Amana stove, however an industrial will often give you additional burners, beefier construction, and the looks most folks desire in a high end kitchen renovation.  We opted for a duel fuel Wolf stove (6 burner) (click here for my Wolf 36 inch six burner review) and it has worked very well thus far, however the stove is very difficult to clean and the large oven takes a long time to reach temperature.

Gut it

Just like I advocate in my five tips on bathroom renovations, it’s best if you gut your existing kitchen so that you can re-wire, re-plumb, level the floor, look for potential problems, etc.

DIY within reason

Professionals cost money and general contractors cost even more.  I would stay away from hiring a general contractor and opt for a 50/50 job where you outsource to professionals for technical tasks (new gas line, installing cabinets, etc.)


The Perfect Time For Your Kitchen Remodel

Your kitchen is a practical, highly-used space that you should truly enjoy living in each and every day. Keeping it updated and to your liking can seem frivolous, but what space could be more important in our daily lives? We’re willing to spend out for a comfortable bed to keep us rested and healthy. Shouldn’t we invest in kitchens that help us live healthier and more comfortable as well?

When you upgrade your kitchen, the efficiency, style, and value of your entire home will improve along with the quality of your own lifestyle. And so we think now is the time to remodel your kitchen. These three primary reasons to consider updating your kitchen, including efficiency, beauty, and investment; all can and will streamline the way you and your family use the kitchen. The industrial kitchen below contrasts with the bright, light-colored kitchen above, but they are both beautiful and customized gathering places at the heart of the home.

Do It For Efficiency

All aesthetics aside, the most practical reason to redo your kitchen is to increase efficiency. This may not be the most glamorous or exciting of reasons to commit to a kitchen remodel, but it is quite possibly one that you will appreciate the most while you live in your home.

Improve Your Quality of Life

Looks aren’t everything, but don’t write them off. A beautiful kitchen has very tangible benefits. A design you love will impact your daily lifestyle — after all, most people spend a large percentage of their time at home in the kitchen, even if they aren’t cooking! The image above is the perfect example of a kitchen remodel that also fosters an environment to gather round during food prep.

See the Rewards

It’s your life: see the difference a kitchen remodel makes on your whole lifestyle, not just the building you call home! This kitchen remodel shown below has a great, personalized touch of teal in the accessories and window treatments that show off the taste of the homeowner in a subtle, professional way.