Beginners Guide To Using Hardwood Flooring

How do I safely clean a real wood floor?

A real wood floor adds a truly beautiful style and feel to any space. But keeping that floor clean is essential for protecting it and extending its longevity. The colour and appearance of the wood will naturally slowly shift, but it’s important to ensure this only happens as a result of natural ageing, and not as a result of damage caused by poor maintenance.

General wood floor cleaning tips

There are several things you can do regularly that will make maintaining your beautiful hardwood floor considerably easier…

  • Ensure you have good quality doormats at all entrances to your house, preferably made from coir matting, to catch as much dirt as possible before it enters your home.
  • Immediately wipe up any spills on your wooden floor. Liquid left standing on the surface of the wood is more likely to be absorbed into the timber, which can cause stains or movement within your floor.
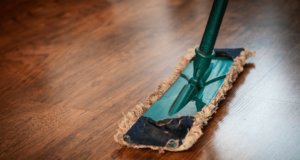
  • Sweep, mop (with caution) or vacuum your hardwood floor regularly. This will prevent any abrasive dust or grit accumulating, which can scratch the surface of the wood and damage / dull the finish.
  • Use a vacuum with a soft brush head. It is not recommended that you use a vacuum with a hard head that can mark the floor. The same applies for heads with a rotating brush as these often have a support bar underneath that could potentially scratch your floor.
  • No steam cleaners. It is not recommended that you use steam cleaners to clean your hardwood floor as they can breakdown the finish as well as potentially cause damage to the floorboards.
  • Use felt pads on the base of all your furniture, to prevent anything scratching the wood.
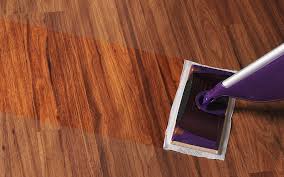
  • When mopping your floor, use the minimum amount of water. Use a mop you can ring out well so you’re not applying an excessive amount of water over the timber.
  • Avoid household cleaners and detergents as they can be abrasive, causing damage to your wooden floor.


How to clean a lacquered wooden floor

A high quality Lacquer will provide an extremely hard finish that is designed to last a long time. From a cleaning perspective, it is simple, as you can effectively clean your floor using a damp mop and appropriate lacquer wood floor soap.

That being said, it’s important to be extra careful when cleaning lacquered floors, as the finish can’t be replenished or patched up easily. Avoid detergents and the use of steam, as this can break down the lacquer over time and take note of the other tips described above.

How to clean an oiled wooden floor

An oiled finish on a wooden floor provides a more penetrating seal, which soaks into the grain of the wood and hardens. Unlike lacquer floors, oils can be more easily replenished by the use of soaps and further treatments of oil.

Consequently, oiled wooden floors can last longer than lacquered providing they are correctly maintained – many lasting decades in good condition.

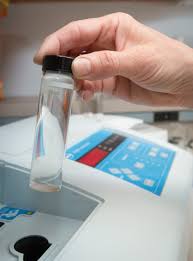
Oiled floors are simple to clean. The cleaning product that you use will depend on what oil has been used to treat your floor. For example, if your flooring has been treated with Treatex Hardwax oil you would clean your floor using a product called Treatex Floor Care whereas if your floor was treated with a Woca Oil you would clean your floor with Woca Soap. These products are simply mixed with water and you can mop your floor, being careful not to get the floor too wet, in the normal way.


Routine Hardwood Floor Cleaning

  • Sweep, dust mop or vacuum regularly. When using a vacuum cleaner, disengage the beater bar or use the “bare floor” setting to avoid damaging your floor. The vacuum head must be brush or felt, and a wand attachment is preferable.
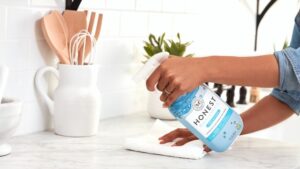
  • Clean your hardwood floor occasionally using a mop with a microfiber or terry cloth cover and cleaner. Never mop with water.

Tips for Protecting Your Floors

  • Wipe up spills immediately.
  • Place a natural or colorfast mat at outside entrances to reduce the amount of dirt and moisture brought into your home.
  • Use area rugs in front of kitchen sinks and within high traffic areas. Rugs must be made of a breathable material to prevent moisture entrapment — and rugs with solid rubber or vinyl backings are not recommended.
  • Keep your pet’s nails trimmed to minimize finish scratches.
  • Use floor protectors on furniture to reduce indentation. The heavier the item, the wider the floor protector needed.
  • Protect your floor from direct sunlight.
  • DON’T walk on wood floors with spike or stiletto-heeled shoes. Remove shoes at the door to avoid potentially dragging in sharp objects that may be stuck in your shoe treads.
  • DON’T use any of the following products (or products similar in nature) on your floor: ammonia-based cleaners, acrylic finishes, wax-based products, solvent-based polishes, detergents, bleach, polishes, oil soap, abrasive cleaning soaps, or acidic substances such as vinegar. Only use a designated hardwood floor cleaner.


Things to Avoid

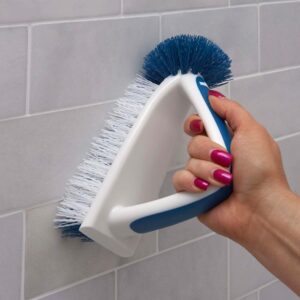
Part of proper engineered hardwood flooring care and maintenance is simply knowing what not to do. As mentioned above, it’s important to avoid cleaning products with harsh chemicals, such as ammonia. You should also steer away from wax-based cleaners and oil soaps. Use only soft materials to apply your cleaners—never use a steel wool brush or scouring pad to buff out marks or scratches. A microfiber cloth or mop works great to collect dust and debris without damaging your floors. Because excessive moisture can damage your floors, avoid using floor steamers, wet mops, or other cleaning methods that would allow water to seep between the planks and cause warping or other damage.

Other Tips and Tricks

Dirt, scratches, and other minor damage is an inevitable part of living with engineered hardwood floors. However, several tricks and tips can help you prevent potential damage—no matter how many pets, kids, or unexpected events your floors face. Do your best to stay on top of messes. Wipe up any spills immediately, before the moisture has a chance to get into the wood and cause damage. Floor mats near doorways are a great way to trap dirt, gravel, and other outdoor debris that might make its way inside. You can also get a floor rug or runner for your entryway, hallway, and other high-traffic areas. Avoid using mats with latex or rubber backing, as this can damage the finish on your floors. You can also place protective mats under chairs or tables with wheels to prevent scratching. Similarly, make sure all the furniture in your house has felt padding on the bottom of the legs. This will help you avoid damaging your floors whenever you move or rearrange furniture.

Taking care of your engineered hardwood floors might seem like a hassle at first, but once you build a routine, you’ll have the reward of gleaming floors and rooms. From the Forest is here to help by providing quality, nationally sourced maple, walnut, hickory and oak engineered hardwood flooring, along with the cleaning products and information you need to make them last. With a little care and effort, you can maintain the luxurious and traditional style that drew you to these floors in the first place.


Ice out wax and gum.

Dried candle wax, crayon marks, and chewing gum on floors with surface or penetrating finishes readily come away with ice. Fill a freezer bag with a few ice cubes, then place the chilled bag over the offending buildup until it becomes brittle, then scrape it off with the edge of a plastic spatula. If the spatula removes the protective wax from a floor with a penetrating finish, re-apply a solvent-based hardwood floor wax to the scraped area with a soft cloth, then buff it into the repaired area with the cloth.

Scrub water, ink, and pet stains well.

Spots left by water, ink, or pet urine represent the most stubborn of stains. Remove them from floors with penetrating finishes by lightly sanding the stain with extra-fine sandpaper, then gently scrubbing with a coarser “00” grade steel wool wet with mineral spirits. Wipe away the mineral spirits with a water-dampened cloth, followed by a dry cloth to remove the water. Apply a solvent-based hardwood floor wax to the scrubbed area with a soft cloth and buff it in to restore its shine. Sandpaper and steel wool can degrade surface finishes, so you’ll want to tackle these stains using only a hardwood floor cleaner, along with a scouring pad designed for surfaced-finished floors.

Camera Operator Mysteries Explained

What is a Camera Operator?

Camera operators work in the television, music and film industry and are usually employed by television and cable companies or by video production houses. They are responsible for capturing different scenes during production and operating a wide variety of technical equipment that may include single and multiple portable, electronic and remote-control cameras.

Other key responsibilities of a camera operator include operating cranes and mobile mountings, assembling and setting up camera equipment, planning and preparing scenes, following camera scripts and working with the lighting and technical staff on each production.

This is one job in the film industry that can be very physically demanding and tiring. The position often requires a great deal of traveling between locations and many long days or irregular work hours.

Additionally, maintenance and proper handling of all filming and recording equipment is extremely important due to the cost of such items.

Primary roles

  • Framing shots

Working closely with the director and other creative personnel to choreograph and frame shots is one of the key tasks for a camera operator. An in-depth knowledge of and the ability to find the appropriate camera lenses to capture a scene is something that will be heavily relied upon. Additionally, the use of special equipment like dollies and camera cranes may be necessary to portray dramatic scenes. Understanding the basic principles of dramatic storytelling and film editing fundamentals may also prove important for this primary role.

  • Operating and maintaining equipment

The camera operator is responsible for using and maintaining some of the most costly items in the entire film production, so a thorough knowledge of said equipment is a must. The position also includes setting up technical equipment on set and responding quickly to directions given by the film director and other creative personnel —all while operating large and expensive equipment.

Secondary roles

  • Communicate with film crew

Because many film and television productions work under tight budget constraints, operators must be able to effectively and quickly communicate with the rest of the film crew during production.  Quick thinking, immense concentration and strong hand-eye coordination are also very important when working under such close time constraints. Potential operators should be prepared to work closely as part of a team but also must be willing to stand out in regards to their own level of competency.

  • Assist the production and crew

Depending on the type of production, operators may need to frame camera shots for live studio or field productions when directed. Taking the initiative and modifying any processes or procedures that will help production move along is also an important aspect of this role on set. To ensure that production keeps moving along at the proper pace, it may also be necessary for operators to help with studio production setup and set preparations as well.

Camera operator job description: what does a camera operator do?

The camera operator is the individual who physically holds and moves/controls the camera throughout principal photography of a production.

Working under the guidance of the director and DP, it’s the camera operator’s job to capture their visions through the viewfinder. Among many responsibilities, he or she is tasked with leading a crew of camera assistants (first assistant camera, second assistant camera, etc.), mapping out the specifics of the film’s visuals with the DP and ensuring they’re executed properly, assisting with blocking the set, getting cameras in position, framing the shot of each scene, supervising the selection and preparation of various shooting accessories that will best serve the moment (lenses, rigs, cranes, dollies), and being in charge of camera/equipment movement and maintenance.

Additionally, the camera operator is often the only one on set who sees how everything is being shot in the moment and so it’s on their shoulders to correct and/or readjust something that doesn’t match the director/DP’s vision.


Career path: How you start and where you can go with it?

Although specialist technical production courses and some training schemes offer a good basic grounding in the skills and knowledge required for this role, intensive industry experience is the key. Most Camera Operators begin their careers as Camera Trainees, and work their way up through the ranks of the camera department over several years. Training and qualifications No specific qualifications are required to work in this role. Studio/OB Camera Operators usually learn most of their practical skills through hands-on experience on the job. However, continual professional development is vital, especially as technology is changing rapidly. Useful advice and information can be gained by studying trade journals, attending exhibitions and joining industry forums. Basic stills photography, which develops visual and composition skills, provides a useful starting point in training for this role.


5 Tips for Becoming a Professional Camera Operator

Like most jobs in the film industry, camera operator positions are not easy to come by, but the following guidelines can help any aspiring cameramen get their foot in the door:

  • Know how to use a camera. Getting to know the ins and outs of your film camera equipment is essential to a successful career as a cameraman. Learn the basics of your camera system including the different shooting modes, lenses, and types of gear. Study other films and become familiar with camera angles, positioning, and movements.
  • Attend a program. Whether you choose to attend film school or community college, many film departments will grant students access to equipment, which means you can practice with real gear and familiarize yourself with both the technical skills and process of a cameraman’s role. While certain camera operator jobs may require a formal education—an associate’s degree in video production or a bachelor’s degree in television production—a high school diploma and strong working knowledge of how to use a camera is enough to get you started.
  • Find an assistant position. You can learn all the tricks of the trade from experienced professionals by finding a job as a camera assistant or production assistant. Learning the ins and outs of the industry and how everything works on-set is valuable practical experience, and also provides a potential opportunity for you to move up within the production studio, or television network, and advance your career.
  • Organize a portfolio. A demo reel or portfolio of work can help showcase your abilities as a cameraman. Your first few cameraman jobs may be unpaid student films or low-budget indies, but these jobs can give you the hands-on work experience you need while helping to build a portfolio that will impress future employers.
  • Hone your skills. Camera operators must have excellent hand-eye coordination, as well as a sharp attention to detail, and solid communication skills. Camera operation is a collaborative process that takes a creative mind, and a team player to execute properly. Work on as many projects as you can to build your skillset.


Recording a video of a solar eclipse

  • When recording video or capturing still images, make sure to use an approved solar filter on your camera, as the sun can damage both your eyes and the camera’s image sensor. It is safe to use a smartphone without a solar filter.
  • When pointing a camera directly at the sun, it is important to have the proper filter in place–the sun’s rays could damage the camera, as the light would hit the camera’s image sensor directly.
  • At the point of totality, just like when capturing still photography, you may want to remove your filter, as it will be quite a bit darker than immediately before or after totality.
  • When capturing video, safety glasses are not needed if you’re only looking through the screen of the camera at a live view; however, a filter should be used to protect the camera’s image sensor. When looking up at the sky during the eclipse, safety glasses should be worn to protect any possible damage to your eyes.
  • When capturing video, you may need to remove the solar filter during totality, and then reattach it immediately after totality, in order to handle the changes in light. This could be challenging if you’re looking to capture continuous video. You might look into capturing a time-lapse video of the eclipse if that better suits your desired outcome.

Commercial Electrical Remodel Bill

ELECTRICAL SOLUTIONS FOR COMMERCIAL REMODELING & RENOVATION PROJECTS

Electrical we take pride in being a leading professional commercial remodeling contractor. We provide all necessary electrical services for commercial renovation and remodeling. Our professional team of experts provides the highest quality electrical services to get your business up and running, no matter the scope.

handle all types of commercial remodeling and electrical work for all types of additions and commercial renovation projects. Regardless of whether you want to remodel your office, bathroom, kitchen or entire restaurant, we will take care of your electrical needs in the most professional manner

team of experts is specialized in electrical work of all types and we work to complete all projects on time and within budget because we know how important time is in these situations. Every business has their own schedule and deadlines, so we aim to provide our services to help you get back to work as soon as possible.

Commercial Electrical Remodeling Services

We provide three types of regular commercial electrical remodeling services:

Building rewiring

Electrical updates

Safety Inspections

If your commercial building of any type is prone to experiencing frequent electrical problems, that probably means that you have faulty electrical wiring. Such problems could cause various types of damage and need to be taken care of quickly. With this in mind, our team of professionals will take care of any wiring problems, so you can focus on more urgent matters.

If you’re in need of entirely new electrical wiring, we can adapt new outlets and installation to your new wiring pattern. Electrical updates are always recommended, simply because it’s how we ensure that you can get back to being fully operational with fully functional electrical solutions.


Commercial Electrical Remodeling

The professional electrical contractors have the skills, knowledge, and experience needed to keep your commercial electric efficient, affordable, and reliable. Our certified electricians can provide a multitude of services and are always available when you need us most. Your business can’t afford to lose time due to electrical malfunctions and still keep its edge over the competition, so let us help you stay on top.

WHY CHOOSE US FOR YOUR COMMERCIAL REMODEL?

Fully licensed and insured professionals

Years of commercial remodeling experience

BBB A+ Rating

Dedicated technicians

Prompt and efficient service

Up front and reasonable prices

WHY YOU NEED 24/7 EMERGENCY ELECTRICAL

A power outage or complication with your commercial electric can hold you back no matter what industry you work in, but certain businesses are impacted more severely than others. If you want to put your mind at ease and make sure you don’t have to close your doors due to a sudden electrical problem, you’ll need to work with commercial electricians who offer emergency services.

COMMON COMMERCIAL ELECTRIC REMODELING SERVICES

Rewiring Your Building – If you frequently experience electrical problems in your commercial building, you might be dealing with faulty electrical wiring. In order to put an end to these problems for good, you might want to talk to the team about rewiring your building. We can take a look at your system and find out if rewiring is necessary to put your problems to rest and allow you to focus on your business.

Electrical Updates – Renovating or upgrading your space is a sign of success and can be exciting, but don’t get ahead of yourself. Be sure to let your commercial electrician know about the project so he or she can be there to help you. Your pro can help you decide where new outlets will go, and you’ll need a professional to install them and adapt your electrical wiring.

Safety Inspections – Before you move into a new commercial building or upgrade your current one, you’ll need to make sure it’s safe to do so. You’ll also need to make sure it remains safe and up to code throughout the entire time you are based out of that building, and the commercial electricians can help. We can perform safety inspections to ensure that your space is safe for your employees and your customers.

commercial electricians understand that time is of great importance in your project and that the longer it takes, the more your business has to wait. That is why we deliver fast and efficient services—completing the job in a timely manner—while in no way reducing the level of quality that we provide.


COMMERCIAL ELECTRICAL RENOVATIONS

Commercial electrical demands are often more complicated than residential planning and implementation. You need commercial electrical experts on your team to ensure all work is done right from the beginning electricians offer the real-life experience needed to see your project through to complete success.

Complete Commercial Electrical Renovations

If the time has come to consider planning and implementing a complete renovation of your electrical system, our expert commercial renovations electrician can help from start to finish. We will discuss what your electrical needs are and design the perfect upgrades and renovations to keep your operations running smooth.

offer electrical renovation services for

Apartments and multi-family units

Industrial complexes

Schools

Hospitals and medical facilities

Keep property secure

Business centers

Office complexes, and more

Specialized Commercial Electrical Build-Outs

Planning and implementation of commercial electrical build-outs done wrong will cost you in both time and money. Our industry certified electricians pay attention to all critical details in build-outs for expansion or a complete business move. You can feel confident that every aspect is considered and planned for to result in the electrical services you require

help with

New circuitry and wiring

Data and phone wiring

Security systems and automatic doors

Fire alarm systems

Illuminated signs

New lighting

Dedicated power centers


Enhance Your Commercial Electrical System

UPDATE YOUR OFFICE’S ELECTRICAL SETUP

certified electrician has helped many business owners add new electrical features to their offices and conference rooms. You can hire us to:

Mount TVs on walls or install custom entertainment areas

Install outlets into conference tables or add extra receptacles throughout your office

Update the lighting in your office


COMMERCIAL ELECTRICAL REMODELING AND WIRING

Do you need an electrician to help you with your business’ electrical needs? When your business needs an electrical remodel, new wiring job or circuit install, it is always best left in the hands of a professional!

Electric promptly attend to whatever electrical problem you run into.

✔ We can work with any type of business

✔ We offer quick & efficient work from licensed technicians

✔ We can quickly remodel & upgrade an electrical wiring system

✔ We provide trustworthy quotes

✔ We always give callbacks to inquiries (some companies don’t)

handle your electrical problems, the sooner you can get on with your business. Here are just some of our commercial electrical specialties:

✔ New circuit installation

✔ Wiring for new structures/buildings

✔ Help with building remodel work

Dog Bite Lawyer Firms

Common injuries suffered by dog-bite victims:

Dog bite victims can sustain everything from small cuts and scratches, to life-threatening injuries which can have devastating effects.  Some of these can affect a person’s ability to function normally for the rest of their lives, both physically and emotionally.  Common injuries resulting from dog bites include:

  • Scar tissue damage: If a dog rips into your skin it can cause scarring, which may take years to decrease and may be permanent. This can have a major effect on a person when the scar is more severe and in a visible area such as the face.
  • Infections such as Rabies and Tetanus: Rabies is a life-threatening virus that spreads through the saliva of infected animals. It causes inflammation of the brain while breaking down the central nervous system. Symptoms include, but aren’t limited to fever, confusion, paralysis, and vomiting. Tetanus is a dangerous bacterium that causes tightening of muscles throughout the entire body. It requires a medical diagnosis and must be treated by as soon as possible.
  • Death: In the most severe cases, dog bites can result in injuries which cannot be overcome, and end up killing a person. While these cases are rare, it is important to acknowledge and understand the potential threat that a truly dangerous dog may pose.


“One-Bite” vs. Strict Liability Rules for Dog Bite Injury Cases

Laws determining liability for a dog bite vary from state to state, but there are essentially two basic kinds of laws: liability when the dog owner knew or should have known the dog might bite someone, and liability regardless of what the owner knew or should have known. This article discusses the difference between these two legal concepts in the context of a dog bite case, and includes state-by-state statutory rules.

”One Bite” Laws

Prior to the twentieth century, a dog owner was only held liable for his dog’s biting someone if the owner had reason to know the dog might bite. This was called the “one bite” rule because it generally meant that a dog was allowed “one free bite” before it would get its owner in legal trouble.

In modern times, the one bite rule does not necessarily allow a dog one free bite. If an owner knows the particular breed is dangerous, or if the particular dog might be prone to biting because of its general character or recent events, he could be liable for the dog’s first bite.

The focus is on whether the owner knew or should have known that the dog might bite, and whether the owner took necessary precautions based on that knowledge. For example, if a relatively aggressive dog recently underwent surgery and the owner did not warn a house guest not to pet the dog, the owner might be held liable if the house guest aggravated the area of the dog’s surgery and was subsequently bitten.

Whether the owner knew or should have known the dog might bite can be a very complicated and contested question. The plaintiff will need to provide enough evidence to convince the jury it was “more likely than not” the defendant knew or should have known, and the defendant will need to argue why the plaintiff’s evidence is insufficient or provide contradictory evidence.

The kind of circumstantial evidence the plaintiff might rely on includes: the dog’s breed, what the owner used the dog for (i.e. protection), how the owner trained the dog, neighbors’ experience with the dog and/or warnings from the owner, and how extensively the owner typically restrained the dog.

Strict Liability Dog Bite Laws

Many states have enacted “dog bite” statutes that provide specific rules for dog bite cases. Most of these statutes create a form of “strict liability” for dog bites. Strict liability means that the defendant is held liable if a certain event occurs, regardless of whether the defendant could have done anything to prevent the event.

The typical strict liability dog bite statute says that the defendant is liable if his dog bit a plaintiff and:

  • The plaintiff was legally allowed to be where he was when the bite occurred, and
  • The plaintiff did not provoke the dog.

If a strict liability dog bite statute applies, what the owner did or did not know about the dog prior to the bite is irrelevant. Note that the dog bite statutes are not the same in every state that has them. Some only apply to bites that occur on public property, some allow the defense that the plaintiff was warned, and some apply specifically to dog bites while others apply to domestic animal attacks generally.

Regardless of the variations, the most important aspect of the strict liability dog bite statutes is that a winning case is easier to predict, the plaintiff will have a much easier time proving and winning a case at trial, and a defendant is therefore much more likely to settle early on if it is clear the statute applies.


Dog Bite Injury Claim Basics

Dogs bite more than 4.5 million people each year, with one out of five dog bite victims needing medical treatment.  We teach our kids how to prevent dog bites, yet children are more likely to be bitten than adults. Sadly, dog bite injuries to children tend to be more severe.

Damages: No matter where you live, to recover compensation for a dog bite claim you’ll first have to prove the dog attack caused harm. Your total damages will directly impact the amount of your final settlement.

Damages for dog attacks can include the cost of ambulance transport, medical treatment, nursing care, physical therapy, lost wages, mental health services, and out-of-pocket expenses for your care and treatment.

You can also include travel expenses and parking costs to get to treatment, the replacement cost of clothing and personal items ruined in the attack, and an amount for your mental anguish, pain and suffering.

Exceptions: A dog bite victim will probably not be eligible for compensation if:

  • The victim was bitten by a police or military dog on duty
  • The victim was trespassing or committing a crime at the home or business of the dog’s owner
  • The victim is a veterinarian or veterinary worker bitten on the job


Precautions After A Dog Bite Occurs

There are several scenarios in which a dog bite might take place. If someone else’s dog bites you, your child or your dog, consider the circumstances. Do you know who owns the dog? Is it a puppy? Is the dog exhibiting strange or aggressive behavior?

If you know who owns the dog and the owner is present, exchange names and contact information. Obtain information from any witnesses, as well. Ask the owner if they can show proof their dog has an up-to-date rabies vaccination. If you do not know who owns the dog, you may need to get a rabies vaccination, which could cost more than $3,000.

What To Do After A Puppy Bites You

If a puppy bit you, stay calm and try not to react.  A puppy is still a baby, and it may bite because it is teething, or trying to establish its dominance. A bite from a puppy is not likely to be the result of aggression.

Though it will probably be a minor dog bite, a puppy bite might still hurt, and it may break the skin as well. If the bite results in a superficial wound, follow the steps outlined below to treat it.

What To Do After An Unknown Dog Bites You

If you do not know the dog — or the owner of the dog — who is responsible for the bite, you will want to act to protect yourself from any possible disease or rabies the dog might have. Avoid trying to hold or catch the dog on your own. Instead, call 911 right away, then they or you can contact animal control. You want to clean the injured area so you can avoid transmitting bacteria that could cause an infection, and get proper medical attention and a rabies vaccination right away.

What If Your Dog Bites You?

If your dog bites you or a member of your household, it may be an upsetting experience, but it is best to try to remain calm. While you do not have to worry about contacting the police or taking down someone else’s information in this situation, you should still think about the circumstances around the bite. Was it accidental? Was the dog playing? Or, was he fighting with another dog and you got in the way? In this situation, don’t discipline the dog after the bite occurs. The dog will not understand the connection between the biting and the subsequent discipline.

There might be medical or behavioral reasons for the bite. Your dog may be concealing pain or injury, and perhaps you got too close and the dog reacted by nipping at you. If you suspect that could be the case, make an appointment with your veterinarian. If your dog bit you because you got too close to something valuable to him, like his favorite napping spot, toy or food bowl during mealtime, it’s possible the dog is starting to show signs of aggression. You may need to work with your dog to try to eliminate aggressive behaviors, and it might require enlisting the help of a professional dog trainer.


Four Things You Need To Know If Bitten By A Dog

  • If you are bitten while in a public place and bitten by a dog running at large, the dog owner will generally be held responsible as long as you were not provoking the dog;
  • If you are on the premises of the dog owner (i.e. home, farm, owner’s driveway, etc..) and get bitten, you will have the legal duty to prove that the owner knew the dog had “dangerous propensities.” This means that the dog had a prior history of aggression or viciousness that has been witnessed by someone, or the owner has admitted to.  Owners rarely admit to these type of things, so you have to find out what the owner knows through their own friends and neighbors.  This is not always an easy task, especially for owners you do not know very well.
  • You need to have appropriate coverage for this type of scenario with your own homeowner’s insurance. Call your agent and ask if you have the correct type of coverage that will cover you if someone else’s dog bites you and does not have any, or enough, insurance coverage;
  • You only have one year (unless you are a minor) to file your claim. After that, you are out of luck.

Practical And Immediate Solutions To The Growing Need For Clean Water Testing

Drinking water testing labs: accreditation and licensing

The rules

Under the Safe Drinking Water Act, labs must be accredited and licensed to test drinking water.

the Ministry of the Environment, Conservation and Parks:

licenses laboratories

inspects laboratories

ensures that laboratories comply with laws and rules around drinking water testing

A drinking water testing licence authorizes a laboratory to carry out analysis for specific drinking water tests by approved analytical techniques.

If you are accredited to certain international standards, you can apply for a licence to test drinking water. The licence allows you to test drinking water for the parameters specified on your drinking water testing licence.

You will be granted a licence for at least one of the following parameter “classes”:

microbiological

organic chemical

radioanalytical

physical/other

inorganic chemical

The drinking water testing licence is valid for up to five years and an annual licensing fee applies. The drinking water testing licence indicates which parameters and methods a laboratory is licensed for under a specific class.

Laboratories must publicly display the drinking water testing wall certificate at the laboratory, so that clients know what classes a laboratory is licensed to perform. A copy of the laboratory’s drinking water testing licence should also be available upon request.


Water quality testing systems

Universal access to safe and affordable drinking water is still a challenge. In remote areas, E. coli is a common contaminant, and timely, accurate and reliable water quality data is hard to come by.

Solutions is a non-profit organisation working to find innovative ways of reducing poverty. In 2018, received a grant to perform E. coli tests using innovative technologies. Using water quality testing solution, an experiment was conducted on the drinking water

The challenge

Water quality testing in remote areas is a challenge. Usually, it’s done by collecting a limited number of water samples and transporting them to laboratories. The time required to perform and complete the tests, as well as the transport and laboratory costs, results in high costs per test and questionable data quality. Samples may get altered in transit and results are not timely, which can lead to interventions based on inaccurate data.

The partnership

wanted to find an alternative solution to lab testing for E. coli contamination in remote areas. joined forces to conduct an experiment using water quality testing system. With data platform and hardware, instant field tests are connected to a mobile-phone based data collection application and real-time decision making dashboards.

The change

The results revealed that between 80% and 83% of the time, the results from water quality testing system matched the laboratory test results for E. coli in drinking water. The system also reduced the amount of time it took to perform 1000 tests by 67%, providing timely insights for immediate decision making.


DRINKING WATER

Drinking Water Standards are the government issued regulatory requirements for the consumption of drinking water.

Drinking water quality will vary greatly depending on rainfall run-off and the land use of the surrounding catchment. It is always advisable to check whether your drinking water meets the requirements of the Drinking Water Standards. This is especially important as water quality is largely impacted by the local environment and can be impacted by contaminants such as nitrates and E. coli.

Groundwater that is low in pH can attack copper piping leading to high levels of dissolved copper.

Important for ion balance check and other parameter estimation. Used to calculate TDS.

Bores close to the ocean can have elevated levels. Water from limestone aquifers can also be high in TDS.

Important for interpretation and other parameter estimation.

High hardness may cause scale deposition and scum formation. Water with low hardness (<100) may be more corrosive.

Important nutrient indicative of fertiliser application and other anthropogenic inputs, health concern (can cause methaemoglobinaemia in bottle fed infants)


Water Testing

Testing Your Well Water

Safe drinking water is important to your health, but how can you tell if your well provides safe water? Public water systems are tested regularly, but if you have a private well, regular testing is up to you. To assure safe drinking water

Department of Health recommends the following:

First, make sure that your well is located, maintained, and constructed properly

Test your water anytime your well is serviced, or you notice a change in taste, color or odor

Regular water testing should be conducted as follows.

For Nitrates & Manganese, always test before giving to an infant and anyone in your house that becomes pregnant.  Testing is even more important if young children drink the water (Safe Drinking Water For Your Baby).

Depending on where you live may also be a factor to consider when testing your water. For example, manganese is a naturally occurring element found in drinking water across, and has recently been found to cause neurological problems, especially in infants over time. For more information on manganese


Water Testing

How much will the water test cost?

Effective February 1, 2017, the following fees apply:

$12.80 for nitrates

$14.40 for coliform

$13 for arsenic

$13 for lead

$13 for manganese

What water tests are required when selling your home?

Coliform Bacteria and nitrates are the two most common tests done to determine if the water is safe for human consumption. Their presence indicates the water has been contaminated, or is being contaminated, from an organic source, and it may be contaminated with some disease causing organisms or substances. Other tests like lead or arsenic can also be required by a lending agency.

A New Paradigm For Accountant Consulting

What are T-accounts?

T-accounts are called such because they are shaped like a T. A representation of the accounts in your general ledger, T-accounts can serve as a visual aid for bookkeepers and accounting personnel who are learning accounting processes, as well as those moving from single-entry to double-entry accounting.

The T-account, like all accounting transactions, always keeps debits on the left side of the T and credits on the right side of the T. Like a journal entry, T-account entries always impact two accounts. T-accounts can also impact balance sheet accounts such as assets as well as income statement accounts such as expenses.

How are T-accounts used?

No matter what type of accounting you are using, you can use a T-account as a visual aid in recording your financial transactions.

T-accounts can be particularly useful for figuring out complicated or closing entries, allowing you to visualize the impact the entries will have on your accounts. For instance, prior to processing closing entries, you can create a revenue T-account in order to check for accuracy. T-accounts also provide a tool for helping to ensure that your entries will balance.

When should you use T-accounts?

T-accounts are typically used by bookkeepers and accountants when trying to determine the proper journal entries to make. Here are some times when using T-accounts can be helpful.

  1. When teaching accounting or bookkeeping

Accounting principles can be difficult to understand, but using T-accounts to explain accounting principles can be helpful, particularly for those who may be struggling with understanding debits and credits and how to record them properly.

  1. When first learning accounting

T-accounts can be extremely useful for those struggling to understand accounting principles.

Even if you currently use or plan on using accounting software for your business, using T-accounts to record practice entries can be particularly helpful for those looking to better understand debits and credits and how they impact your financial statements.

  1. When trying to understand a complicated entry

If you’re still recording journal entries in various accounting journals or tracking financial transactions using spreadsheets, using T-accounts can guide you through the entry process, allowing you to see exactly how your entries will affect your accounts.

This can help prevent errors while also giving you a better understanding of the entire accounting process.


What is double-entry accounting?

Double-entry accounting is a method of bookkeeping that tracks where your money comes from and where it’s going. Every financial transaction gets two entries, a “debit” and a “credit” to describe whether money is being transferred to or from an account, respectively. Each accounting entry affects two different accounts: for example, if you sell a cup of coffee, your cash account goes up, and your inventory account goes down.

When making these journal entries in your general ledger, debit entries are recorded on the left, and credit entries on the right. All these entries get summarized in a trial balance, which shows the account balances and the totals of your total credits and total debits. If done correctly, your trial balance should show that the credit balance is the same as the debit balance.

There’s one more common accounting term you should know here: chart of accounts, which is a big list of all your accounts (what kind of transaction in your business is an asset, what’s a liability, what’s an equity, etc.). You can see an example here.

Recording transactions this way provides you with a detailed, comprehensive view of your financials—one that you couldn’t get using simpler systems like single-entry.


Types of accounts

There are five types of accounts: Asset, Liability, Equity, Income, and Expense. Income and Expense are sub-accounts under Equity, but they behave differently enough that they’re worth treating on their own.

  • Assets are things that you have (say, cash in the checking account, or maybe a building) or that someone is legally obligated to give you later (such as Accounts Receivable).
  • Liabilities are monies that you are legally obligated to pay to someone else—like debts, accounts payable, or financial aid money not yet disbursed.
  • Equity—or, for non-profits, Net Assets—is what remains of your Assets after deducting your Liabilities. If you have $100 in Assets and $25 in Liabilities, your Net Assets/Equity would be $75. In a for-profit business, the shareholders would have some interest in that equity. But in a non-profit context, Net Assets are more like an ongoing resource.
  • Income refers to the revenues you take in during a given time period. Your income accounts might read thus: Graduate Tuition, Undergraduate Tuition, Fees, Room & Board.
  • Expenses are the costs you incur during a given time period. Utility Bills, Faculty Salaries, Insurance—these are typical expense accounts. Tuition discounts are also considered an expense.


Introduction to Debits and Credits

If the words “debits” and “credits” sound like a foreign language to you, you are more perceptive than you realize—”debits” and “credits” are words that have been traced back five hundred years to a document describing today’s double-entry accounting system.

Under the double-entry system every business transaction is recorded in at least two accounts. One account will receive a “debit” entry, meaning the amount will be entered on the left side of that account. Another account will receive a “credit” entry, meaning the amount will be entered on the right side of that account. The initial challenge with double-entry is to know which account should be debited and which account should be credited.

Before we explain and illustrate the debits and credits in accounting and bookkeeping, we will discuss the accounts in which the debits and credits will be entered or posted.

What Is An Account?

To keep a company’s financial data organized, accountants developed a system that sorts transactions into records called accounts. When a company’s accounting system is set up, the accounts most likely to be affected by the company’s transactions are identified and listed out. This list is referred to as the company’schart of accounts. Depending on the size of a company and the complexity of its business operations, the chart of accounts may list as few as thirty accounts or as many as thousands. A company has the flexibility of tailoring its chart of accounts to best meet its needs.

Within the chart of accounts the balance sheet accounts are listed first, followed by the income statement accounts. In other words, the accounts are organized in the chart of accounts as follows:

  • Assets
  • Liabilities
  • Owner’s (Stockholders’) Equity
  • Revenues or Income
  • Expenses
  • Gains
  • Losses


Balance sheet accounts and profit and loss accounts

There are two main classes of accounts, which are derived from the balance sheet as subaccounts and subdivided as required: balance sheet accounts and profit and loss accounts.

The inventory accounts, as their name suggests, concern the raw materials, work in progress, and finished goods of a company. The asset accounts contain the tangible assets, inventories, cash and cash equivalents, and so on that are located on the asset side of the balance sheet. The liability accounts comprise the equity (business shares, reserves, annual surplus, etc.) as well as the borrowed capital (loans, outstanding invoices, and other liabilities) on the liabilities side of the balance sheet.

The equity capital of a company occupies a special position: The profit and loss accounts in accounting are sub-accounts from this balance sheet area – again divided into income accounts and expense accounts. These are mainly sales revenues – but asset growth is also included. In the expense accounts, you post expenses that reduce the company’s assets – for purchases, rent, interest, as well as wages and salaries.

Organizing Tips For Effective House Cleaning And Organizing

How to Clean the House Quickly – and Thoroughly

So, you have been looking forward to hosting this dinner party for two weeks, but two hours before it’s due to start you look up and realise the house is an absolute state. Every time, right? If you’re in need of finding out the quickest way to clean your house, you’ve come to the right place: these house cleaning tips will help you address that mess in no time

Go top to bottom

Want to know how to clean your house fast? The first thing to remember is that, like everything else in life, the laws of gravity apply to dust and grime. This downward settling of dust has everything to do with your speedy cleaning strategy. Firstly, it means that if your house has multiple floors, you need to start on the top floor. Otherwise, the dust from upstairs will settle on the lower floors and you might find you have to start again.

Make a house-cleaning checklist

This might seem like strange advice when you’re in a rush, but it really is worth taking five minutes to jot down a house-cleaning checklist. Why? Well, some of the things you do when you have longer to clean might be unnecessary when you’re working out how to clean the house quickly.

Work smart

Once you have your house cleaning checklist, figure out the quickest way to clean your house. What order does it make sense to clean the rooms in? Where should you start in each room? What’s the last thing you should do in there, and what might you not have thought of? The moments you spend doing this will save you a lot of time and frustration once you get to work.

Remember the essentials

When you’re thinking about how to clean your house fast, it’s easy to get overwhelmed by the bigger tasks and forget about the little things. Here are a few you might not have thought of:

Make sure you have clean towels out

Change bed linen if your guests are staying overnight

Vacuum your sofa

Air any stuffy rooms by opening the windows an hour or so before they arrive


Guide To A Thorough House Cleaning

Regular deep cleaning is ideal for your home – but not everyone has the time to do it. More often than not, you’ll have to wait until the end of a busy season before finding some time for a major clean-up. Although daily weekly dusting and vacuuming may be sufficient for maintenance, it’s still necessary to dive into the nooks and crannies and clean every neglected area of your house at least once a year. That’s why we’ve come up with a guide on how to tackle a thorough cleaning for every room in your home.

Tips Before You Start

Depending on where you live, you may need to consider a mold inspection. Mold is harmful to health and, if left unchecked, could damage your home and, at the same time, cause illness to you or any of your family members. Also, removing clutter and getting rid of junk makes cleaning a lot easier. If you have a lot of garbage piled up over the years, you can hire a junk removal service to take care of the hauling and disposal. Lastly, plan how you want to approach the cleaning process. You may also want to take stock of your cleaning supplies and tools to ensure that you have everything you need before you start.

Bathroom

There is nothing more frustrating than a grimy and unkempt bathroom. After scrubbing all the essential fixtures like the tub, toilet, and shower, you need to focus your attention on the hard to reach areas. Start with light fixtures, mirrors, and windows. Make sure that you wipe down all corners and edges to get rid of dust and grime. If there is exposed grout, you can use a specialty grout cleaner or make one using some baking soda and white vinegar. Don’t forget to clean out drawers and disinfect all surfaces, especially doors and handles.

Bedroom

The first thing you need to do is remove all drapes, beddings, and rugs. Wash them in warm water to disinfect and kill dust mites. If your mattress has a lot of stains, you can consider having it steam cleaned. Carefully vacuum all surfaces, especially behind and underneath furniture. Clean and wipe down closets, drawers, and cabinets.

Kitchen

Cleaning the kitchen could take time; that’s why it’s best to break down your task into manageable steps. Start with hard to reach areas like cabinets and cupboards. Clean the top, corners, and inside using a damp cloth. While cleaning surfaces, you can start defrosting your refrigerator. The oven is harder to clean, so you might need to soak the stains in a mixture of baking soda and vinegar. The same applies to your microwave. Most importantly, throw away old sponges and replace dish towels. Also, don’t forget to disinfect all surfaces after cleaning.


Insane But True House Cleaning Facts!

Cleaning Burns Calories

Cleaning for two hours burns 200 calories. Who needs to get on the elliptical when you can just mop the floors?

Blenders Clean Themselves

Did you know blenders clean themselves?

You read correctly! Just fill your blender with water and add a few drops of soap. Turn the blender on for a few seconds and rinse after. Ta-da!

The Kitchen Sink Has More Germ Than The Toilet

The kitchen sink contains more germs than your toilet. Yes, you actually need to clean your kitchen sink, not just rinse it out.

You Can Clean Your Shower Curtain In The Washing Machine

Did you know you can clean a shower curtain in the washing machine?

No more scrubbing for half an hour trying to get muck off your shower curtains. Just pop them in your washing machine’s gentle cycle with a pint of vinegar and press “start.” Aren’t washing machines one of the best inventions ever? If you feel like getting even more done, you can try cleaning your washing machine too.

Dust Is Mostly Made Up Of Dead Skin Cells

You know all those dust particles lying around? Well, roughly 70-80% of them are made up of dead skin cells. And you thought your pet shed a lot!

Mold Can Grow In Your Trash Can

Did you know mold can grow at the bottom of the trash can?

Mold loves moisture so add 1/2 cup of borax to the bottom of the trash can to absorb mold-causing dampness.

Mattresses Carry Dust Mites

An average mattress contains anywhere from 100,000 to 10 million dust mites. That’s it. We’re sleeping on the floor from now on.

You Can Cook A Sponge

Did you know you can cook a sponge?

Not to eat, to clean! Pop a wet sponge in the microwave for two minutes to kill germs and prolong the life of your sponge. Make sure the sponge is very wet; a dry sponge could start a fire!

Mouthwash Can Clean Floors, And The Crazy But True Story Of

Listerine

Mouthwash can clean floors. If you run out of cleaner, add a capful of mouthwash for every gallon of water and you’ll be good to go. It’s a long story, but to sum it up, Listerine was originally developed to be a surgical antiseptic. However, they realized that surgical antiseptics were only marketable to a small group of professionals. In the hopes of increasing sales, the company began to market Listerine as a floor cleaner – as well as a cure for Gonorrhea! So where does mouthwash come in?


This interactive cleaning guide will make your life so much easier

How to clean upholstery, from couches to car interiors

Does your upholstered furniture look dingy and tired? Is your couch in desperate need of a clean? What about your car? Upholstery, like carpet, needs regular attention

If you’re going to hire a professional: Bisaillon recommends having upholstery cleaned by a certified cleaning technician every 12 to 24 months — or more frequently in households with small children or pets. To assure that you’re getting a qualified cleaner, look for certification by International Cleaning and Restoration Association or International Institute of Cleaning and Restoration. Before booking an in-home cleaning, request the name of the technician and his/her ICRA or IICR registration number.

Vacuum: Use upholstery and crevice attachments (they make a huge difference!) to pick up crumbs and dust on a weekly basis.

Clean spills immediately: Blot them up ASAP. If the spill leaves a spot, follow instructions on the fabric care label. If it’s safe to use water, blot the area alternately with a damp towel and a dry towel to remove it.

Treat the stain: As always, follow cleaning instructions on the fabric care label. For stains on silk and antique fabrics, consult a professional. Otherwise, if the stain is from an organic source, like mustard, coffee or other foods, Bisaillon suggests lightly misting it with 3 percent hydrogen peroxide.


How to clean a TV screen, computer screen and more

Is your phone screen covered with greasy smudges? Is your tablet dotted with doughnut debris? And what about your TV screen? Let’s be honest, it’s definitely covered in dust. It’s time to clean them all and see the e-world as it was meant to be. There’s no need to put this chore off — it’s so easy you’ll wonder why you hadn’t done it sooner. Before getting started, consult the owner’s manual for specific instructions, and be sure to unplug all devices.

Dust it

To remove dust, use a microfiber cloth and lightly wipe the screen, moving in one direction and working from top to bottom. hat’s all it usually takes to remove dust, grease, oil, dirt and 99 percent of bacteria that’s on the screen.

Use the right cloth

Not all microfiber is the same. recommends cleaning screens using only cloths specially made for electronics, like E-Cloth or MagicFiber, because they have shorter, finer fibers. And more fibers means faster results.

For stubborn smudges…

Slightly dampen a corner of the microfiber cloth and wipe the area lightly. (Too much pressure will damage the screen.) Dry with an unused portion of the cloth. You’ll know it’s time to move to a new part of the cloth (or wash it) when it starts leaving dust behind.

What NOT to use

Don’t apply too much pressure. Use a light hand to prevent damage to the screen or the anti-reflective coating. Never use abrasive cleansing cloths or pads since they’ll scratch the screen. And avoid any products that aren’t recommended in the owner’s manual, including window cleaner, ammonia, vinegar, ethyl alcohol, powdered cleanser, benzene or paint thinner.

A Guide To Becoming A Dentist

Dental decay – how to tell if you need a tooth filling

Dental decay is a serious issue. If left untreated, it can become a serious threat to your dental hygiene and cause you a lot of pain. Tooth fillings can be used to help solve this problem and help you achieve your perfect smile. Could you need a tooth filling? To help you find out, we’ve put together this guide on dental decay and tooth fillings.

What is dental decay?

Simply put, dental decay is the process of sugary food dissolving teeth.

Whenever sugars in the food we eat and drink react to the bacteria in plaque, it forms acids that soften and dissolve the enamel and dentine of a tooth. The acid is eventually neutralised through natural salts in your saliva but can attack your teeth for up to an hour after eating and drinking.

Over time, the sugary food will make a cavity (hole) in the tooth.

There are three types of cavities dental decay can cause:

  1. Coronal cavities

This is the most common type and is located on chewing surfaces or between the teeth. This type of cavity is common in both children and adults.

  1. Root cavities

Our gums recede as we age, which leaves parts of our tooth roots exposed. Since there is no enamel covering tooth roots, these exposed areas are more susceptible to dental decay.

  1. Recurrent decay

This type of cavity is located around existing fillings and crowns which have accumulated a build-up of plaque.

Without treatment, dental decay can destroy your tooth and kill the delicate nerves at its centre. It can also cause the area at the root tip to become infected. Once this part is infected, it the tooth can only be treated with root canal, surgery or by extracting the tooth.

If the decay is not too serious, it can be removed. The tooth can then be restored with either a white or silver filling. The silver fillings contain mercury, while the white fillings are made from a durable white material that matches the colour of your teeth.

If caught early enough, sometimes dental decay can also be treated with a fluoride varnish to help stop more decay.


How to tell if you need a filling

Unfortunately, dental decay does not have a lot of symptoms in its early stages. However, if you experience any of the following symptoms, contact your dentist for a consultation.

  • Tooth sensitivity

Does one of your teeth feel sensitive when exposed to certain foods, such as hot or cold temperatures, or sweet, sticky and sour foods?

  • Flossing string tears

When you floss, does the string tear each time you floss a particular tooth?

  • Damage to a previous filling

If a previous filling is cracked, broken or missing, you may need to replace the filling.

  • A chipped or fractured tooth

Is your tooth damaged?

  • Food stuck between teeth

When you eat, does your food always get stuck on or between certain teeth?

  • Dark spots

Can you see or feel a dark spot or a hole in your tooth? Does your tooth feel rough?

  • Throbbing or sharp pain

Do you have throbbing in your mouth, or pain in your tooth when you bite down or chew your food?


Signs and Severity of Tooth Decay

You won’t notice pain and sensitivity until decay goes through the enamel into the dentin layer, the Academy of General Dentistry notes. Dentin is made up of tiny nerve endings that become irritated and cause sensitivity when exposed to hot, cold, sweet, sticky and sour foods. You may also feel discomfort when biting down and find that food frequently gets trapped between your teeth.

Decay spreads rapidly through dentin because it is much softer than enamel. Root decay also spreads quickly, since the cementum covering on the root is not as hard and thick as enamel. Be warned that as tooth decay continues, your pain may be more frequent and intense.

It is important to remember that infection develops when decay and bacteria reach the pulp portion of your tooth, which contains the nerves and blood vessels. The ADA notes that pain from an abscessed tooth is persistent, serious and will likely keep you up at night. Other symptoms include fever, facial swelling and a bad taste in your mouth. You may notice pus draining from a red swelling on your gum near the root tip. Consequences can be serious if the infection spreads into your jawbone or throughout your body.


How Implants Work

During a minor surgical procedure, your dental implant is inserted directly into the jawbone in the space vacated by the missing tooth. It will then be left to heal for a period of months before the final crown is attached. During this healing period, the implant actually fuses to the bone surrounding it.

Tooth Replacement Options Using Dental Implants

Implants can replace missing teeth in a variety of ways. They can be used to:

Dental Implants Replace One Tooth.Replace One Tooth — When you have one tooth missing, a single implant is inserted into the bone to replace the root part of that tooth; a crown then goes on top to simulate an actual tooth. This treatment choice has the highest success rate, making it the best long-term investment for replacing a single missing tooth. Even if the initial cost is slightly higher than other options, it is the most cost-effective solution over time. An implant will never decay or need root canal treatment, and feels just like the tooth that was there.

Dental Implants Replace Multiple Teeth.Replace Multiple Teeth — When you have more than one tooth missing, implants provide an ideal replacement mechanism. You don’t even need one implant for every missing tooth. Instead, implant teeth can act as supports for fixed bridgework. For example, if you are missing three teeth in a row, we can place two implants, one on either side of the gap, and a crown in between that has no implant underneath. That way, you won’t need to use any of your remaining natural teeth as bridge supports, which could weaken them and make them more susceptible to decay.

Dental Implants Replace All Teeth.Replace All Teeth Permanently — Implants can support an entire arch of upper or lower replacement teeth that are fixed into the mouth and are never removed. Sometimes the new teeth can be supported by as few as 4 implants. It’s comparable to the structure of a table, which only needs 4 legs to hold it up. In cases where jawbone density and volume have deteriorated, 5 or 6 implants might be needed to support a row of 10 to 12 teeth. Dental implant replacement teeth protect your jawbone, won’t slip, and should last a lifetime.

Dental Implants Support Removable Dentures.Support Removable Dentures — Implants can even make removable dentures more comfortable, effective and healthier to wear. Traditional dentures rest on the gums and put pressure on the underlying bone. This accelerates bone loss so that the jaw shrinks and the dentures slip, particularly on the bottom. But today dentists can attach a removable denture onto implants, transferring that pressure into the bone structure rather than the bone surface. This prevents the dentures from slipping while you eat and speak, and preserves the bone directly beneath them.


Signs and Symptoms of Periodontal Disease

It’s important to understand that you can have periodontal disease with no obvious symptoms, especially if you are a smoker (nicotine reduces blood supply preventing bleeding and swelling of the gum tissues). Still, there are some important things to look for:

  • Bleeding gums — Some people think that when their gums bleed, it simply means they’re brushing too hard. While brushing too hard is bad for the gums, it should not cause bleeding. Any bleeding of the gums should be considered a warning sign of gum disease.
  • Bad breath — It’s very easy for plaque to collect in the spaces between the teeth, creating the perfect living conditions for bacteria that produce odorous, sulfur-containing compounds, resulting in bad breath.
  • Redness or swelling of the gums — Inflammation of the gums is usually the first visible sign of periodontal disease.
  • Receding gums — If you notice that your teeth look longer than they used to, it may be that your gum tissue has receded (away from the enamel), exposing some of your tooth roots.
  • Sensitivity — If there is gum recession, the exposed roots may become sensitive to hot or cold.
  • Periodontal abscess — Bacteria can become enclosed in a periodontal pocket and the area will fill with pus, becoming swollen and painful.
  • Loose teeth — When periodontal disease results in bone loss, teeth can become loose or migrate. Tooth loss can result and may be accelerated if you are applying excessive biting forces from clenching or grinding your teeth.

Deep Cleaning An A Commercial Kitchen Area

A Smarter Way to Clean Your Home

Every home — big, small, apartment or vacation home — gets dirty. And while there’s not just one way to clean your living space, there is a smarter way to get the job done. Take this guided tour of your home — from the kitchen and bathroom to the bedroom and living areas — to learn the basic rules of cleaning as well as some tips and short cuts that will help you clean thoroughly and efficiently, starting now.

How to Clean the Kitchen

In the kitchen, wiping surfaces, keeping tabs on the fridge and washing dishes every day will prevent big time-consuming messes down the line.

Keep Dishes Clean

If you’re a person who tends to let dishes pile up in the sink to avoid washing them, try this simple trick to put the effort involved into perspective: For a few days, as you think of it, set a timer before you begin washing the dishes, and make note of how long it took to clean up. If you know the task will take just minutes to complete, it will be less difficult to convince yourself to take care of those dishes now.

How to Clean a Burned Pot: To clean a badly scorched pot without scrubbing, cover the burned area with a liberal amount of baking soda and pour in enough boiling water to fill the pot a third to halfway up. When the water is cool enough to touch, head in with your sponge and use the baking soda solution to scrub away the scorch. Dump the solution and wash the pot with hot, soapy water.

The Dishwasher Debate: While there isn’t an absolutely correct way to load a dishwasher (and what would couples bicker over if such a directive were carved in stone?), there is one universal rule: It is much easier to load from back to front.


Deep Clean Like You Mean It: Your Exhaustive House Cleaning Checklist

Aless-than-clean home can cost you thousands off the sale price or completely turn away potential buyers. A messy house is a red flag for many buyers, who’ll suspect repair problems lurking beneath the dirt. A spotless home sends the unspoken signal that yours is a well-maintained property.

It’s not as simple as tidying up for a dinner party either. . Buyers are coming in to kick your home’s proverbial tires. As they decide if your house will meet their needs, they’ll open closets, explore out-of-sight corners and may even shift furniture. A good deep cleaning at the beginning will make it easier to keep your place tidy for showings the entire time your home is on the market.

Hiring in a cleaning crew is one option to get the job done, but it comes with a price. Depending on the square-footage and cleanliness of your house, you could be looking at a full day job for a multi-person team.

If you take on the job yourself you not only save money, you get a jumpstart on tackling the biggest distraction to buyers: clutter. Roll up your sleeves, get the cleaning supplies out, and follow along. We’ve put together this easy-to-follow guide for deep cleaning a house while it’s on the market.

Conquering Clutter

Take a stroll through your home and appraise the place as if you were a guest instead of a resident. Fresh eyes will find those untidy paper stacks on your desk, the mantel overflowing with photos, the basket of laundry waiting to be folded.


The Ultimate Room-by-Room Spring Cleaning Checklist

Breathe new life into your home after a long winter. Our complete spring cleaning checklist guides you through a deep-cleaning that will leave your house shining from the inside out.

As the snow melts into spring showers, it’s time to refresh your home. This comprehensive spring cleaning checklist offers an opportunity to get the whole family involved in tidying up. Running short on time? Try tackling one room per week

Entryway

Sweep floors

Mop floors

Wipe walls

Wipe baseboards

Clean door

Clean doormat

Organize shoes

Hang jackets

Kitchen

Clean stovetop

Clean oven

Clean microwave

Clean dishwasher

Clean refrigerator

Wipe drawers and shelves in refrigerator and freezer

Defrost freezer

Discard old or expired food in pantry, fridge and freezer

Clear countertops

Degrease cabinet doors and backsplash

Remove items from cabinets and thoroughly clean inside

Clean fridge/freezer seal

Dust top of high surfaces including fridge, microwave/range hood, cabinets

Deodorize and degrease the kitchen drain

Wash dish rags and clean sponges

Wipe walls

Wipe baseboards

Mop floors

Shake out dust or dirt from floor mats

Dining Room

Dust china in china cabinet

Launder and press table linens

Polish silver

Dust and polish furniture

Vacuum or spot clean chair cushions

Wipe walls

Wipe baseboards

Clean light fixture

Dust blinds

Dust curtain rods

Clean window sills

Wash windows

Clean or vacuum curtains

Mop or vacuum floor

Shampoo rugs or carpet


Guide to Deep Cleaning your Car

Interior

Use vinegar or specific cleaner for the insides of the windows.

Wipe clean any dust or stains from the dashboard or steering wheel.

Use reputable upholstery cleaners and wipes.

Consider using newspapers to keep the windows streak-free.

Vacuuming

Make sure your vacuum is lightweight, and has a variety of attachments.

Shake the floor mats out.

If your car smells, sprinkle a little baking soda then vacuum it up.

Get under the seats and pedals.

Do not forget to vacuum the boot.

Washing

Park in the shade.

Wet the car, then use a soft sponge or cloth to gently scrub the entire roof in a circular motion. The car should stay wet the entire time.

Move on to the windshield and bonnet, repeating the steps from the roof.

Lift the wipers to ensure that you reach all necessary cleaning points.

Dry the car, starting from the roof, using a microfibre cloth or chamois.

Use a brush to scrub the tyres, rims and wheel wells.

Once the car is dry, use a non-acid based tyre cleaner to make them look new.

Waxing

Use a wax stripper to clear off any old wax so you can start with a clean, even surface.

Apply the wax in a thin layer, and buff it until it is slightly cloudy. Let it sit for 15-20 minutes.

Buff the first coat until shiny, then apply the second coat more liberally. Let it cure for 20 minutes, then buff it until it is clear.

Make sure you have quality, long-lasting wax (either liquid or paste), depending on your preference.

Mask off any plastic, chrome or other materials to protect them in case you accidentally put wax on them.


Ultimate Coronavirus Deep Cleaning Guide

In this cleaning guide you will learn:

What is Coronavirus (COVID-19)

How to protect your home and family

What cleaning products kill coronavirus?

How to deep clean your home like a pro

What is Coronavirus?

According to The World Health Organisation Coronavirus is an infectious disease caused by a newly discovered coronavirus. Most people infected with the COVID-19 virus will experience mild to moderate respiratory illness and recover without requiring special treatment.  Older people, and those with underlying medical problems like cardiovascular disease, diabetes, chronic respiratory disease, and cancer are more likely to develop serious illness.

How to protect your family

Always follow government advice and stay at home until told otherwise. You can take extra precautions when going out for essential items. Be sure to wear a face mask and gloves at all times. When you have left the shop or supermarket where you have been, throw the gloves in the nearest bin. You don’t want to contaminate your car after wearing them in the supermarket.

You should also:

wash your hands with soap and water often – for at least 20 seconds

wash your hands as soon as you get home

cover your mouth and nose with a tissue when you cough or sneeze

put used tissues in the bin immediately and wash your hands

not touch your face if your hands are not clean

What cleaning products kill coronavirus?

We recommend keeping your home clean and disinfected to prevent the spread of coronavirus. If no one in your household is showing symptoms or has been diagnosed, then the chances of the virus living on a surface in your home are less likely.

Rodent Make For Horrible Roommates

Humane Mouse Removal Guide: Steps for a Rodent-Free Home

Have you ever had friends who wouldn’t leave your house, no matter how much you hinted that you wanted your own space? Perhaps you even subtly moved the snacks from the coffee table to the cabinets to discourage them from hanging out longer. You may have felt guilty for wanting them to leave since they were super-sweet and didn’t cause any trouble. The worst thing that they’d do is leave little crumbs on your countertops and occasionally deposit some poop in a corner of the room.

I’m talking about mouse “friends,” people! Even though mice are absolutely adorable and more afraid of you than you are of them, it’s understandable that you may not want a family of them calling your home their own. But removal methods like glue traps and poisons are exceedingly cruel and cause animals unimaginable suffering.

Eliminate access to food.

Mice are less likely to hang around if you make it harder for them to get to their favorite thing: food. Keep counters, floors, and cabinets crumb-free, and store dry food, including pet food, in chew-proof containers.

Seal your trash

when Templeton the rat has a full-on fiesta in the trash after the carnival closes for the night? No? Well, picture it, because that’s what your garbage might look like when you’re asleep if you don’t make it impossible for rodents to get into it. And I don’t mean that you should tie a pretty little bow with the trash ribbons: I’m talking sealed shut with a bungee cord, people.

Don’t leave out your companion animals’ food.

Think mice discriminate when it comes to human food versus animal-companion food? Well, they don’t. Be sure not to offer them a feast by leaving your cat or dog’s food out—pick it up once your animal companions are done grubbing.

Repel rodents with unpleasant scents.

You may be thinking, “Oh, come on. Bad smells? Mice like trash.” But here’s a secret: Mice hate the scent of peppermint. So buy peppermint essential oil (you can get it on Amazon.com or ask your yogi aunt for some), soak cotton balls in it, and put it in the infested areas. Ammonia-soaked rags work even better. (Ammonia can be purchased at any grocery store in the cleaning section.)


Rodent control: How to get rid of mice and rats in the house

Mickey Mouse is cute and all, but his real-life friends have no business being inside your home. Unfortunately, mice and rats can’t read, so putting up a “No rodents” sign won’t keep the creepy critters away. Knowing why they come inside in the first place, however, can help with rodent control.

“Rodents like what we have to offer them: food, water and shelter! If there is an opening, they will take advantage of it and then take advantage of the safe spot and food resources in our homes,”

Like many of us, mice and rats don’t love the cold, so they tend to seek shelter in the cooler months especially. They also gravitate toward a few specific rooms in your house.

“They like safe places with access to food. That could be your attic with access to the fruit tree or trash bin outside your garage with birdseed and pet food sitting out or your kitchen with dark cabinets and plenty of food options,”

How to tell you have a rodent in the house

Just because you haven’t seen a rodent in person doesn’t mean it’s not there. If you suspect that you have a mouse in the house, you could be right if you see any one (or all) of the following signs:

Mice droppings: The little pests often leave their signature calling card in rooms where food is stored, along the baseboards and under sinks.

Greasy rub marks: Rats in particular leave greasy dirt marks behind them as they travel the same pathways over and over.

Chew marks: While searching for food and water, rodents can chew through any number of materials, including wires and plastic.


HOW TO GET RID OF MICE IN YOUR HOME

Discovering a rodent in your home can be stressful. One moment you’re watching TV and the next you’re standing on the couch screaming at an unwanted, furry guest. While rodents in the house may not sound like a very big deal in some circumstances, they do pose health risks, especially for children, the elderly, and pets. Getting rid of mice does not necessarily warrant an expensive call to a pest control service — oftentimes you can deal with it on your own.

If all else fails, calling a professional pest control service is a good option. Even though Aftermath doesn’t perform pest extermination, we do recommend full-scale disinfection service following any severe rodent infestation. We know sanitation best-practices and put together this DIY pest control guide to help you out!

ELIMINATE RODENT ENTRY POINTS INTO THE HOME

One of the best ways to control rodents in the home is to make it difficult for them to gain entry in the first place. Mice can squeeze through holes the size of a dime, so this can be challenging. Concrete and caulk are the most reliable ways of keeping rodents out, but copper, aluminum mesh or steel wool can be used in places where more flexibility is required.

Plug or repair all cracks and gaps in foundation, walls, basements, etc.

Seal gaps and cracks around doors and window frames.

Caulk holes around pipes that lead to appliances.

Check that seals around all exterior lines (TV, cable, electrical) leading through walls are tight.

CLEAN UP FOOD AND TRASH

In addition to shelter, rodents need easy access to food. Although eliminating garbage and food waste is one of the best ways to avoid a potential infestation, it will not resolve an active one


Rats: How to Get Rid of Rats

The most common rats in the USA are Norway Rats and Roof Rats. A quick look at the habits of both will help you understand how to inspect and control the rat population.

Norway rats are larger than the smaller, and sleeker Roof Rats. Roof rats have bigger ears and a longer tail than the Norway rat. Also, the roof rat has a pointed nose, and they are excellent climbers. Roof Rats inhabit attics, upper stories, and exterior vegetation. Norway rats occupy lower portions of the building and the ground.

Roof Rats are predominate in coastal areas. Generally, Roof rats stay within 100 miles inland. Roof rats are found in more temperate climates, since they do not do well in cooler temperatures

The First Step for Rat Control is Sanitation, Inspection and Exclusion

Inspection is an important first step in getting rid of rats. Once you know the location of the rats, you can set traps or place bait.

Exclusion is an important rodent control technique. It will get rid of the rats by making it difficult for them to enter the home or structure. Rats are easier to exclude than mice because rats a typically larger. Mice can enter an opening as small as 3/8″ wide. All openings greater than 1/4″ should be sealed to exclude mice. For rats, all openings greater than 1/2″ should be sealed.

Please also read the section on Sanitation, as it is an important consideration in rodent control.

Rats (especially Roof rats) are wary of new objects, new foods, or changed in the environment. They are constantly exploring surroundings and notice changes and are suspicious by nature. Their suspicious nature is why traps and bait stations may be avoided for a day or two. They approach new food or object with caution. Within a rat colony, they may be a few rats that are extra cautious and manage to avoid traps or eating rodent baits.

Rodenticides are poison baits and should be used in areas where domestic animals and children can’t access them. For protection against accidental poisoning, use tamper-resistant bait stations that hold the baits in place and keep children and pets out.


How to Get Rid of Rats Naturally

If you have a rat issue but do not want to use poison or other lethal measures to eradicate the population, you need a natural outdoor rat repellent. Or, to be more specific, you are going to need a combination of tactics to repel or prevent a backyard rat colony.

Killing them off is, of course, the fastest and surest method for getting rid of outdoor rats, but there are several reasons you may not want to go this route. One of the main reasons folks do not want to resort to lethal methods is because they want the rats gone, but that does not necessarily mean that they want them dead.

Another reason to not use lethal methods is that they may affect other animals that are welcome in your yard. For example, squirrels or chipmunks may be killed by baited traps or may consume the rat poison and die. It is also possible that your dog, your cat or a raptor might catch a poisoned rat and become ill or die

Then, of course, there are the dead rats to deal with when you use lethal methods. At the very least, this likely means that you will have to endure horrible smells coming from under your deck until the bodies decompose. In other cases, this could mean fishing dead rats out of your swimming pool or hot tub, or it could mean collecting rat carcasses littering your yard.

While you may not want to use lethal methods to rid your yard of rats, there are reasons to take steps to ensure that a rat colony does not become established in your backyard. For example, rats carry fleas that can transfer to your dogs or cats and that sometimes carry diseases (does bubonic plague ring a bell?). Plus, the rats, themselves, carry a handful of diseases that can be transferred to humans or other animals.