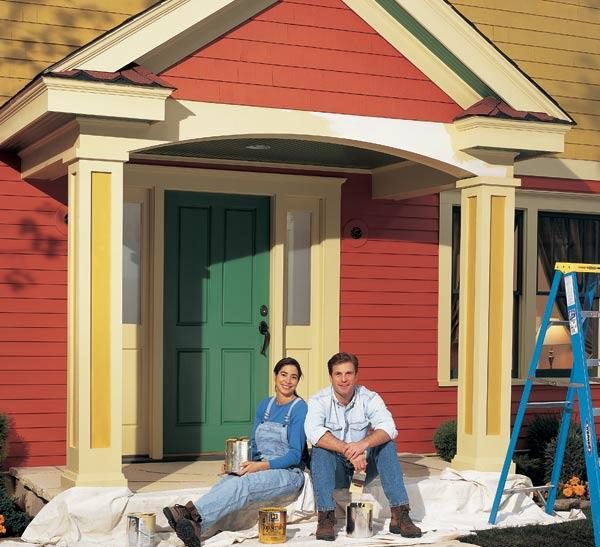
Exterior Painting Tips and Techniques
Painting the exterior of your house is a huge job. But the rewards are great too. With a minimum investment in tools and materials, you’ll save thousands of dollars, extend the life of your siding and trim and increase the value of your home. Best of all, you’ll make it look like new again
While you may spend a substantial amount on tools and paint, the same job done by a pro could easily cost many times more. The savings come at a cost, though. A good paint job requires countless hours of careful preparation. Plan to devote an entire summer to prepare and paint even a medium-size house.
In this article, we’ll show you how to apply the final coats of paint (we used acrylic latex) for a durable, professional-looking finish. Preparation is a separate topic covered in other articles. Completing a top-quality exterior paint job requires more than patience and perseverance. You’ll need a sharp eye, a steady hand and a bit of practice to paint crisp, straight lines. In addition, you’ll need the strength to move and set up tall ladders, and the confidence to work from them once they’re in place
Buy high-quality painting tools
Applying topcoats (the final coats of paint) doesn’t require much equipment beyond what you’ve already accumulated for scraping and priming. We recommend buying at least two top-quality synthetic-bristle brushes for applying the latex paint: one 4-in. straight-bristled brush for large areas and a 1-1/2-in. angled sash brush for detail work.
3-step brush technique
Paint stores can help with colors and quantities
Choosing exterior paint colors that complement the architectural details of your house and fit the character of your neighborhood is the first step to a great paint job. Check out bookstores and libraries for books on the subject. You’ll find brochures at the paint store with collections of historic colors. Many paint stores have designers on staff who can help you choose colors, or you could hire a designer or architect.
Steps to a Perfect Exterior Paint Job
Old wood siding, fast becoming a dinosaur in new construction, regularly needs the protection of a new coat of paint. A professional will charge you between $4,000 and $6,000 to paint a 2,000-square foot, two-story house. But you can do it yourself in a few weekends for the cost of paint and supplies.
A good paint job can last 10 years. The key is proper preparation. Here are 10 steps to take to make sure your exterior paint job looks great, adds value to your home, and lasts a long time
Get the Lead Out
Do-it-yourselfers are not obligated to follow EPA regulations for lead-safe practices, as professional paint contractors must. But if your home was built before 1978, when lead paint was banned for residential use, you should protect yourself and your neighbors from airborne lead particles
Wash the Exterior
Mildew thrives under fresh paint, which won’t adhere well to dirty, grimy, spore-sporting exterior walls. So wash your home’s exterior before painting. Use a mix of water and a phosphate-free cleanser such as Jomax House Cleaner ($15 per gallon) and Mildew Killer Concentrate ($8.50 for 32 ounces)
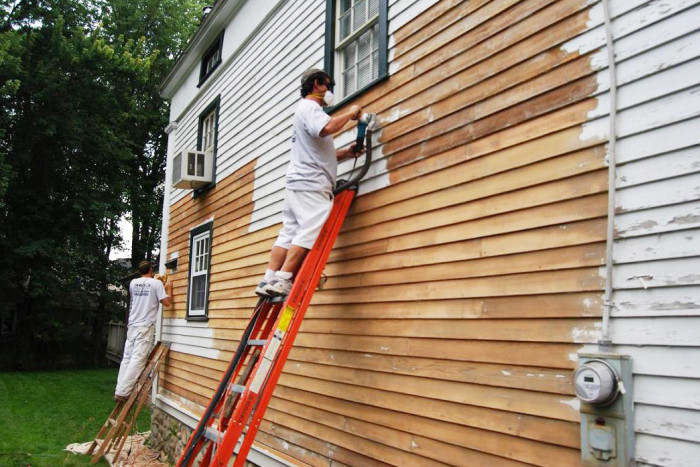
Scrape off Loose Paint
Once clapboards are dry, remove loose, flaking paint. A handheld scraper is usually the best tool for the job, though you can also use a hot-air gun or infrared paint stripper. Never use an open-flame torch, which can easily start a fire and is illegal in most states unless you have a permit
How to Properly Paint Your Home’s Exterior
Pressure-Wash Walls
To ensure best coverage, remove dirt and dust buildup from house using a pressure washer. TIP: Work your way from top to bottom of house in a smooth, controlled manner, overlapping each stroke by 8 inches
Repair Damaged Surfaces
Walk around entire perimeter of house taking note of damaged surfaces such as: wood, masonry, metal, siding or stucco. Apply epoxy filler to cracks or holes using spackle knife. Once dry, lightly sand using medium-grit sanding block.
Remove Loose Paint
Once exterior is dry, walk around perimeter of house taking note of any loose or chipped paint. Place drop cloths along ground, then remove chipped and loose paint using paint scraper or medium-grit sanding block
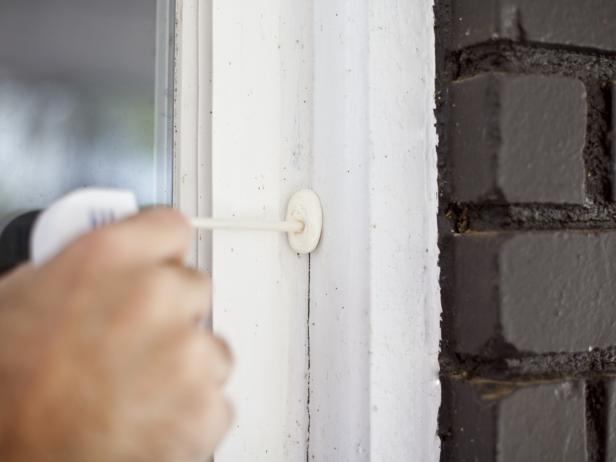
Caulk Trim
Fill any gaps between house and trim around doors and windows using exterior caulk and caulk gun. If house has mixed materials such as siding and brick, add caulk along surface where different materials meet
Prime Stains
Examine exterior for any stains or visible wood knots. Apply one coat of stain-blocking primer to area using paintbrush.
Tips That Make Painting a House Faster and Easier
Paint Your House the Same Color or Darker
You create more work for yourself when you choose to change your exterior house color, and it significantly increases the amount of work when you go lighter. With one-coat-painting, the old color will still show through in some areas. When you paint the same color, though, those thin areas blend in
Wash Your House Quickly and Painlessly
It’s hard to imagine a house that does not need to be washed down prior to painting. Just run a white t-shirt across the side of your house and witness years or even decades worth of accumulated gray soot and dust. Even in the most desperate of painting projects, it’s still recommended to wash down the house.
Prime Only Problem Areas, Not the Whole House
While the entire house could benefit from a full coat of primer, prime only the problem areas, meaning things like raw wood and dried wood filler.
Shrink Your Prep Time
Prep work can equal the amount of time spent painting. Taping and covering will quash the enthusiasm of even the most patient homeowner. Doing a fastidious job on a house with many features can suck up an entire day’s work and more.
Scrape Only the Bare Minimum
Scraping paint isn’t such a time-waster on its own. The problem, though, is that it’s like opening a Pandora’s Box. You scrape that little dime-sized flake of paint, and it leads to more and more and more
EXTERIOR HOUSE PAINTING TIPS
Choosing Exterior Paint Colors
To select the best exterior paint for your home, consider colors the best complement your home’s architectural detail. With the popularity of home decor websites, it’s easy to find examples of your home’s style and paint schemes that will work for you. Some paint manufacturers also offer online tools that let you upload an image of your home and virtually test different paint colors. Once you’ve narrowed down your color choices, purchase the smallest amounts possible and test them on your exterior walls.
How Much Paint do I need?
To find out how much paint you need, take approximate measurements of your house, noting the size of various surfaces, such as wood trim around doors and windows. Take this information to your paint store, where the staff will be able to help you calculate the amount of paint you’ll need
How to Choose Exterior Paint Finishes
Buy the best paint that you can afford, as it will last longer and cover more easily. Paints with light sheens, such as satin or eggshell, are easier to clean and more resistant to fading than flat or matte paint. Water-based latex and oil-based alkyd are the two main types of paint for exteriors. Acrylic latex paints are the most common choice, but oil paint is good for wooden steps and porch floors, as well as steel and wood railings
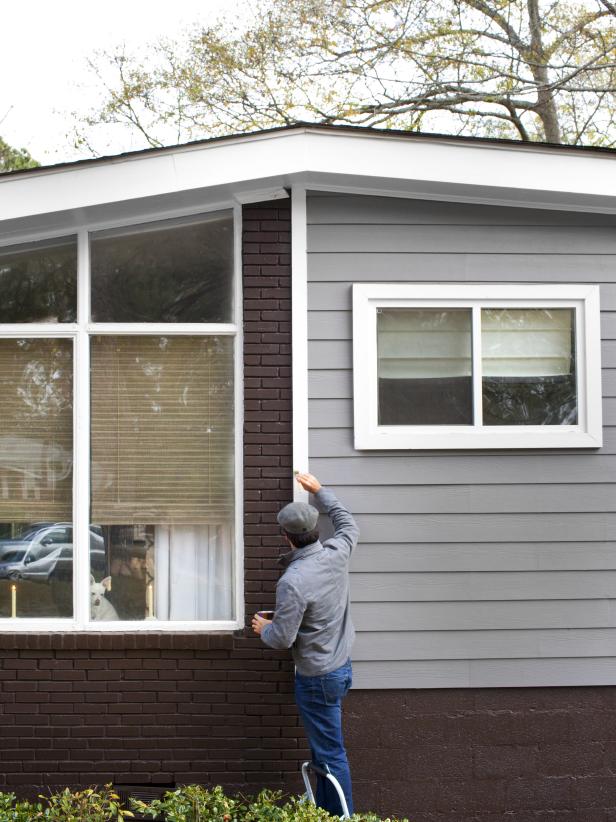
Get the Right Painting Tools
While most professional painters now use paint sprayers for their speed and ability to coat evenly, the quickest and most effective way to apply exterior paint yourself is with a paintbrush and a roller. Standard 9-inch rollers are best for large, flat areas. Brushes are most effective for narrow surfaces, edges, and trim, or you can use a short, smaller diameter roller to get into small spaces
Prep the Exterior Surface
Paint won’t adhere well to rough or problem surfaces, so be sure to clean, dry, and sand, scraping off any peeling paint. Rotten wood will deteriorate even under new paint, so this wood should be replaced, or if the rot area is small, you can apply a wood hardener followed by a wood filler before prepping and sanding the area.