Home Exterior Painting Contractors

Tips on How to Choose the Best Exterior Paint Colors

It is usual that we concentrate more on our interior designs. We want it to symbolize our individuality, but we seldom realize that it’s the exterior that gives the viewer the first impression about your home and your personality. But choosing an exterior wall paint colour for Indian climate is not an easy job as there are a lot of factors depending on it

Combinations

When it comes to the exterior wall paint colours, stick to one or maximum of two exterior home painting colours, as more colours on the exteriors appear cluttered. If you feel that using a single colour will make your house a monotonous sight, then using different shades of the same colour is the best approach. These combinations will also give a good appeal to your house.

Choice of colours

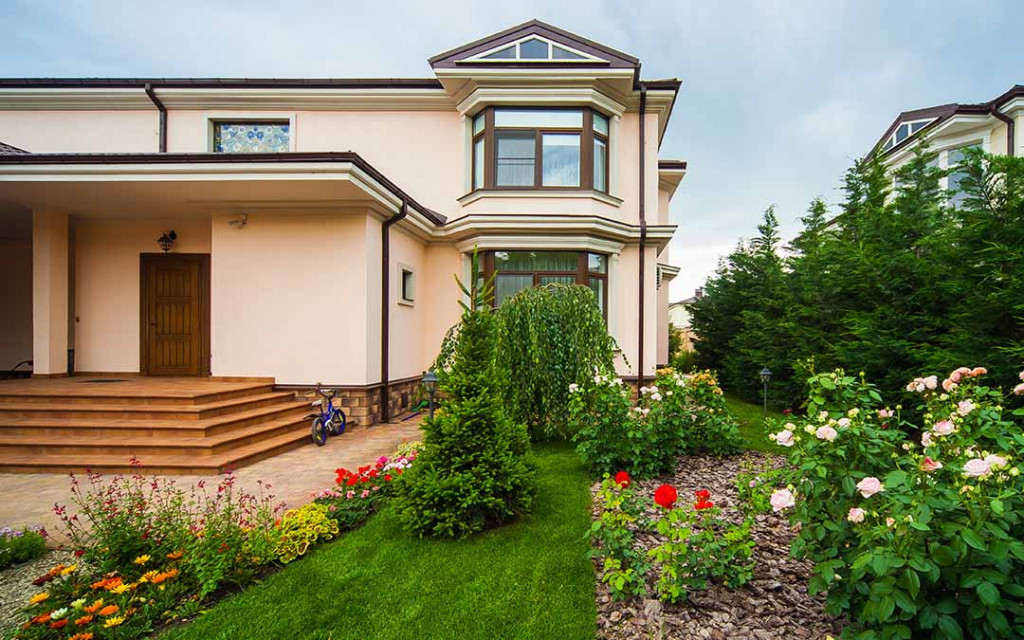
One of the best exterior paint colour idea is to avoid black and other dark colours. These colours absorb dust and make you repaint your exterior wall paint frequently. However, it is better to use a pale shade of the dark colour and mix them with another light colour. Since the dark colours give a sense of dignity to the house, it can also be used to highlight the main features of the house.

Durability

The type of exterior home painting colour used will decide the durability of the paint colour irrespective of the colour. High gloss paints are not befitted for exterior wall paints even though it has the highest durability. For a perfect exterior wall paint finish, satin and eggshell are the best choices as they have high durability and easier to clean. These finishes also enhance your exterior paint colour ideas.

Effect of nature

Whatever colour and finish you use to your exterior walls, it will only look good if it blends with your surroundings. Especially people living in hilly regions and near the sea should spend more time on choosing their exterior wall paint colour. Their exterior wall paint should go with the mood and climate of their surroundings and backdrop. Cool colours are the best house painting ideas for houses in hilly regions as it suits the climate and the greeneries surrounding the house.


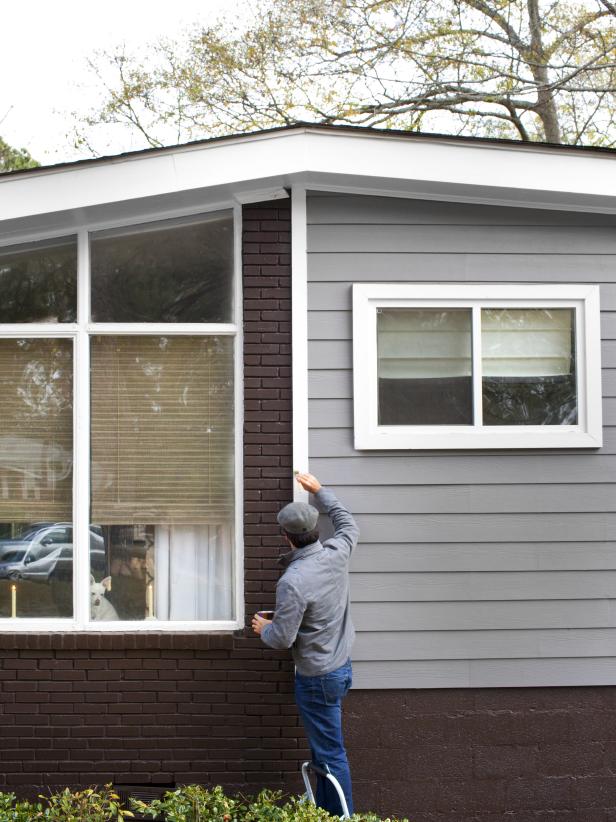
How to paint an exterior wall

There’s some things you need to know when preparing and painting an exterior timber weatherboard wall. A splash of paint can make any surface look fantastic, and it doesn’t take very much to do it. We’ll show you how in a few simple steps.

Preparing the exterior wall

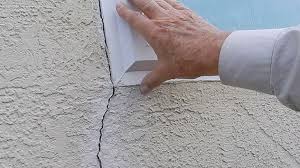
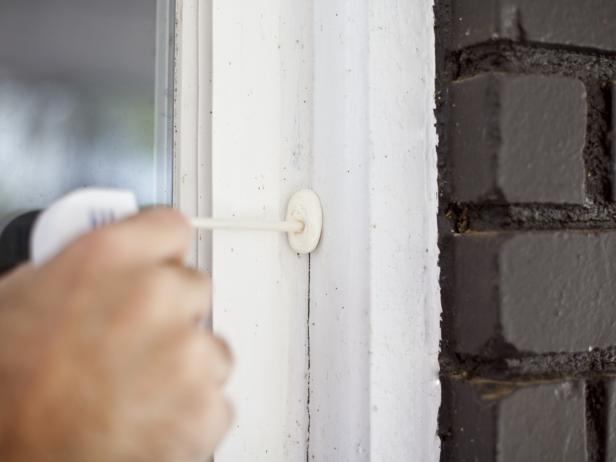
The first step is to take a good, thorough look at the wall. If there are any gaps between the boards, use the caulking gun to fill them up with filler and make a weatherproof seal. Use some rubber gloves while doing this so that it doesn’t get all over your hands.

Painting the exterior wall

There’s many different types of exterior paints available at your local Bunnings Warehouse. If you’re not sure about which is best for your place, a Team Member in-store can help you choose.

Make sure you stir the paint in the tin before using it. Then, tip it out into a paint pot and give it another stir. Using the pot is means you don’t need to carry a large tin around with you and risk spilling it unnecessarily.

Other helpful painting tips

If you’re using acrylic paint, it’s water-based, so get your brush wet first and then flick it off so that the paint won’t stick to the top of the brush.

If it’s above 30 degrees or below 10 degrees, don’t start painting as it’s too hot/cold for it to dry.

On a hot day, you’ll notice the brush fills up with paint. To prevent this, clean it out with water every half an hour or so to keep it fresh.

If you’re going to paint a downpipe a different colour to the wall, it’s best to paint it first. Give it two coats and then you can wrap it in newspaper so that you can paint the wall behind it without worrying.

Consider using undercoat to increase the longevity of your wall and paint.


Exterior Painting

To a contractor, painting the exterior of a house is the best way to keep it in good shape. Caulk and paint may be a home’s only weatherproofing, so it’s essential that they be applied with skill. If siding is painted poorly, for example, it can incur very costly damage, especially in a harsh climate. Bottom line: Hiring professionals to paint your exterior may feel like a big expense, but it’s nothing compared to what you’ll pay later if the work isn’t up to snuff

How Does Exterior Paint Stand the Test of Time?

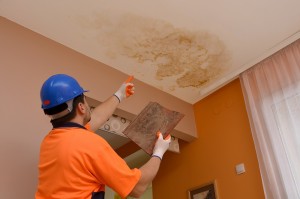
While weather can be unpredictable, some regions offer especially harsh conditions for exterior paint. Subfreezing temperatures, sleet, storms, and punishing heat are just a few of paint’s natural enemies. To make matters worse, no building stays put completely; every structure shifts over time, which can make things hard on an exterior paint job. Houses swell in hot weather and contract when it’s cold, and wood cracks and warps all the time.

The amount of skill that goes into applying exterior paint strongly influences its ability to withstand the elements. Of course, it’s also wise to use first-rate materials. The combination of expert work and top-notch products should minimize future costs for the homeowner. Good paint, well applied, also boosts a house’s value — never a bad thing in the current economy

Painting Outside Surfaces

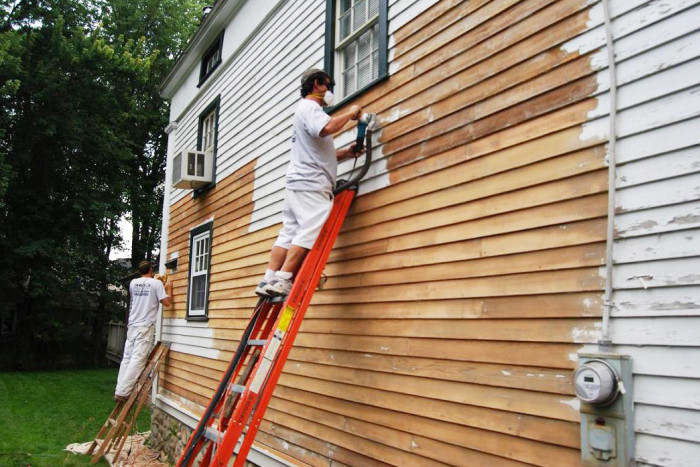
A successful painting project must proceed step by step. The first step is a scan of the house’s exterior to determine what kinds of paint products will be needed.

Slow But Steady Creates Lasting Work

Every home exterior is unique. This means that your project may call for techniques and types of paint that your neighbor’s didn’t require. Stained wood exteriors demand the proper stain; cedar siding and redwood trim are common, but many other varieties exist. If outside surfaces are to hold stain for a long time, they must be permeable. In some cases, the prior stain may need to be disposed of. Whether a home is painted or stained, surface preparation should not be given short shift.


Tips for painting a brick home exterior

Looking for a quick, easy and affordable way to transform your dated brick home exterior? Painted brick is one of the hottest home exterior trends right now, favoured for its cost-effective and totally transformative results

Updating the exterior of your home is a sure-fire way to up your street appeal and increase the value of your property, but at what cost? Rendering or cladding the exterior of your home can prove to be an expensive exercise that may not entirely pay itself off when it comes to calculating the resale value.

That’s where the power of paint comes into play. Paint is a DIY renovator’s best friend. It’s easy to use, affordable and can transform a tired looking space, piece of furniture or in this case, a brick home exterior, quickly and effectively.

TIPS FOR PAINTING OVER BRICK

“Painting exposed bricks is an effective way of refreshing any room or home exterior,” says Fiona King, Taubmans Colour Expert. “Walls offer a canvas for artistic vision and injecting much needed colour – this inexpensive updating process can transform the style and feel of a home.”

A wall that has been properly prepared will not only make painting easier, but will help achieve a vibrant, long-lasting finish. Prior to painting, ensure to remove any lingering dust and dirt by thoroughly washing the brick wall with a mild soap solution of household detergent and water. Once clean of containments, rinse the wall and ensure it is dry before proceeding.

For good adhesion and a smoother, more professional looking top coat, ensure to prime your surface and leave to dry thoroughly before painting. A second coat of primer is important when dramatically changing the colour of the brick wall, as it aids in effectively blocking out dark brick colour when painting with a lighter paint colour.

To ensure the best finish from your paint job, use a minimum of two – three coats of paint.


PAINTING TIPS & FREQUENTLY ASKED QUESTIONS

How to select interior color

Light colors will help lighten a dark or poorly-lighted room, and provide a psychological lift. Light colors also make walls and ceilings appear to be further away, and can be used to make small rooms appear larger and more open.

Dark colors can give a room a dramatic look, and create a sense of intimacy. They can also make walls and ceilings appear to be closer, and can be used to make a large room appear smaller and more cozy.

Bright, vibrant colors will give the room a cheerful feel, and a sense of excitement.

Reds, yellows and oranges are warm colors. When these colors are used in a room, they make the walls appear closer, creating the illusion of a smaller room.

Violets, blues and greens are cool colors. When these colors are used in a room, they make the walls appear farther away, creating the illusion of a larger room.

Tans, greys, and off-whites tend not to attract attention, and can be used to create a restful, relaxing atmosphere. They are also easier to coordinate with other colors in the room.

For long, narrow rooms, paint the shorter walls a darker color. This will make these walls appear closer together, so the room will seem less like a tunnel.

For square rooms, paint one wall a different color, preferably the wall first seen when entering the room. This will give the room a more dramatic look and make it seem less ‘boxy’.


To decide which paint sheen is best for your project, ask yourself the following questions:

What room, area, or surface is being painted?

Will the painted surface be handled frequently, or subjected to abrasion or excessive wear?

Will the painted surface be washed or scrubbed frequently?

Will the painted surface be regularly exposed to moisture or high humidity?

Does the surface being painted have any nicks, dents, or surface flaws present?

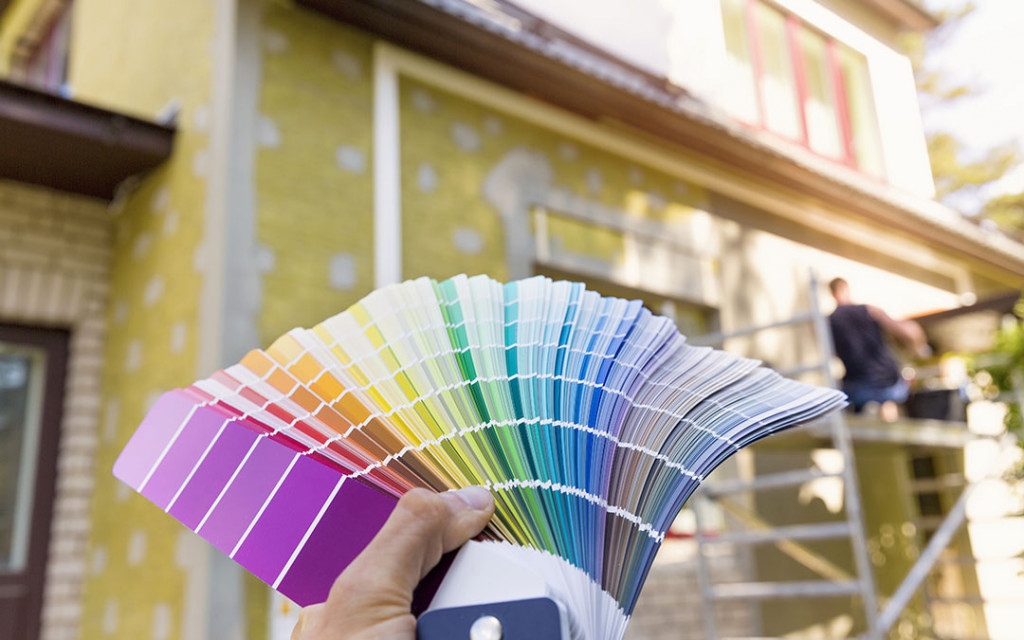
How to select exterior color

When selecting exterior paint colors, take the fixed colors into account (like the roof, brick, stonework or any stained wood), and make sure all the colors look good together.

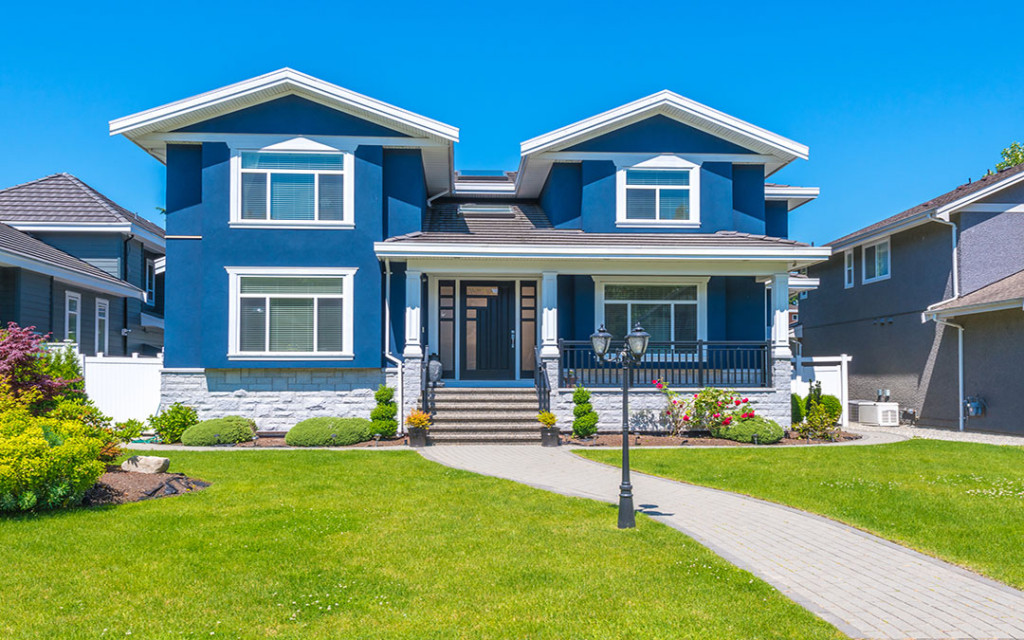
Light colors will make a small house seem larger, and dark colors will make a large house seem smaller.

A large, boxy house can be broken up by using a trim color that contrasts the body color.

A small house will appear larger if the trim is painted the same color as the body of the house.

Light colors will help keep a home cooler in warmer climates, because they absorb less heat. Dark colors will help keep a home warmer in cooler climates, because they absorb more heat.

Because light colored paint films absorb less heat, they will generally last longer than darker colored paint films.

Some communities have restrictions on what colors can be used on house exteriors, so check this out before you make your choice.

How Stucco Repairs Is Done

How Much Does It Cost To Repair Stucco?

Stucco is one of the more long-lasting options as a siding for your home. However, despite its longevity, it can occasionally become damaged. Harsh weather conditions and accidents can chip, crack or warp stucco, making repairs necessary

Repairs should be done quickly to prevent damage to the underlying wood lath and prevent water penetration. Even minor cracks can lead to significant damage, so if your stucco is in need of repair, it is important to handle the situation immediately to minimize the risk of additional damage. Bonus Tip: If the crack or hole was caused by an underlying problem, be certain to fix the underlying issue before tackling the repair to prevent having to replicate the chore later.

DIY vs. Hiring Costs

The decision of whether to tackle stucco repair on your own or hire a professional to do the job depends on several factors. For instance, if the crack is a hairline crack or a small chip, you may feel comfortable using a stucco repair kit to do the job yourself. Or, if you have extensive masonry experience, you may decide to handle larger cracks and holes

Labor, Materials, and Installation

Because of the skill level required to repair and match the repaired material to the existing stucco, many contractors consider stucco repair to be a virtual art form. Labor costs are generally figured in one of two ways, either by the hour or by the square foot.

Labor Costs

Nationally, contractors charge anywhere from $40 to $50 per hour to repair stucco, or from $60 to $120 per square foot. The two main reasons for these costs are the complexity of the repair and the fact that it takes time, as it involves waiting for each coat to cure before proceeding to the next step.


Stucco Contractors, A Few Hiring Tips

If you have a larger project, then you will likely be interviewing several stucco contractors. Narrowing down which ones will make sure that your project turns out the way you want it to can be somewhat confusing, not to mention the different bids you’ll be getting, recommended repairs needed, texture and color samples, etc

References:

Ask to see a couple of jobs that the contractor has done in the past. Try to get some more recent jobs, within the past month or two, would be better and will show that they are still doing good work and people are still hiring them.

Stucco Supply Yard: The staff will know virtually every plastering crew in your vicinity and can make excellent resources. Just call and ask for 3-5 recommended plastering contractor’s that they know do good work

Local Online Communities: These are a great place to get recommendations from actual people and can be found on sites like Facebook, various forums, etc. Try typing in “(your city) online community” into a search engine like Google and see what pops up.

General Contractors: General contractors will hire a stucco crew to complete any stucco homes that they are working on and will only hire the best contractors for their jobs. Ask how long they have used them for and if you can look at some of their previous work, this is a HUGE benefit for you.


TIPS TO FIND THE BEST STUCCO REPAIRS

HOW TO REPAIR STUCCO CRACKS

Small, thin cracks in your stucco can be easily fixed with exterior latex paintable caulk. Choose a caulk color that is close to your stucco color. You may not find an exact match, but something close to it. If need be, you can touch up the caulked area with an exterior paint that matches your stucco color. Use a utility knife to cut the nozzle at a 45-degree angle, and place it in a caulking gun. Puncture the internal foil patch at the base of the nozzle with a nail or other slender sharp object. Hold the caulking gun at a 45-degree angle parallel to the crack being filled and pull the nozzle along the crack. Don’t push it. Position the nozzle opening so that it forces sealant onto the crack. As you finish applying each bead of caulk, release the trigger and pull back on the caulking gun rod to stop the flow of caulk and relieve the pressure inside the tube. Releasing the trigger alone will not stop the caulk from flowing out of the nozzle. Let the caulk set for the manufacturer-recommended amount of time.

Repairing Stucco Cracks

Cracks in stucco are a common problem. Stucco, after all, is not very resilient–it’s made of cement. So when a house settles over time or shifts because of heavy winds or earthquakes, the stucco siding cracks. The proper way to repair these problems depends upon their size

Hairline Cracks

Very fine, hairline cracks are very easy to fix. If they are super-thin, a coating of acrylic latex paint that matches the siding will probably do the job. If they are a little too wide for paint to fill the crevices, fill them with latex caulking compound first. Allow this to dry thoroughly, then paint the surface with acrylic latex paint.

Stucco can and should be sealed properly to prevent moisture intrusion.

If new, stucco can be sealed with a clear concrete/ masonry sealer, which will penetrate into the stucco and stop moisture entrance. These are typically silicone type sealers. While effective, these finishes will usually need to be redone every 4-5 years. Redoing sealing on a regular basis is what prevents deterioration and damage, which can lead to the need for full replacement.

Common Causes of Stucco Water Damage

Stucco damage is often caused by water. If you noticed that your stucco walls have blistering, staining, or mold, you could have water damage. Stucco siding is vulnerable to a multitude of issues that can cost you thousands of dollars. Here are the four common causes of stucco water damage.


Home Tips: Repainting Stucco

The stucco on my home’s exterior looks faded. What can I do to make it look new again?

Stucco, like many surfaces, can fade – especially when it’s exposed to direct sunlight. But, making it look new again is easy. Quality paint can revive the look of your stucco, giving your home a fresh, new appearance

What if I want to completely change the color of my stucco?

No problem. Just like any surface (for example, wood siding), stucco can be repainted to suit your color preferences. If you want to achieve a darker shade than your original stucco color, and the surface is in good shape, quality paint can probably provide the coverage you need in one coat. Painting a lighter shade over a darker tone may require two coats. When selecting a new color, don’t forget to coordinate with other exterior colors on your home such as shingles and trim.

There are so many exterior paint products on the market. How do I know which one will be the best for stucco?

Most exterior paint products are formulated for application on a variety of surfaces, from wood siding to brick and stucco. The knowledgeable sales people at Sherwin-Williams can tell you about products like Duration® Exterior Coating, and SuperPaint® Exterior Latex Paint. Just tell them a little about your home’s exterior and your goals, and they’ll help you select the coating that will best suit your needs.

Which are better, latex- or alkyd-based products?

Acrylic latex products perform the best on stucco. Most do-it-yourselfers find that latex products are easiest to use because they are easy to apply and they clean up with soap and water Acrylic latex paints also offer good gloss and color retention as well as good coverage that dries fast.

Do I need a primer?

If the surface of your stucco is in good shape with no exposed substrate, possibly not. However, if you need to make a lot of repairs, using a primer will make your finish coat look great and provide the beautiful, long-lasting results you expect. Ask the experts at Sherwin-Williams to help you pick the right product for the job.


STUCCO REPAIR COST GUIDE

There are many factors to consider when weighing stucco repair costs after discovering damaged stucco siding on your home. While certain approaches may cost you less money in the short term, they could leave you vulnerable to future damage, more costs and more headaches down the road.

WHAT IS STUCCO REPAIR?

Stucco repair usually refers to re-sealing the stucco around windows, flashing and joints, or removing certain “chunks” of damaged stucco and installing new stucco in its place. Compared to a stucco remediation job, in which the all the stucco siding is removed and replaced, stucco repair is more of a quick fix.

WHY WOULD I NEED TO REPAIR STUCCO?

Stucco failure usually results from water invading a home’s exterior walls, causing damage to materials under the siding. Usually, failed stucco is a result of the original siding installation being done improperly, without the necessary moisture barriers in place. The first sign of serious problems is usually “tears,” the greenish-black stains that appear to be “crying” on your exterior walls—especially near windows—that indicate moisture intrusion. Other indicators of stucco problems include musky odors near the stucco, large cracks and missing chunks of stucco.

TUCCO REPAIR COST FACTORS

Price is often a homeowner’s first worry, but when you’re weighing different stucco repair costs and options, it’s important to see the full picture. The money you spend now could pay off in the long run.

INSPECTION COSTS – An inspection is a crucial first step in diagnosing the problem. Moisture meter readings involve inserting small probes in suspicious areas of your walls to determine the amount of moisture in the wall cavity. After the reading is complete, holes are caulked over and resealed.

Choose The Best Colour For Your Exterior Painting

Exterior Painting Tips and Techniques

Painting the exterior of your house is a huge job. But the rewards are great too. With a minimum investment in tools and materials, you’ll save thousands of dollars, extend the life of your siding and trim and increase the value of your home. Best of all, you’ll make it look like new again

While you may spend a substantial amount on tools and paint, the same job done by a pro could easily cost many times more. The savings come at a cost, though. A good paint job requires countless hours of careful preparation. Plan to devote an entire summer to prepare and paint even a medium-size house.

In this article, we’ll show you how to apply the final coats of paint (we used acrylic latex) for a durable, professional-looking finish. Preparation is a separate topic covered in other articles. Completing a top-quality exterior paint job requires more than patience and perseverance. You’ll need a sharp eye, a steady hand and a bit of practice to paint crisp, straight lines. In addition, you’ll need the strength to move and set up tall ladders, and the confidence to work from them once they’re in place

Buy high-quality painting tools

Applying topcoats (the final coats of paint) doesn’t require much equipment beyond what you’ve already accumulated for scraping and priming. We recommend buying at least two top-quality synthetic-bristle brushes for applying the latex paint: one 4-in. straight-bristled brush for large areas and a 1-1/2-in. angled sash brush for detail work.

3-step brush technique

Paint stores can help with colors and quantities

Choosing exterior paint colors that complement the architectural details of your house and fit the character of your neighborhood is the first step to a great paint job. Check out bookstores and libraries for books on the subject. You’ll find brochures at the paint store with collections of historic colors. Many paint stores have designers on staff who can help you choose colors, or you could hire a designer or architect.


Steps to a Perfect Exterior Paint Job

Old wood siding, fast becoming a dinosaur in new construction, regularly needs the protection of a new coat of paint. A professional will charge you between $4,000 and $6,000 to paint a 2,000-square foot, two-story house. But you can do it yourself in a few weekends for the cost of paint and supplies.

A good paint job can last 10 years. The key is proper preparation. Here are 10 steps to take to make sure your exterior paint job looks great, adds value to your home, and lasts a long time

Get the Lead Out

Do-it-yourselfers are not obligated to follow EPA regulations for lead-safe practices, as professional paint contractors must. But if your home was built before 1978, when lead paint was banned for residential use, you should protect yourself and your neighbors from airborne lead particles

Wash the Exterior

Mildew thrives under fresh paint, which won’t adhere well to dirty, grimy, spore-sporting exterior walls. So wash your home’s exterior before painting. Use a mix of water and a phosphate-free cleanser such as Jomax House Cleaner ($15 per gallon) and Mildew Killer Concentrate ($8.50 for 32 ounces)

Scrape off Loose Paint

Once clapboards are dry, remove loose, flaking paint. A handheld scraper is usually the best tool for the job, though you can also use a hot-air gun or infrared paint stripper. Never use an open-flame torch, which can easily start a fire and is illegal in most states unless you have a permit


How to Properly Paint Your Home’s Exterior

Pressure-Wash Walls

To ensure best coverage, remove dirt and dust buildup from house using a pressure washer. TIP: Work your way from top to bottom of house in a smooth, controlled manner, overlapping each stroke by 8 inches

Repair Damaged Surfaces

Walk around entire perimeter of house taking note of damaged surfaces such as: wood, masonry, metal, siding or stucco. Apply epoxy filler to cracks or holes using spackle knife. Once dry, lightly sand using medium-grit sanding block.

Remove Loose Paint

Once exterior is dry, walk around perimeter of house taking note of any loose or chipped paint. Place drop cloths along ground, then remove chipped and loose paint using paint scraper or medium-grit sanding block

Caulk Trim

Fill any gaps between house and trim around doors and windows using exterior caulk and caulk gun. If house has mixed materials such as siding and brick, add caulk along surface where different materials meet

Prime Stains

Examine exterior for any stains or visible wood knots. Apply one coat of stain-blocking primer to area using paintbrush.


Tips That Make Painting a House Faster and Easier

Paint Your House the Same Color or Darker

You create more work for yourself when you choose to change your exterior house color, and it significantly increases the amount of work when you go lighter. With one-coat-painting, the old color will still show through in some areas. When you paint the same color, though, those thin areas blend in

Wash Your House Quickly and Painlessly

It’s hard to imagine a house that does not need to be washed down prior to painting. Just run a white t-shirt across the side of your house and witness years or even decades worth of accumulated gray soot and dust. Even in the most desperate of painting projects, it’s still recommended to wash down the house.

Prime Only Problem Areas, Not the Whole House

While the entire house could benefit from a full coat of primer, prime only the problem areas, meaning things like raw wood and dried wood filler.

Shrink Your Prep Time

Prep work can equal the amount of time spent painting. Taping and covering will quash the enthusiasm of even the most patient homeowner. Doing a fastidious job on a house with many features can suck up an entire day’s work and more.

Scrape Only the Bare Minimum

Scraping paint isn’t such a time-waster on its own. The problem, though, is that it’s like opening a Pandora’s Box. You scrape that little dime-sized flake of paint, and it leads to more and more and more


EXTERIOR HOUSE PAINTING TIPS

Choosing Exterior Paint Colors

To select the best exterior paint for your home, consider colors the best complement your home’s architectural detail. With the popularity of home decor websites, it’s easy to find examples of your home’s style and paint schemes that will work for you. Some paint manufacturers also offer online tools that let you upload an image of your home and virtually test different paint colors. Once you’ve narrowed down your color choices, purchase the smallest amounts possible and test them on your exterior walls.

How Much Paint do I need?

To find out how much paint you need, take approximate measurements of your house, noting the size of various surfaces, such as wood trim around doors and windows. Take this information to your paint store, where the staff will be able to help you calculate the amount of paint you’ll need

How to Choose Exterior Paint Finishes

Buy the best paint that you can afford, as it will last longer and cover more easily. Paints with light sheens, such as satin or eggshell, are easier to clean and more resistant to fading than flat or matte paint. Water-based latex and oil-based alkyd are the two main types of paint for exteriors. Acrylic latex paints are the most common choice, but oil paint is good for wooden steps and porch floors, as well as steel and wood railings

Get the Right Painting Tools

While most professional painters now use paint sprayers for their speed and ability to coat evenly, the quickest and most effective way to apply exterior paint yourself is with a paintbrush and a roller. Standard 9-inch rollers are best for large, flat areas. Brushes are most effective for narrow surfaces, edges, and trim, or you can use a short, smaller diameter roller to get into small spaces

Prep the Exterior Surface

Paint won’t adhere well to rough or problem surfaces, so be sure to clean, dry, and sand, scraping off any peeling paint. Rotten wood will deteriorate even under new paint, so this wood should be replaced, or if the rot area is small, you can apply a wood hardener followed by a wood filler before prepping and sanding the area.

Tips To Find The Best Stucco Repairs

HOW TO REPAIR STUCCO CRACKS

Small, thin cracks in your stucco can be easily fixed with exterior latex paintable caulk. Choose a caulk color that is close to your stucco color. You may not find an exact match, but something close to it. If need be, you can touch up the caulked area with an exterior paint that matches your stucco color. Use a utility knife to cut the nozzle at a 45-degree angle, and place it in a caulking gun. Puncture the internal foil patch at the base of the nozzle with a nail or other slender sharp object. Hold the caulking gun at a 45-degree angle parallel to the crack being filled and pull the nozzle along the crack. Don’t push it. Position the nozzle opening so that it forces sealant onto the crack. As you finish applying each bead of caulk, release the trigger and pull back on the caulking gun rod to stop the flow of caulk and relieve the pressure inside the tube. Releasing the trigger alone will not stop the caulk from flowing out of the nozzle. Let the caulk set for the manufacturer-recommended amount of time.

For cracks larger than a ¼” or so, fill the crack with premixed stucco patch and a small putty knife. Allow the stucco patch to set for the a mount of time recommended by the manufacturer. You may need to apply a few layers of the stucco patch to adequately fill the crack and make the patch flush with the surrounding stucco surface. Follow all instructions.

HOW TO REPAIR STUCCO HOLES

  • Step 1: Remove Broken and Crumbling Stucco
  • Step 2: Inspect/Replace Metal Mesh
  • Step 3: Mix Batch of Stucco
  • Step 4: Apply Stucco
  • Step 5. Paint (Optional)


Repairing Stucco Cracks

Cracks in stucco are a common problem. Stucco, after all, is not very resilient–it’s made of cement. So when a house settles over time or shifts because of heavy winds or earthquakes, the stucco siding cracks. The proper way to repair these problems depends upon their size.

Hairline Cracks

Very fine, hairline cracks are very easy to fix. If they are super-thin, a coating of acrylic latex paint that matches the siding will probably do the job. If they are a little too wide for paint to fill the crevices, fill them with latex caulking compound first. Allow this to dry thoroughly, then paint the surface with acrylic latex paint.


REPAIRING & SEALING CRACKS & HOLES IN STUCCO

Project Instructions

  • Widen the crack to a minimum of 1/4 inch using a chisel and hammer (the edges of the crack should be vertical or beveled in an inverted “V”).
  • Break away any deteriorating concrete and remove loose material with a brush.
  • Cut the nozzle tip of the QUIKRETE Stucco Repair on an angle with a utility knife to match the width of the crack and load into a standard caulk gun.
  • Slowly draw the gun down the crack forcing a bead of stucco repair caulk deep into the

Pre-Mixed Stucco Patch

  • Stir the pre-mixed stucco using a margin trowel or putty knife.
  • Spread and texture the concrete patch to match the surrounding stucco – wet the trowel to achieve a smooth finish.

NOTE: for patches or cracks over 1/4 inch thick pre-mixed stucco patch should be applied in multiple layers, allowing each layer to dry before applying the next.


Stucco can and should be sealed properly to prevent moisture intrusion.

If new, stucco can be sealed with a clear concrete/ masonry sealer, which will penetrate into the stucco and stop moisture entrance. These are typically silicone type sealers. While effective, these finishes will usually need to be redone every 4-5 years. Redoing sealing on a regular basis is what prevents deterioration and damage, which can lead to the need for full replacement.

If the stucco is older and has already developed cracking, an elastomeric coating would be a best choice. These finishes are waterproof, seal hairline cracks, and are extremely pliable and flexible. If cracks develop below these coatings, the finish will stretch and bridge the crack, and help keep waterproof. As importantly, these finishes are microporous; they will breath to allow moisture vapor behind it to properly escape without bubbling and blistering. When properly done, elastomeric coatings can easily last 10 or more years.

Of course, after the execution of elastomeric coatings, the best way to get the most value out of such an installation is to stay on top of your stucco maintenance regularly performing the tasks required to keep your stucco in top condition.


Common Causes of Stucco Water Damage

Stucco damage is often caused by water. If you noticed that your stucco walls have blistering, staining, or mold, you could have water damage. Stucco siding is vulnerable to a multitude of issues that can cost you thousands of dollars. Here are the four common causes of stucco water damage.

Hydraulic Pressure

Hydraulic pressure happens when water moves from behind the stucco wall. It can result in blooming and eventually blistering. To avoid stucco damage, a moisture barrier will need to be constructed that has an efficient drainage. This enables water to travel from behind the wall instead of accumulating and causing damage. Additionally, you should avoid painting retaining walls since there’s a heightened risk of blistering. If you have this issue, you will need to have water removal in Alpharetta.

Wicking

Wicking happens when moisture is consumed into the stucco wall’s plaster. It can result in blistering, staining, and efflorescence. If this occurs, it was most likely caused by a deficient weep screed or poor installation. A weep screed is situated between the moisture barrier and the surface of the stucco. When the moisture travels through the stucco surface, the water flows down the screed and exits through the weep holes. If a weep screed is non-existent, then the walls can easily be damaged if they are plastered all the way to the ground.

Surface Moisture

Many homes have flower beds that surround the base of the house. If you use sprinklers in your flower beds, you must ensure that the sprinklers were properly installed. When sprinklers aren’t properly installed, they can spray water directly onto the base of the walls. This can cause efflorescence and potentially blistering. Under some circumstances, a paper moisture barrier is damaged and is unsuccessful with keeping moisture away from the walls, which can cause mold to develop.