Must Know About Electrical Installation

Discover Safety Tips on Any Electrical Installations

Why is it so important to work safely with or near electricity?

The voltage of the electricity and the available electrical current in regular businesses and homes has enough power to cause death by electrocution. Even changing a light bulb without unplugging the lamp can be hazardous because coming in contact with the “hot”, “energized” or “live” part of the socket could kill a person.

What kinds of injuries result from electrical currents?

People are injured when they become part of the electrical circuit. Humans are more conductive than the earth (the ground we stand on) which means if there is no other easy path, electricity will try to flow through our bodies.

There are four main types of injuries: electrocution (fatal), electric shock, burns, and falls. These injuries can happen in various ways:

  • Direct contact with exposed energized conductors or circuit parts. When electrical current travels through our bodies, it can interfere with the normal electrical signals between the brain and our muscles (e.g., heart may stop beating properly, breathing may stop, or muscles may spasm).
  • When the electricity arcs (jumps, or “arcs”) from an exposed energized conductor or circuit part (e.g., overhead power lines) through a gas (such as air) to a person who is grounded (that would provide an alternative route to the ground for the electrical current).
  • Thermal burns including burns from heat generated by an electric arc, and flame burns from materials that catch on fire from heating or ignition by electrical currents or an electric arc flash. Contact burns from being shocked can burn internal tissues while leaving only very small injuries on the outside of the skin.
  • Thermal burns from the heat radiated from an electric arc flash. Ultraviolet (UV) and infrared (IR) light emitted from the arc flash can also cause damage to the eyes.
  • An arc blast can include a potential pressure wave released from an arc flash. This wave can cause physical injuries, collapse your lungs, or create noise that can damage hearing.
  • Muscle contractions, or a startle reaction, can cause a person to fall from a ladder, scaffold or aerial bucket. The fall can cause serious injuries.


Electrical Safety Tips for Your Home

We love electricity – it keeps us warm, makes our homes bright, allows us to access all of our entertainment, enables us to eat a warm meal whenever we want and so much more. Electricity has made our lives more enjoyable in so many ways– but that doesn’t mean it comes without its risks–we’ll walk you through some electrical safety tips that all homeowners should be aware of.

Gain some knowledge on basic electrical safety tips– these  tips will help you enjoy the devices and appliances you love while keeping everyone safe from harm.

  1. Replace or repair damaged power cords

Exposed wiring is a danger that cannot go overlooked, the NFPA wrote. If you see the protective coating on a wire is stripped away, be sure to replace it or cover it with electrical tape as soon as possible.

  1. Don’t overload your outlets

Every outlet in your home is designed to deliver a certain amount of electricity; by plugging too many devices into it at once, you could cause a small explosion or a fire. If you have a lot of things to plug in, use a power strip (an energy saving one of course!) that can safely accommodate your needs.

  1. Avoid extension cords as much as possible

Running extension cords through the house can trip up residents; this can cause injury and damage to the wire or outlet if it causes the cord to be ripped out of the wall. If you find yourself using extension cords very often, consider having an electrician install new outlets throughout your home.

  1. Keep electrical equipment or outlets away from water

Water conducts electricity, so even the slightest exposure to this dangerous mix can lead to injury. Make sure you wipe up any spills to ensure that plugs don’t get wet.

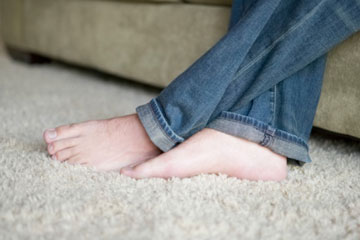
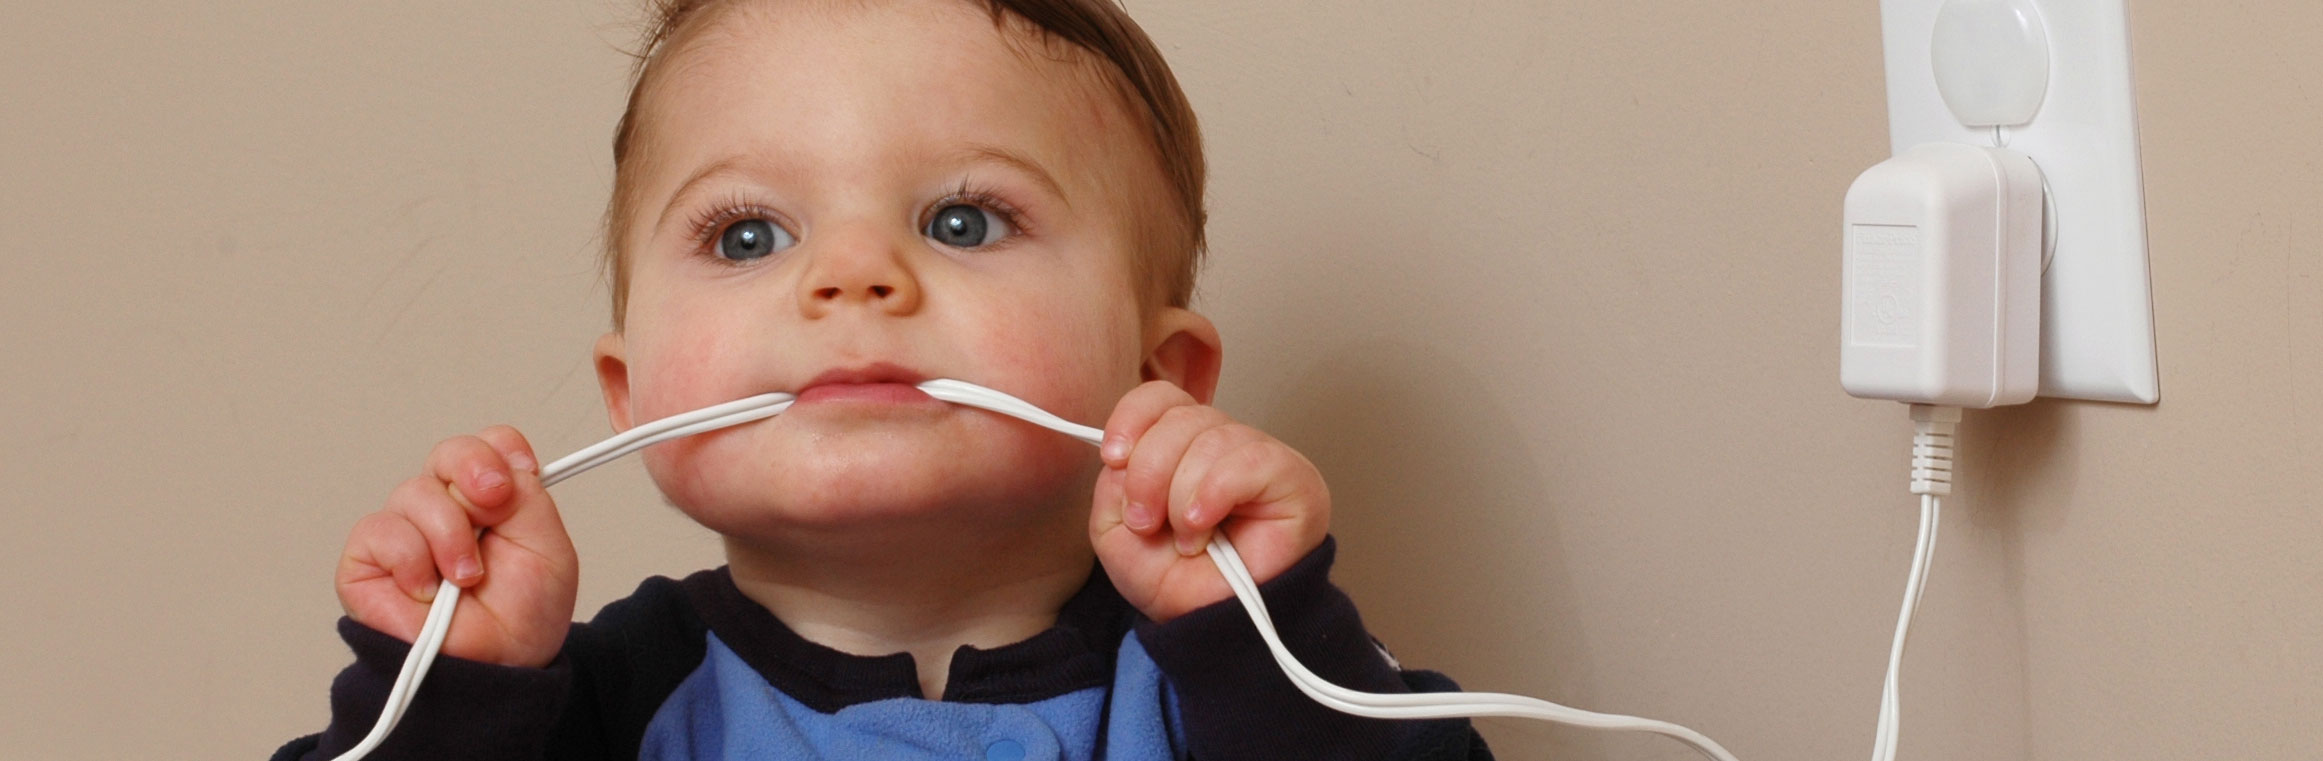
  1. Protect small children from hazards

Toddlers and small children are very curious– and they love to explore just about everything. Parents of small children should put tamper-resistant safety caps on all unused electrical outlets. In addition, all loose cords should be tidied up and put out of reach to avoid kids tugging on them.


Child proofing your home

Keep curious kids safe from the temptation to stick foreign objects into outlets or plugs.

  • Unused wall outlets should be secured. Plastic inserts can be used but they can be pulled off and stuck in the mouth. Consider using safety outlets that prevent foreign objects from being inserted. You can also block outlets with the creative arrangement of furniture.
  • If you’re temporarily using extension cords, hide them behind furniture or use a hide-a-cord device. You can also put electrical tape over unused plug holes on cords.
  • Put electrical devices such as DVD players on a shelf out of reach, or behind a barrier.
  • Store bathroom and kitchen electrical appliances – like hair dryers and toasters – out of reach of curious children.


More Residential Electrical Safety Tips

Other electrical safety tips at home range from preparing for severe weather to checking new appliances for Nationally Recognized Testing Laboratories (NRTL) listings. Here’s a sample of electricity safety suggestions that will help keep your home’s appliances running smoothly:

  • Look for NRTL listings for your products and appliances. NRTLs such as Underwriters Laboratories (UL), Edison Testing Laboratories (ETL) and Canadian Standards Association (CSA) test appliances to ensure they comply with OSHA’s electrical safety rules.
  • Ask a professional to install electrical wiring. Electrical systems are potentially dangerous. Even if you’re a skilled DIYer, consult with a professional before installing new wiring or electrical appliances. Licensed electricians have the skills and knowledge needed to keep your home safe and in compliance with electrical codes.
  • Know what to do when the power goes down. Knowing what to do when the power goes out helps you protect yourself from downed power lines and other hazards while shielding your appliances from damage caused by power surges.
  • Install smoke detectors. Electrical fires often smolder before breaking out into open flame, and the U.S. Fire Administration reports that most electrical fires occur between midnight and 6:00 a.m. Installing smoke alarms helps alert you to the dangers of electrical fires.


BEWARE OF FIRE HAZARDS

Come up with a fire emergency plan; ensure that everyone knows and understands it.

Practice fire drills.

Avoid “power strips” which can ignite a fire if overloaded.

Ventilation is critical, especially if dealing with fumes and chemicals.

  • Good ventilation helps to reduce the toxins in the air, and thus to eliminate highly flammable vapors.

In case of fire, know what has fed the fire.

  • Never fight a grease fire with water; water will splash the oil and spread the flames.
  • Be aware of the whereabouts and use of fire extinguishers.

Electricity safety is important in any home. From powering your appliances, to lighting your home, electricity is an amazing force worthy of our respect and consideration. By practicing these electrical safety tips at home you can lower your risk of accidents, avoid overworking your home’s electrical system, and keep you and your family safe.

Make A Routine Deep Cleaning In Your Home

When Is the Right Time for Kitchen Deep Cleaning?

The Best Time to Clean Every Part of Your Kitchen

Raise your hand if you feel like, despite your very best intentions, your kitchen is messier than you’d like it to be. I’m right there with you. And it makes sense! The kitchen is the very center of your house. No matter how comfy your living room is, chances are people are always hanging out in the kitchen — or helping themselves to food from the fridge — which leads to major messes.

There are, however, a few little things you can do throughout the day to stay on top of things. Follow this plan to keep the space a little cleaner than usual.

Morning

Take advantage of being well-rested and do a little bit of tidying first thing in the morning. You can even do these tasks while you wait for the coffee to finish brewing.

  • Unload the dishwasher or dish rack. If the dishwasher is empty, people will be able to put their dishes right in instead of letting them accumulate in the sink. And an empty dish rack means the dishes have a place to go once they’re cleaned later in the day.
  • Refill any empty canisters that hold your coffee grounds, beans, pasta, or sugar.
  • If you packed lunch for yourself or any other family members, make sure the ingredients are put away, the utensils are in the sink or dishwasher, and the crumbs have been wiped up.
  • Have a few extra seconds? Go through and toss any suspicious-looking leftovers in the fridge or check your fruit bowl and get rid of anything that’s a little too ripe.

Before Dinner

If you happen to work from home, you can do these things at lunchtime. If you work in an office, make sure you do these little chores before you start making dinner.

  • Move breakfast dishes to the dishwasher. Again, you want to have a place for new dishes to go as you dirty them.
  • Clean your coffee or tea tools. Chances are, you had a few cups and then headed out the door in the morning rush. Clean out the used grounds, wash out the pot, and consider setting things up for coffee the next morning.
  • Dampen your sponge and microwave it to kill bacteria and microbes. Just be sure to keep an eye on it.

After Dinner

Welcome to the heaviest kitchen cleaning you’ll do all day. You gotta eat, so once dinner is done, it’s time to clean up. While it might sound pretty miserable to clean on top of cooking dinner, do not leave it for the morning. “Morning You” will not like that!

  • Load the dishwasher and don’t forget to run it! Not running it will throw off this whole cycle.
  • Wipe down the stove and counters. Fresh spills are always easier to clean. Include the cabinet fronts in this task. Sometimes spills get sneaky and make their way onto cabinet facings.
  • Wipe down the front and handle of the fridge. These spaces can get disgusting real fast.
  • Clean the sink and the hardware on your sink. Clear the drain, too. The more your stay on top of this, the less of a deep cleaning you have to do later on.
  • Take out the garbage and recycling, so it doesn’t accumulate and so you don’t have to do it in the morning.
  • Sweep or vacuum crumbs off the kitchen floor. You don’t want to step on them in your slippers in the morning.


Clean & Organize Storage Cupboards

  • Remove all items from remaining storage cupboards or shelves and place on countertop or kitchen table.
  • As you remove items, toss or donate any items that are broken, unwanted, unnecessary, or that you haven’t used in over a year.
  • Set aside any seasonal items that only get used once or twice a year to be placed with other seasonal items in storage.
  • Wipe down all shelves with soapy water or kitchen cleaner.
  • Determine whether you can rearrange any of your storage areas to make your kitchen more efficient.
  • Group like items together and place back in cupboards.
  • Put seasonal items in storage and bring donation items to local drop-off as soon as possible.


Cleaning out The Refrigerator

One of the biggest projects to tackle during your kitchen . As a home to perishable foods, it’s often prone to spills, leaks, and rings left behind from containers. For a serious clean, we recommend removing everything inside and giving the bins a good soak with baking soda and water. For a stainless-steel exterior, mix one-parts vinegar to two-parts water and wipe down with a microfiber cloth


Cleaning Pantry

  • Pull out all items
  • Trash any expired, old, stale or inedible food
  • Donate any unopened food you don’t want
  • Transfer open items to jars or containers
  • Combine like half-used containers
  • Wipe down pantry shelves
  • Replace any tattered shelf liners
  • Clean any organizers
  • Place items back into pantry neatly
  • Wipe down pantry door and knob


How to Clean Kitchen Cabinets

Every once in a while, all kitchen cabinets need a good deep clean to keep them in tip-top shape. These step-by-step instructions for cleaning your kitchen cabinets make it easy to tackle this project.

  1. Empty your cabinets inside and outside.
  2. Make a cleaning solution by mixing equal parts white vinegar and warm water in a spray bottle. If your cabinets are particularly grimy, add a few drops of liquid dishwashing detergent. If you have stone or granite cabinet knobs, swap the white vinegar with rubbing alcohol.
  3. Spray the outside of the cabinet doors with the cleaning solution, letting it sit for a minute or two.
  4. Using a microfiber cloth, wipe the cabinet doors clean. If dirty spots remain, repeat the process a second time.
  5. Open the cabinet doors and spray the inside of the doors and the shelves with the cleaning solution.
  6. After letting it sit for a minute or two, wipe the cleaner off with a microfiber cloth.
  7. Get out a clean cloth, wet it with clean water and wipe all the surfaces you cleaned.
  8. Use a clean towel to dry all surfaces thoroughly.

How To Take Control Ants In Your Garden

Eliminating Your Ant-Problems

Why do you have an ant problem?

Ants can enter your home for any number of reasons, but more than likely, they are searching for food. Your home just happens to be close to where a queen decided to set up her colony. Just like humans, ants have to eat to survive. They also have to feed their young. It’s not that they want to bother you or cause distress.

They are simply trying to eke out a living just like any other animal, insect, bug or plant on Earth. Your home represents a possible food and water source. It can also provide protection from predators and the elements, thus serving as a potential site for new colonies when they’re ready to expand. Obviously you’ll want to prevent this invasion and colonization from happening whenever you can.


How to Find Ant Nests

Sometimes the solution to an ant problem is getting rid of their nest. If you’re dealing with carpenter ants, which can do structural damage to your house, it’s vital that you wipe them out ASAP. Finding the nest may not be easy and takes some detective work. Ants generally prefer damp areas, such as framing or flooring that’s soft and spongy from a plumbing or roof leak. How to get rid of ants begins by looking for areas with water damage. Attics, bathrooms and exterior walls are obvious candidates. Cut small holes in water-damaged walls to track down the ant nest. (You’re going to have to repair the walls anyway.) When you find the nest, spray it with an insecticide that contains bifenthrin, permethrin or deltamethrin (look on the label).


Tips for Dealing with Ants

Here are some tips to help you eliminate and prevent an infestation of ants in your home.

Identify Ant Trails

The key first step in eliminating an ant infestation is to identify the trails used by worker ants to move to and from the nest. Any visible ants moving inside your home are seeking food, and once an ant finds edible material, it carries it back to the nest By doing so, the ant leaves a chemical path, or trail, for its fellow worker ants to follow to collect more food.

Use Ant Bait Indoors

Avoid the temptation to simply use pesticides to spray visible ants marching along trails in your home. Pesticide sprays can eliminate a few visible ants, but more will quickly replace them, and you’ll never make real progress to eliminating the infestation. Instead, use these worker ants as the ticket into the colony by placing ant bait for them to carry back to the hidden nest.

Ant baits are edible materials, usually sweet, sugary carbohydrates, mixed with substances that are toxic to ants but which have minimal toxicity to animals or humans. Some ant baits are primarily made from boric acid, a natural substance that is entirely non-toxic to humans.

Ant baits can be “stations” containing granular materials or liquids that are sprayed onto surfaces. Whatever form of ant bait you use, try to place it close to visible ant trails but outside the reach of pets and children. The bait will work most effectively if you keep other surfaces clean so that the bait is the only sweet substance available to attract the ants.

Use Spray Pesticides Outdoors—Carefully

If you happen to follow ant trails and identify an outdoor nest for the colony, then it may make sense to apply a heavy dose of liquid pesticide that can soak down to reach the queen. Drenching the nest with an approved insecticide spray (following all label directions) can be effective. Make sure, however, to verify that this is the colony creating your indoor infestation problem. Many types of ants are helpful garden creatures that you have no reason to kill. And be aware that these pesticides are likely to be toxic to all insects, including beneficial ones, so apply them carefully according to label directions.

Keep It Clean

Sanitation is critical for the prevention and control of any pest. Like all living creatures, ants need water, food, and shelter for survival. Ants leave the shelter of their colony to find food and water. Don’t make it easy for them! Keep foods sealed, floors swept, and all surfaces cleaned. Be especially careful to keep things clean while you are targeting the nest, as this will make the sweet ant bait the only thing available to the ants. But don’t clean away the ant trails until you have eliminated the infestation, as these trails will allow the ants to find your bait and carry it back to the nest. Once the infestation has been eradicated, then clean up the trail surfaces and keep them clean.

Seal Entry Points

Ants are tiny creatures and can enter homes and buildings through minute cracks and crevices. To minimize this, seal around windows and doors and all cable, pipe, and wire entry points. Regularly inspect foundations for tiny cracks through which ants can gain entry to your home.


Outdoor Ant Baiting

Using an ant bait outdoors will allow you to exterminate ants that are farther away from your structure. We recommend you use both a liquid ant bait and a granular ant bait because ants can be picky and will sometimes only accept the liquid bait or sometimes only accept the granule bait, depending on what nutritional needs they are trying to meet. You can use both bait formulations in each station at one time. You should place the stations near areas where you are seeing high levels of ant activity. Check the stations once a week and replenish the bait as needed until the ant population has been eliminated


Sprinkle cinnamon in problem areas

Cinnamon has been touted as a natural ant repellent. Scientific research backs up the claims, but the study that looked at this technique used highly concentrated cinnamon essential oil. Sebring cautions that household cinnamon probably doesn’t have a great enough concentration to be truly effective, but he says it’s worth a shot. Sprinkle cinnamon on the areas where you have seen ants, or saturate cotton balls with cinnamon essential oil and use them to wipe down known trails and entry spots. But a word of caution: Essential oils can strip paint and stain surfaces, so test how your floor reacts in an inconspicuous area before you use it everywhere.

Must Know How Dui Lawyer Works

Choosing Qualified DUI Lawyers for the Case

A DUI can have an immediate impact on your day-to-day life. It can affect your driving privileges, your employment, and it may even mean possible jail time. As such, it is necessary to find out your options as soon as possible.

First, you must come up with a plan to tackle the daunting legal battle that comes with fighting a DUI arrest. This article discusses how to hire a DUI attorney and important things to consider when making your decision.

Public defender or private attorney

If your income is low enough you may qualify to have a public defender represent you. In many jurisdictions public defenders handle a lot of DUIs. They’ll know how the system works and how to get you the best deal possible given the facts of your case.

If you qualify for a public defender, try to find out what reputation the public defender’s office has in your jurisdiction. If it’s positive, the prosecutor may be more willing to negotiate a good deal.

If your income is too high to qualify for a public defender, you’ll need to hire a private attorney if you want representation. For the best chance of success, keep a few things in mind:

An attorney who handles DUI cases regularly is more likely to get you a good outcome than a generalist.

Make sure you find out up front how much your case is likely to cost, including factors that might increase the cost.

If possible, talk to at least 2 or 3 lawyers to find one you are comfortable with.

An initial consultation is often free, so you can see if the attorney is a good fit for you. Some attorneys do charge for the initial consultation but will apply the fee to the cost of your case if you hire them.

In many cases you won’t need an attorney for a first offense DUI. But if your case isn’t straightforward, an attorney may be able to get a better outcome for your case than you could alone.


Hire Lawyers

When you hire a private DUI lawyer, it’s typically to represent you in DMV proceedings and criminal court. Having the same attorney work on both aspects of your case can lead to better outcomes, including a shorter license-suspension period.

Most defendants see the price as the major drawback with private lawyers. Hiring a private DUI lawyer will generally cost you between $1,000 and $5,000. If your case goes to trial, it can be even more expensive. (And there are cases where spending the money for a private lawyer won’t get you a more favorable outcome than had you gone with the public defender.)

However, hiring a private DUI attorney (assuming you can afford one) can be well worth it. Of course, when you’re retaining an attorney, you get to decide who that attorney will be. Attorneys who specialize in DUI cases often have an in-depth understanding of DUI law and defenses that other attorneys don’t have. In some cases, this expertise can lead to more satisfactory results—perhaps, a better plea bargain or dismissal of the charges altogether.

Having a private lawyer can also minimize the time you have to spend in court. In some areas, public defender clients must personally appear for all court dates. With private counsel, on the other hand, you usually won’t have to be present for routine court appearances. For many people, especially busy professionals, not having to miss work to come to court is a significant perk.

Another benefit of hiring an attorney is you’ll typically get more one-on-time than you would with a public lawyer. Most people feel more comfortable with their case when they get all their questions answered and concerns addressed.


Selecting a DUI attorney

Conduct Detailed Research About the DUI Lawyer

When you have to choose a DUI lawyer, then the most significant aspect is that you should research on your part. The smart approach is that you must prepare an excel sheet, and list down the details about the top DUI lawyers in the sheet. You can include the addresses, email, and phone numbers of the lawyers in the excel sheet. For example, you may list down the details about Vista DUI Attorney.

Get Hold of An Attorney with Experience

What you need to keep in mind is that you have little time to act when you get arrested for DUI. You need to hire an attorney who has significant experience related to DUI cases and DMV.


Some Key Questions For Your DUI Lawyer To Ask

  1. What Training as a DUI Specialist Do You Have? Ask if the lawyer is certified by any organizations such as the NCDD (National College for DUI Defense). Does the attorney have training from the National Highway Traffic Safety Administration in administering Standardized Field Sobriety Tests? An important part of your case may hinge on whether the police officer conducted your roadside tests correctly. Has the lawyer received training on using the breathalyzer machine? At your meeting, look for certificates for these and other DUI-related training, which should be hanging on the lawyer’s office wall.
  2. What is Your Experience in Representing DUI clients? How many years has the attorney been practicing DUI law and on how many cases in a typical year? What is the lawyer’s trial experience? Ask what percentage of the lawyer’s caseload is focused on DUIs—it should be close to 100%. A lawyer who specializes in DUI cases will be up to date on anything that has changed in DUI laws.
  3. Can You Tell Me About the Last DUI Case You Won, and How? Your lawyer should have a very recent local case that was successful. Ask when the attorney’s next case will be. DUI lawyers whose practice is devoted to DUI cases should be expected to have one or more DUI trials on their schedule within a week or so of your interview. Ask how often the lawyer takes cases to trial.


To help you make the right decision consider the following:

  • Level of Comfort: You will want to select the attorney that you felt the most comfortable with since you will be speaking with him or her throughout the duration of your case.
  • Good Communication Skills: You want to select the attorney that was best able to relate the information regarding your case in a manner that was easy to understand. Presentation is key in any legal case and the way the attorney communicated with you is a good indication of how he will communicate with the judge and jury.
  • Confidence: The attorney’s confidence is also important. An attorney that seems ambivalent and does not have clear responses to your questions may not have as much experience as he says.
  • Trust: It is difficult to know how trustworthy a person is after just one meeting. Client testimonials may help in this regard; however, beware of Yelp reviews or other online reviews by disgruntled clients as they may not be happy with the outcome of their case despite the attorney’s fair representation.

Tips To Find Thrusted Loading Services

What Is Vacuum Loading?

Vacuum loading is a very efficient process that is used extensively in a multitude of industries.Vacuum trucks can perform a clearance task across many different settings and have the appropriate pumps of various capacities mounted on them.These draw up the material that needs to be removed and transfers it to a tank or other receptacle that is mounted on a truck.

Standard vacuum trucks have tanks that can hold over 3,500 litres. However, there are some monster trucks that can have the capacity to remove up to nearly 20,000 litres. Tanks need to be made of materials that can safely carry the required waste without any fear of corrosion.

Most people think of vacuum cleaners when the term “vacuum” is mentioned, but vacuum chambers are present in nearly every industry.  A vacuum tank is part of a system that filters air or fluids through suction, outgassing, pumping, or a combination of techniques.  Vacuums use pressure to prevent contamination, purify, dehydrate, and even power.  Not all vessels are able to withstand the difference in internal and external pressure that results from a vacuum.  For this reason, when designing a system that will utilize variations in internal and external pressure, it is critical to consider if a vacuum tank will be necessary to ensure the system’s success as well the safety of the operator.


What is a vacuum truck used for?

Vacuum trucks, also known as vacuum tankers, are often used by cities to handle large-scale liquid and sludge clean up, most commonly in sewer and septic system maintenance. They can also be used in industrial and municipal settings to suction water and debris left from hydro-excavation or drilling jobs. From clearing mud to expose utility lines, to preventing sewer system overloads, vacuum trucks meet the needs of cities and industries requiring environmental clean up, storage tank upkeep, and waste management.

How does a vacuum truck work?

A vacuum truck works similarly to a shop vac. A powerful pump removes air from the holding tank, which creates a vacuum inside. Opening the primary and secondary shutoff valves on suction hoses forces the tank to try to equalize the pressure inside, letting the truck suck up liquids and sludges. Just like a home vacuum, the quality of the equipment and the power of the pump affect suction power and the ability to handle difficult jobs.


Common Uses of Vacuum Trucks

Vacuum trucks intend to meet the various large-scale cleaning needs of cities, municipalities, industries, and other contractors. The traditional uses of vacuum trucks are for emptying septic tanks and cleaning sewer pipes for proper preventive maintenance. Moreover, one of the latest applications of vacuum trucks is hydro excavation. A high-pressure water jetter drills the ground and an industrial vacuum hose pulls the debris into the tanks.

Uncommon Uses of Vacuum Trucks

Aside from keeping streets and operating fields clean, vacuum trucks can perform life-saving and environment-protection functions, too. They can be used for emergencies, especially when dealing with cave-in rescue and recovery missions. Furthermore, during spillage of hazardous materials, vacuum trucks are useful in quickly drawing them out. Some oil and mining firms deal with soil pollution through vacuum trucks as well.


SEPTIC TANK PUMPER OPERATION PROCEDURES

Septic pumping trucks are specialized vehicles which combine a powerful vacuum pump with a holding tank for sewage and wastewater.

The vacuum pump is activated, suction confirmed, the pumper is connected to a 4″ or larger vacuum line, and the operator uses the line to empty the septic tank.

Common septic pumper truck vacuum pump brands include Battioni & Pagani vacuum pumps, Conde vacuum pumps, Hertell vacuum pumps, Masport vacuum pumps, Moro vacuum pumps, NVE (National Vacuum Equipment) pumps, PB vacuum pumps, Juro vacuum pumps.

An example of the type of vacuum pump used on septic tank service vehicles is the Masport HXL400 System – Water cooled 400 CFM unit. Various pump sizes and pumping rates are available, all of them that work on septic pumper trucks will be similar in effect however.


VIP Truck Mounted Combination Wash/Vacuum System 92BBL Specs

The 92BBL Combination vehicle was made from the same steel alloys as the 82BBL model, and at the same thickness. Its tank was divided into two compartments to hold water for cleaning and vacuum debris. The full capacity of the two tanks was 3,864 gallons; with 980 gallons reserved for water and 2,240 gallons for vacuum debris. The combination wash/vacuum vehicle used the same suction and discharge valves as the 82BBL model, and also used a Hibon VTB 820 (1,400 cfm) vacuum pump. The vacuum pump on the combination vehicle had a maximum vacuum of 27 inHg (inches of mercury).

Tips To Find The Best Stucco Repairs

HOW TO REPAIR STUCCO CRACKS

Small, thin cracks in your stucco can be easily fixed with exterior latex paintable caulk. Choose a caulk color that is close to your stucco color. You may not find an exact match, but something close to it. If need be, you can touch up the caulked area with an exterior paint that matches your stucco color. Use a utility knife to cut the nozzle at a 45-degree angle, and place it in a caulking gun. Puncture the internal foil patch at the base of the nozzle with a nail or other slender sharp object. Hold the caulking gun at a 45-degree angle parallel to the crack being filled and pull the nozzle along the crack. Don’t push it. Position the nozzle opening so that it forces sealant onto the crack. As you finish applying each bead of caulk, release the trigger and pull back on the caulking gun rod to stop the flow of caulk and relieve the pressure inside the tube. Releasing the trigger alone will not stop the caulk from flowing out of the nozzle. Let the caulk set for the manufacturer-recommended amount of time.

For cracks larger than a ¼” or so, fill the crack with premixed stucco patch and a small putty knife. Allow the stucco patch to set for the a mount of time recommended by the manufacturer. You may need to apply a few layers of the stucco patch to adequately fill the crack and make the patch flush with the surrounding stucco surface. Follow all instructions.

HOW TO REPAIR STUCCO HOLES

  • Step 1: Remove Broken and Crumbling Stucco
  • Step 2: Inspect/Replace Metal Mesh
  • Step 3: Mix Batch of Stucco
  • Step 4: Apply Stucco
  • Step 5. Paint (Optional)


Repairing Stucco Cracks

Cracks in stucco are a common problem. Stucco, after all, is not very resilient–it’s made of cement. So when a house settles over time or shifts because of heavy winds or earthquakes, the stucco siding cracks. The proper way to repair these problems depends upon their size.

Hairline Cracks

Very fine, hairline cracks are very easy to fix. If they are super-thin, a coating of acrylic latex paint that matches the siding will probably do the job. If they are a little too wide for paint to fill the crevices, fill them with latex caulking compound first. Allow this to dry thoroughly, then paint the surface with acrylic latex paint.


REPAIRING & SEALING CRACKS & HOLES IN STUCCO

Project Instructions

  • Widen the crack to a minimum of 1/4 inch using a chisel and hammer (the edges of the crack should be vertical or beveled in an inverted “V”).
  • Break away any deteriorating concrete and remove loose material with a brush.
  • Cut the nozzle tip of the QUIKRETE Stucco Repair on an angle with a utility knife to match the width of the crack and load into a standard caulk gun.
  • Slowly draw the gun down the crack forcing a bead of stucco repair caulk deep into the

Pre-Mixed Stucco Patch

  • Stir the pre-mixed stucco using a margin trowel or putty knife.
  • Spread and texture the concrete patch to match the surrounding stucco – wet the trowel to achieve a smooth finish.

NOTE: for patches or cracks over 1/4 inch thick pre-mixed stucco patch should be applied in multiple layers, allowing each layer to dry before applying the next.


Stucco can and should be sealed properly to prevent moisture intrusion.

If new, stucco can be sealed with a clear concrete/ masonry sealer, which will penetrate into the stucco and stop moisture entrance. These are typically silicone type sealers. While effective, these finishes will usually need to be redone every 4-5 years. Redoing sealing on a regular basis is what prevents deterioration and damage, which can lead to the need for full replacement.

If the stucco is older and has already developed cracking, an elastomeric coating would be a best choice. These finishes are waterproof, seal hairline cracks, and are extremely pliable and flexible. If cracks develop below these coatings, the finish will stretch and bridge the crack, and help keep waterproof. As importantly, these finishes are microporous; they will breath to allow moisture vapor behind it to properly escape without bubbling and blistering. When properly done, elastomeric coatings can easily last 10 or more years.

Of course, after the execution of elastomeric coatings, the best way to get the most value out of such an installation is to stay on top of your stucco maintenance regularly performing the tasks required to keep your stucco in top condition.


Common Causes of Stucco Water Damage

Stucco damage is often caused by water. If you noticed that your stucco walls have blistering, staining, or mold, you could have water damage. Stucco siding is vulnerable to a multitude of issues that can cost you thousands of dollars. Here are the four common causes of stucco water damage.

Hydraulic Pressure

Hydraulic pressure happens when water moves from behind the stucco wall. It can result in blooming and eventually blistering. To avoid stucco damage, a moisture barrier will need to be constructed that has an efficient drainage. This enables water to travel from behind the wall instead of accumulating and causing damage. Additionally, you should avoid painting retaining walls since there’s a heightened risk of blistering. If you have this issue, you will need to have water removal in Alpharetta.

Wicking

Wicking happens when moisture is consumed into the stucco wall’s plaster. It can result in blistering, staining, and efflorescence. If this occurs, it was most likely caused by a deficient weep screed or poor installation. A weep screed is situated between the moisture barrier and the surface of the stucco. When the moisture travels through the stucco surface, the water flows down the screed and exits through the weep holes. If a weep screed is non-existent, then the walls can easily be damaged if they are plastered all the way to the ground.

Surface Moisture

Many homes have flower beds that surround the base of the house. If you use sprinklers in your flower beds, you must ensure that the sprinklers were properly installed. When sprinklers aren’t properly installed, they can spray water directly onto the base of the walls. This can cause efflorescence and potentially blistering. Under some circumstances, a paper moisture barrier is damaged and is unsuccessful with keeping moisture away from the walls, which can cause mold to develop.

Use Water Testing To Make Sure Your Water

The National Ground Water Association (NGWA) recommends well owners test their water at least annually for bacteria, nitrates, and any contaminants of local concern. More frequent testing should be considered if.

There is a change in the taste, odor, or appearance of the well water, or if a problem occurs such as a broken well cap, inundation by floodwaters, or a new contamination source

The well has a history of bacterial contamination

The septic system has recently malfunctioned

Family members or house guests have recurrent incidents of gastrointestinal illness

An infant is living in the home, or

To monitor the efficiency and performance of home water treatment equipment.

Check with your local health or environmental health department for recommendations regarding the type and frequency of testing specific to your location. For help in interpreting your water test results—and what might be a health risk or an aesthetic issue—ask the lab that conducted the test or your county health department.

Total coliform is the most commonly used indicator of bacterial contamination. The presence of coliform bacteria is an “indicator” of a well’s possible contamination from human or animal wastes. Total coliform are a broad category of bacteria, most of which pose no threat to humans. Some come from fecal matter; others naturally occur in soils, vegetation, insects, etc. The presence of coliform bacteria in well water can be a harbinger of worsening water quality. In some cases, more specific tests for fecal contamination, such as E.coli, may be used.


THE IMPORTANCE OF PRIVATE WELL WATER TESTING

WHY SHOULD I TEST MY WELL WATER?

Testing your private well’s water quality on a regular basis is an important part of maintaining a safe and reliable source. The test results allow you to properly address the specific problems of a water supply. This will help ensure that the water source is being properly protected from potential contamination, and that appropriate treatment is selected and operating properly.

It is important to test the suitability of your water quality for its intended use, whether it be livestock watering, chemical spraying, or drinking water. This will assist you in making informed decisions about your water and how you use it.

IS MY WATER SAFE TO DRINK?

The only way to tell if your drinking water is safe is by having it tested at a certified laboratory. Harmful bacteria, parasites, and viruses are invisible to the naked eye, so water which looks and tastes good may not necessarily be safe to drink. These microbes can exist in surface and groundwater supplies, and can cause immediate sickness in humans if not properly treated.

Certain chemical contaminants that are sometimes found in a water source can cause long term health problems that take years to develop. Frequent water testing will identify unsafe water and ensure that the treatment system is treating the water to a satisfactory level.

WHAT TESTS SHOULD I HAVE DONE?

Useful tests are available to help determine the health and safety of a water supply, and the performance of a water treatment system. Your local health department can assist in selecting tests important for assessing your drinking water.


How Can I Test My Water at Home with a Water Test Kit?

What is a home water test kit?

Home water test kits come in a variety of methods, styles, and shapes. They include simple test strips that you dunk in the water and swirl around for a few seconds and then compare the test strip colors to the colors on the side of the bottle. Test kits also include chemical titration tests that work for hardness and iron, a photometer, or a TDS electronic handheld meter that test for total dissolved solids (TDS) and pH or ORP (oxidation reduction potential)

What do home water test kits test for?

Water tests test inorganics like iron, hardness minerals, and total dissolved solids (TDS), or specific contaminants like lead, nitrates, or arsenic. Since bacteria tests are limited, just test for coliform. Finding out if your water contains coliform is important because reveals bacteria and warns that your water could contain something more specific or more dangerous or harmful like e. Coli. If a bacteria test shows positive for coliform, then use a handheld UV light to further test for e. Coli. Photometers have a litany of different testing capabilities. They can test for cyanide, copper, lead, and many other contaminants. But there are some contaminants that home water test kit won’t find, like cryptosporidium.

What are the different options for home water testing?

There are a variety of options using different methods, but many tests are fairly specific to what you want to find out. For example, if you want to make sure that your water softener is working, water hardness test strips would be ideal. If you’re concerned contaminants like nitrates or arsenic, then you need more specific testing. For example, an arsenic kit includes several phases of sampling water and adding different compounds in it to create a gas in the sample bottle, which then interacts with a test strip.

Do home water test kits test for water hardness?

Yes, they do. We offer different types of hardness tests. One is a test strip that shows you a range and tells you whether your water is soft or not. If you want to test your city water, a test strip will give you a range of hardness. A titration test, where you drop chemicals into a test bottle, gives a more accurate measure of grains per gallon. If you’re setting up or maintaining equipment and want to make sure you’ve done it properly, we recommend that you use the titration test. This chemical test will give you accurate results to help you know you’ve set your equipment up properly.


Drinking Water Testing Kits – Testing Evaluation Program

Environmental Education and Outreach – Drinking water testing and analysis services provided by a National Testing Laboratories, other laboratories,  or certified/licensed professionals.  The residential drinking water testing program includes analysis for common water quality problems, microbiological contamination, and makes recommendations regarding the potential need for water treatment devices, such as: softeners, reverse osmosis units, distillation, neutralizers, chlorination systems, ultraviolet or UV systems. As part of the Water Research Center continuing efforts of environmental education for customers of public water supplies and private water systems, he have offer information on drinking water testing, private well owner education, assistance with explaning water testing results, review water treatment options, and ways to self-screen the quality of your drinking water.

The Basic Water Chemistry Package for drinking water and Bacterial Testing – You will be linked to a different web page – then navigate to Product List and Find the Code Sighted in the Link.

This is a quick test for the presence or absence of Coliform and E. Coli Bacteria in your drinking water or well water. Coliform is an indicator bacteria that public water supplies are required to monitor. The presence of Coliform could indicate the presence of other infection disease causing organisms. If Coliform is present, then we look for E. Coli. which is a known pathogen.

The dual lead test will test for the lead contect in the water and includes sample containers and testing for a “first draw” and a “flushed” sample is perfect for public water systems or private water sources were you suspect corrosion or high levels of copper and lead may be impacting your drinking water (order).

This testing package covers 22 heavy metals and minerals such as calcium, magnesium, iron, lead, arsenic, and mercury in your city or well drinking water. Additionally, analyzes other inorganic compounds and physical characteristics including nitrate, nitrite, chloride, fluoride, sulfate, alkalinity, pH and hardness.


How to test your tap water for lead

Home Testing

Our second round used a “First Alert” home test (sold online and in many hardware stores) that promised to detect not only lead, but also bacteria, pesticides, nitrates, chlorine, hardness, and pH. If you have lead pipes, acidic water can cause the lead to leach out. That’s essentially what happened in Flint. Because water managers failed to add an anti-corrosive agent (as a cost-cutting measure), water from the Flint River ate away at the pipes and pulled lead into the drinking supply.

Tap Score

Of the three tests that we took, Tap Score was the easiest. It also had the most comprehensive results, including measurements for things like copper (which only makes you sick at very high levels, but can kill your goldfish at a much lower threshold), hexachlorobutadiene (which can affect the kidneys), and isopropylbenzene (which may increase risk of cancer). But Billy did not dig the delayed gratification.

Should I test my water for lead?

If you’re at all uncertain of your water’s safety—and you live in New York State—nabbing a free testing kit is a no-brainer. If your state doesn’t offer testing for free, consider investing in a $15 kit to ease your mind. The redundancies between our three results certainly suggest that all of the options we tried are fairly accurate, so if spending 100-200 dollars on a testing kit sounds like overkill, it probably is. But if you live in a town where municipal testing is infrequent—or if you get your water from a well you’ve never tested—it might be worth upgrading to a test that’s as comprehensive and user-friendly as Tap Score.

Tips To Find The Best Accountant

Choosing the Best Accountant For Your Business

Once you’ve decided it’s time to hire an accountant, the next step is to choose which accountant to hire.

It’s important to take the time to do this carefully, and there are a few things you’ll want to consider first. You’ll need to think about issues such as the accountant’s location, the division of workload and the type of accounting software you’ll use. Consider how much you’ll have to pay the accountant, and whether they can help to reduce your business taxes.

It’s in your company’s best interests to have an experienced, capable person handling one of the most important areas of your business – your finances. The right person will save you time and money year after year. So here are some things you should consider when you’re choosing an accountant.


Inside accountant

When the business grows in revenue and the transactions become more complicated, it is time to consider hiring a full- or part-time inside accountant. Since the outside accountant’s fee grows with the size of the business, the owner may see some cost savings by bringing some of the work in-house.

Duties and responsibilities of an in-house accountant usually include:

  • General ledger/chart of account maintenance
  • Responsibility for daily transactions
  • Financial statement preparation and analysis
  • Cost accounting and variance analysis
  • Treasury and cash management including bank reconciliations
  • Payroll and fixed asset accounting


Know What You Need

But before you choose an accountant, you need first to understand the kind of work or responsibilities you want the accountant to handle for your business. If you need monthly financial statements and bookkeeping tasks, a non-certified accountant or bookkeeper can be hired. But to get tax planning advice, tax returns prepared, or audited financial statements, you need a CPA or certified public accountant.

Ask About Accounting Software 

Before you choose an accountant, you’ll want to ask what software they recommend for their small business customers. You may find some accountants who are using the same old desktop accounting software. They do not want to switch to the latest online accounting solutions. You want to invest in an accounting software system that you can grow into in 3-5 years. You also want an accountant who can teach you how to use your software and set up your initial chart of accounts. You should also inquire about whether they could help you get a discount on your accounting software.


Referrals – ask other business people about their accountants.

Find out who other business people use and how satisfied they are with the services their accountant provides. If you don’t or can’t get any worthy referrals using this method, use the internet or yellow pages and choose several accounting firms.

When you call, tell the receptionist what you do and ask for the name(s) of accountants familiar with your type of business. Use this information to create a shortlist of prospective accountants.

It’s important that you choose an accountant that is familiar with the special requirements of your business and/or your tax situation so you can use these to vet potential accountants. For example:

If your business is internet related, you’ll want to find out if the accountant is familiar with ecommerce.

If your business involves periods of work in other countries, you need an accountant that’s knowledgeable about international tax issues. For instance, if you are Canadian and wish to do business in the U.S. you need someone who is familiar with the IRS and has experience completing U.S. tax forms (or has easy access to someone else who does, such as another specialist who works in the same firm).

If you’re thinking about exporting, ask how the accountant might help you develop an export strategy.


How will you be billed?

Before moving forward with your accountant of choice, make sure you understand how the accountant bills for services. Billing structure can vary pretty widely. Some accountants charge by the hour, others have flat rates per service, and others use some combination of the two.

Don’t forget to ask about charges that could occur, that haven’t been discussed yet. That might seem like an odd question, but you could be surprised by the answers you get. Better to be surprised now, before you’ve made any commitments, than to be surprised by your extra-large bill.

Tips To Make An Eye Care

Everyday Eye Care Tips

Wear Sunglasses: not just for looking cool. Sun damage is serious business for your eyes. For all of your outdoor activities, you need year-round UV protection for your eyes. Always wear eyeglasses and sunglasses with 100% UV protection. You can’t rely on sunscreen alone for protection from UV rays. Even though 75 percent of Americans report having concerns about UV eye exposure, less than one-third (31 percent) wear sunglasses every time they go outside, according to the 2016 Vision Watch survey of more than 10,000 adults 18 and older. Pearle Vision makes it easy for you to get Rx sunglasses. Click here to find a Pearle Vision Eyecare center in your neighborhood.

Don’t ignore headaches. Reaching for another aspirin? Frequent headaches can be a sign of an eye health issue. Check with your eye doctor or read more about common eye health issues.

Tears can be a good thing. Beware of dry, itchy eyes caused by environmental factors, certain medications or just aging tear ducts. Artificial tears work wonders for thirsty, irritated eyes. Visit your nearest eyecare center.

Don’t be afraid to blink. Healthy eyes need breaks. Frequent blinking prevents fatigue.

Safety first. If you think you should be wearing safety glasses, put them on.

Supercharge your eyes.Diets rich in Vitamin A keep eyes healthy and sparkling. So eat lots of carrots, dark leafy greens or sweet potatoes. Read a full list of eye-healthy foods here.

Give ’em a rest. Reduce computer-related eyestrain with the 20-20-20 rule: Every 20 minutes, look about 20 feet away for 20 seconds.

Sleep on it! Sleep is the most natural form of eye care. Lack of sleep can lead to increased strain and make your eyes look unhealthy (dark circles or bags).


How to Keep Your Eyes Healthy

Look Away From the Computer Screen

Staring at a computer or phone screen for too long can cause:

Use Safety Eyewear

If you use hazardous or airborne materials on the job or at home, wear safety glasses or protective goggles.

Wear Sunglasses

The right pair of shades will help protect your eyes from the sun’s ultraviolet (UV) rays. Too much UV exposure boosts your chances of cataracts and macular degeneration.

Quit Smoking

It makes you more likely to get cataracts, damage to your optic nerve, and macular degeneration, among many other medical problems. If you’ve tried to kick the habit  before only to start again, keep at it. The more times you try to quit, the more likely you are to succeed. Ask your doctor for help.

Eat Well

Good eye health starts with the food on your plate. Nutrients like omega-3 fatty acids, lutein, zinc, and vitamins C and E might help ward off age-related vision problems like macular degeneration and cataracts. To get them, fill your plate with:


Tips For Choosing The Best Eye Care Center For Your Family

Look for Savings

Money matters. All medical care can be expensive and depending on your family’s needs (and how many family members you have) and eye care is no exception. Look for a vision center that will help you identify what your insurance plan will cover. Many insurance plans will help cover the cost of vision care for your family. Try to find an eye care center that offers promotions, coupons, and more breaks to help you afford treatment. That’s a benefit you can take advantage of over time and it shows that the vision care center wants to help families afford care. That’s a sign that they’re approach is one your family can get behind.

Examine The Mission

What is the Mission of the vision care center you’re looking into? Do they seem primarily concerned with cultivating lifelong eye care relationships with patients of all ages? Or, do they seem like they’re motivated by making money and taking on as many new patients as possible to grow profits? If it’s the latter, you have to ask yourself ‘Is this the right place for me and my family?’ Especially for younger children, it’s important to find an optometrist who will put them at ease and be a steady resource for all kinds of vision maintenance and improvement. An optometrist that can provide vision for life is invaluable to your family. Find an eye care center with values that match your own. It’s the groundwork for a successful and lasting eye care relationship.

Go Somewhere with Selection

After you receive top-flight medical care from an optometrist and they determine you need glasses or contacts, it’s a humongous benefit to be able to find what you need right in the same vision center. Opt for an eye care center that has an incredible selection of glasses (lenses and frames) for every need. Not only should you be able to order contacts from your vision care center, but you should also be able to find the perfect pair of glasses. Find an eye doctor that has brand names at competitive prices. A good selection will make it easy for each person in your family (who needs glasses) to find the pair that works for them! Think about the trouble saved when you’re able to knock out eye exams and find new glasses for everyone in the same place.

Make Sure They’re Qualified

This tip can apply across the medical care spectrum. But, it’s important. Your family is what matters most. Ensure that you’re taking them to an eye care center with licensed, credentialed, and experienced optometrists. How long the vision center has been in business, how trusted it is within a community, and its experience treating patients should all be considered when choosing where to take your family for vision care. You want to find an optometrist that will be a resource for vision care throughout each family member’s life. That’s a tall task and not everyone will be up to it. Find eye doctors who want that life long relationship and have the skills to back it up.

Ask if They Treat All Ages

Taking a child or a grandparent into an eye care center for their first exam is enough of an event. If the optometrist you’re seeing doesn’t have experience treating particular age groups, that can add undue pressure and result in some clumsy interactions and sub par treatment. Find out ahead of time whether the eye care center you’re considering has experience treating all ages. You want to find an optometrist that has seen it all and is equally comfortable treating a 4-year-old as they are treating an 80-year-old and every age in between. If you’re looking for a family vision care center, make sure that the entire family can find the treatment they need there. That will make eye doctor appointments easier on your family and will spare inexperienced optometrists the awkwardness.


Eye Care Tips Your Optometrist Wishes You Knew

Take UV Damage Seriously

Don’t reserve your sunnies for bright days. “UV damage to your eyes is cumulative over your lifetime,” says North. “Make sure the label on your sunglasses says they block 100 per cent of UVA and UVB rays.” Overexposure to UV light is linked to cataracts, macular degeneration, eyelid cancer and corneal sunburn.

Be Careful with Cosmetics

Eyelash extensions are trendy, but the strong glue that holds them on can cause allergic reactions or chemical burns. Reserve those fluttery lashes for special occasions, and be sure to go to a licensed aesthetician who uses sterile equipment.

Learn to Fight Screen Fatigue

Sit back as far as possible, get rid of any extraneous glare and take frequent breaks: some optomet­rists recommend looking away at least every 20 minutes. “Staring at a screen is like holding a weight over your head,” North says. “Every time you look away, those muscles relax.”

Digital Eye Strain is on the Rise

And most bifocals and reading glasses aren’t designed for computer use. “Get prescription eyewear specifically for work,” says North.

Never Rinse Your Contacts in Tap Water

Acanthamoeba, a rare but nasty sight-­destroying bug, may lurk in your water supply.


Tips for Optimal Eye Health

The Sooner the Better

Timing is of undeniable significance when it comes to treating most serious eye conditions like AMD and glaucoma. The sooner they get diagnosed, the higher is the probability of treating them successfully. So, start consulting your eye doctor regularly before it’s too late.

Avoid Excessive Coffee Consumption

To be honest, that hurt me the most as well, but I still prefer healthy eyes. If the thought of a steamy cup in front of you every afternoon is too strong to resist, try replacing coffee with green tea. In addition to fulfilling your body’s fluid requirements, green tea is known to be a great source of catechins, which along with other antioxidants (like vitamin C, vitamin E, zeaxanthin and lutein) help eyes fight against various eye problems including cataracts and AMD.

Sharing Your Towel is Not a Good Idea

Being generous is one thing and sharing your towel is a totally different one. It’s more like choosing between the two, because sharing face towels and washers means getting your eyes vulnerable to contagious eye infections like conjunctivitis (or pinkeye).

Sleep Well

Your eyes can also get into trouble if you are in a habit of skipping sleep regularly. Adequate sleep ensures that your eyes are well rested and strain free.

Stay Hydrated

Talking of dry eyes, dehydration can also lead to it. Human body relies heavily on water to function smoothly. If you are not conscious about fluid level in your body, tear production in your eyes is also affected amongst a myriad of other complications, which results in dry eyes. Simply, stay hydrated to keep your eyes out of trouble.

Pick The Best Carpet Flooring For Your Living Room

Tips for Choosing Carpet

Start the Countdown

Nothing compares to the soft, luxurious feeling of carpet under your feet. Carpeting provides a safe, comfortable spot for kids to play and may even reduce the risk of injury during a fall. Sure, carpet requires a bit of extra maintenance compared to vinyl or tile, but there’s simply no substitute in terms of sound absorption, warmth and overall comfort.

Pick the Perfect Padding

Don’t be tempted to skimp on carpet padding to save a few dollars. Just as a building needs a solid foundation, carpeting relies on a layer of padding for support, strength and a bit of extra cushioning. You can’t see the padding, but you’ll definitely spot the extra wear and tear on your new carpet if you pick an inadequate padding material.

Consider Various Carpet Styles

Carpet comes in many styles, including plush, Saxony, Berber, textured and frieze. These terms apply to its pile, which is the surface you see, created from yarn tufts that are either folded over into loops, cut straight across or both. While each style has a distinctive look, that shouldn’t be your main consideration. Instead, look at how well your lifestyle meshes with a particular carpet style. Plush carpeting, for example, is made from tightly twisted pile, and is thick, soft and inviting. But it also shows footprints and vacuum tracks, and can develop something called “pooling,” or areas that appear shaded because the normal direction of the carpet fibers has been reversed. Saxony, the most common type of carpeting, is similar to plush. These carpet styles work best in low-traffic areas like formal living rooms and master bedrooms.

Don’t Blow Your Budget

Even the most luxurious carpet doesn’t have to cost a fortune. Shop around to find carpet that fits your lifestyle and budget. Always request separate pricing for materials and installation so you can make an “apples-to-apples” comparison among different suppliers.

Select Your Carpet Provider with Care

You can purchase carpet in a variety of places — carpet showrooms, of course, but also flooring companies, furniture stores, large department stores and even online. While you can end up with beautiful carpet that’s expertly installed using any of these options, your best bet is to select a reputable establishment that specializes in carpeting.


The Do’s and Don’ts of Choosing a Carpet

Deciding What You Like With Confidence

Do decide on a style that works for you. While there are hundreds of carpets available, they can all be narrowed down into one of only a few style categories. Learn about the benefits and drawbacks of each carpet style, so that you’ll know whether it will work in your home.

Finding a Retailer

Do shop around and find a retailer you are comfortable with. Many people feel vulnerable when shopping for carpeting because the quality of the carpet isn’t always immediately apparent, so customers often have to trust the salesperson. Make sure that you deal with a salesperson you feel you can trust, at a store where you can expect to have a positive experience.

Determining Quality

Do learn how to tell the quality of a carpet. You don’t have to become an expert on the subject, but if you have an overall sense of the various factors that contribute to a carpet’s quality and how well it will perform, then you can avoid choosing the wrong carpet.

Understanding Fibers and Warranties

Do learn about the fiber types and figure out which one would work best for you. Not all carpet fibers are created equal; for example, there are natural fibers, such as wool, and synthetic fibers, which are more commonly used in wall-to-wall carpet. Understand the characteristics of each fiber type so that when you go shopping, you can almost immediately narrow down your selection.


How to Select the Perfect Carpet

Though numerous carpet options are available, there are basically only two styles of carpet — loop pile and cut pile.

In the loop-style pile each of the ends is connected into the backing so there’s a continuous loop. If you actually ran a pin underneath, you would feel the loop.

In the cut-style pile, the loops are actually cut so that there are individual ends sticking up through the backing. If you ran the same pin through there the pin would lift right up. It is like a sheer cut pile.

Fiber is a critical area when it comes to carpet. There are three basic fibers used today in the carpet industry:

  • Polypropylene, such as the loop-style pile.
  • Polyester, which is made from recycled beverage containers.
  • Nylon, the most popular and durable fiber by far.


How to Choose Carpet

Nylon outperforms all other fibers in durability, resilience and easy maintenance. This is a good choice if you want your carpet to last a decade or longer, for high-traffic areas, and in homes with kids and pets (Photo 1). Higher quality nylon fibers are “branded,” and the carpet label will use terms like “100% Mohawk Nylon” or “100% Stainmaster Tactesse.” Lower-quality, “unbranded” nylon fibers are listed simply as “100% nylon.” The strongest and softest type (and most expensive) is 6.6 nylon. Nylon carpet cost is $10 to $45 per sq. yd.

Triexta (brands include Smart-Strand and Sorona) is a newly classified fiber derived partly from corn sugar (Photo 2). It has excellent, permanent anti-stain properties (nylon must be treated with stain protectors over its life span). It also has good resilience, but it’s too soon to tell whether it will match the durability of nylon in high-traffic areas. Because of its superior stain resistance, this is a good choice if you have young kids or pets. Triexta carpet cost is $20 to $45 per sq. yd.

Polyester (also called PET) is stain resistant, very soft and luxurious underfoot, and is available in deep and vibrant colors (Photo 3). However it’s harder to clean, tends to shed and isn’t as durable as nylon. It’s best used in low-traffic areas (like bedrooms) and in households without kids or pets. A nice, cushy choice if you like to exercise on the carpet. Polyester carpet cost is $8 to $18 per sq. yd.

Olefin (polypropylene) is an attractive, inexpensive fiber that’s strong and resists fading, but it’s not as resilient as nylon (Photo 4). It’s most often made into a looped Berber with a nubby weave that conceals dirt. It has good stain, static and mildew resistance. Olefin carpeting is often selected for high-traffic “clean” areas such as family rooms and play areas. Olefin carpet costs $8 to $25 per sq. yd.


How to Choose the Best Carpet for a Modern Home

Consider Durability

One of the reasons so many people choose hard flooring is that it tends to be more durable and easier to clean than carpet. While that’s true in most cases, some fibers are more robust and low-maintenance than others.

You can identify the durability of most carpets by checking their tuft twist, density rating and face weight. The density rating should be at least 2,000, while the face weight should be at least 40 ounces. Also, look for a tuft twist of five or more.

Choose the Right Pile

When you start searching for a carpet for your modern home, you’ll need to know whether you want a woven or tufted pile. Generally speaking, modern spaces tend to be more conducive to tufted carpets, but not always. To make the right decision, you need to know the characteristics of each pile type.

Woven Pile

There are two main varieties of woven carpet: Axminster and Wilton. They’re both made the traditional way using loomed methods, and they’re both relatively expensive.

Choose the Right Level of Softness

Softness isn’t usually a word used to describe a modern living area. Yes, a soft carpet might be great for lying on, but it might confuse the overall aesthetic. Limit your search to short-pile carpets made with manmade fibers — or at least a combination of manmade and natural fibers.

Alternatively, you could go the other way and choose something extremely deep and luxurious. After all, a sumptuous floor covering can be a great way to relieve the monotony of clean lines and minimalism.