Cockroaches Facts And Termination

COCKROACHES: THE GOOD, THE BAD, AND THE UGLY

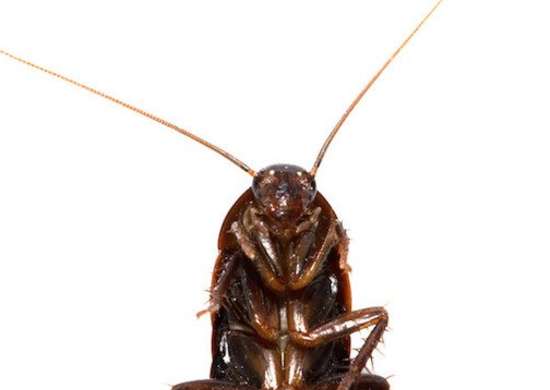
Upon hearing the word “cockroach,” most people involuntarily grimace or shudder. These bugs don’t have a good reputation, and they’re usually towards the top of people’s “Most Disgusting Pests” lists. But are cockroaches all that bad? Let’s take a look.

THE GOOD

The truth is that the environment needs these little guys; more specifically, cockroaches (also known as water bugs) help play a large role in the ecosystem’s nitrogen cycle, where nitrogen moves from bacteria, animals, and plants to the ground and the air

“Most cockroaches feed on decaying organic matter, which traps a lot of nitrogen. Cockroach feeding has the effect of releasing that nitrogen (in their feces) which then gets into the soil and is used by plants. In other words, extinction of cockroaches would have a big impact on forest health and therefore indirectly on all the species that live there.”

THE BAD

Okay, so cockroaches aren’t all bad, but they’re not all good, either. These creatures can feed on almost anything, including (but not at all limited to) bread, beer, dead skin flakes, hair strands, glue, and baked goods

These bugs tend to target places that are unsanitary and damp or used to prepare and store food. Common sites include bathrooms, sewers, kitchens, restaurants, grocery stores, and bakeries. When they’re feeding, cockroaches “produce odorous secretions” that not only contaminate food, but can also alter the flavor of the food and leave behind an unpleasant odor, especially when there are lots of cockroaches.


HOW TO GET RID OF COMMON BUGS AND PESTS

COCKROACHES

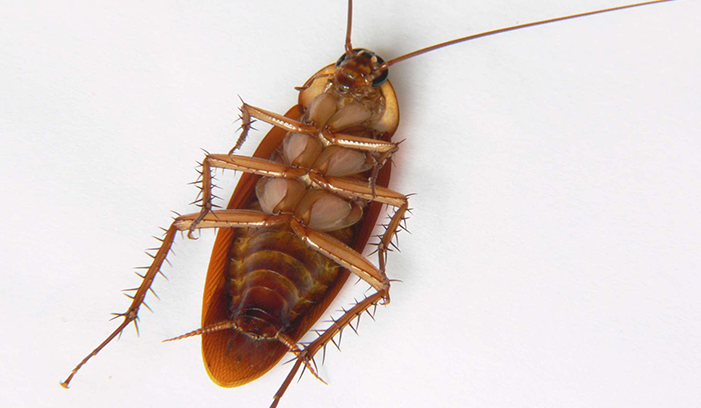
Cockroaches are the most common household creepy crawlers you will encounter in Japan. There are a variety of different species, but the kind found most frequently here might be bigger than what you’re used to. Most people believe that cockroaches hang around in dirty, unclean or garbage areas because of food. But, don’t forget that they can live weeks without food. The hot, humid summer climate is perfect breeding ground for these, the most versatile of insects. Your apartment is far from dirt, but you will still see cockroaches from time to time. Cockroaches come out most, when things are moved around. So when you first move in, you may notice cockroaches coming out of hiding, but don’t panic, it’s not uncommon. They go back to hiding when things settle down and you won’t see them much again if you can keep your place reasonably clean.

Do not leave food or dishes for a long time.

If food and dirty dishes are left until night, it will be a good food for cockroaches. When cockroaches are crawling, disease-causing bacteria may spread and cause food poisoning. Cleaning frequently is probably the best form of prevention.

Let’s clean the shades

If there is rubbish and cooking waste on the back of a refrigerator, under a stove, and places where cockroaches are likely to be hidden, it becomes food for cockroaches.

Discard unhygienic items immediately.

If unsanitary items (raw garbage, dirt on the drainage port, etc.) are left as they are, there is a risk that cockroaches will carry pathogens

If you find one in your apartment, remove the cockroach as soon as you can. For that you will have to spray it and then throw away. But, keep in mind that they are really fast, they can fly.

Note that conventional bug sprays are not effective at cockroaches. Instead, you will have to use specially targeted at these bugs. There are also traps with a sticky pad where you can put food to attract them. These are pretty effective and work nicely because cockroaches are usually more active at night.


Facts About Cockroaches You Won’t Want to Believe

With ancestors tracing back more than 280 million years, cockroaches have been around for an incomprehensibly long time, and they’re here to stay. Because no other household pest provokes such fervent anxiety, disgust, and downright terror, we teamed up

Believe it or not, there are well over 4,000 different types of cockroaches—that we know about. Some estimates suggest we’ve discovered only about half the total number of species. Though most live in the wild, at least a few tenacious species have become uncomfortably common, extremely unwelcome guests in our houses and apartments.

Cockroaches Endure

You may have heard the myth that a cockroach can live without its head. Well—it’s true! According to the National Pest Management Association, a headless cockroach can live for weeks, moving about, reacting to touch, and exhibiting other basic behaviors. That’s because the insect breathes not through the nose and mouth like we do, but through openings along the body. Not only would the decapitated body of the cockroach survive, but, at least for several hours, so would the separated head.

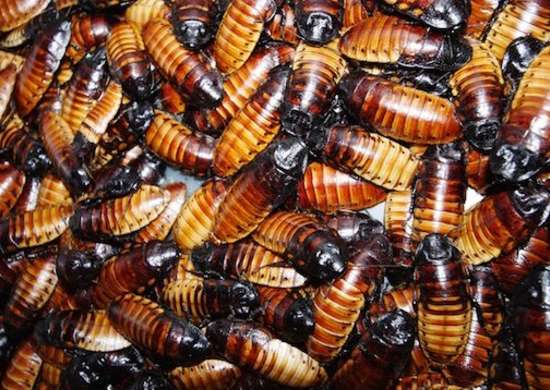
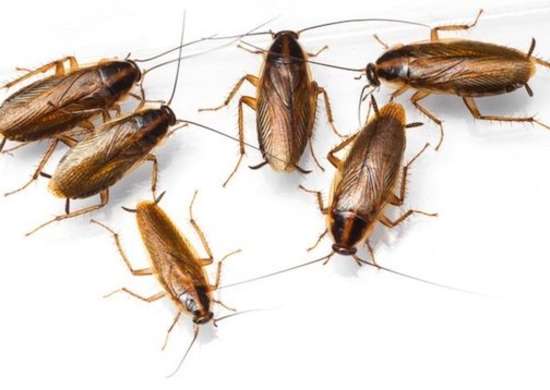
Cockroaches Multiply

The German cockroach, which is brown with two stripes behind its head, ranks among the most abundant in the United States. That may be because, at any given time, a female of the species can be carrying 40 eggs. With an incubation period that lasts only three weeks, one German lady roach can hatch up to 700 baby roaches in the course of a year. Even more alarming: Some more recent generations of German roaches have shown resistance to a number of treatment options.

Cockroaches Astound

If you thought the roach you spotted last night was oversize, wait until you get a load of this: The wonderfully named rhinoceros cockroach is the heaviest in the world, typically weighing more than one full ounce. It’s also one of the longest-living of all insects, with an average lifespan greater than 10 years.


Why is it so Hard to Kill a Cockroach with your Shoe?

Food and Water

German cockroaches, Blattella germanica, the most common domestic roach in the United States, have been observed to live 45 days without food, and more than two weeks with neither food nor water.

Cockroaches will eat almost anything including glue, feces, hair, decayed leaves, paper, leather, banana skins, other cockroaches, and dead or alive humans. They will not, however, eat cucumbers. They are particularly fond of dried milk around a baby’s mouth.

Why is it so hard to kill a cockroach with your shoe?

Schweid observes that “when a cockroach feels a breeze stirring the hairs on its cerci, it does not wait around to see what is going to happen next, but leaves off whatever it is doing and goes immediately into escape mode in something remarkably close to instantaneous fashion.” Studies show that a cockroach can respond in about 1/20th of a second, so “by the time a light comes on and human sight can register it, much less react by reaching for and hoisting something with which to squash it, a roach is already locomoting towards safety.”

Blood

Cockroach blood is a pigments, clear substance circulating through the interior of its body, and what usually spurts out of a roach when its hard, , outer shell—its exoskeleton—is penetrated or squashed is a cream-colored substance resembling nothing so much as pus or smegma.

Brains

Cockroaches have two brains—one inside their skulls, and a second, more primitive brain that is back near their abdomen.


Ways To Get Rid Of Roaches

Cockroaches are one of the most hated pests in our homes, and, unfortunately, they are also among the hardest pest control jobs. It’s very hard to completely get rid of roaches, and even harder to keep them gone, especially if you live in an apartment.

Eliminate Food And Water Sources

This is a common piece of advice, and it’s good, but limited in effectiveness. Eliminating large sources of food, and especially water can reduce the number of roaches your home can support, but it’s unlikely to completely rid your kitchen of roaches. Why? Because roaches don’t need a lot of food to survive and thrive.

A single crumb of food on the floor is a good meal for a roach. Not only that, but they will eat things that you don’t even think of as food. Grease spots on pages of your cookbook, for example, can be a good meal. They are related to termites and can nibble on wooden spoons, cutting boards, and other tools that have absorbed food or skin oils.

Insecticide

Insecticide is also a reasonable approach to control roaches, but not eliminate. You can kill the roaches you see, but the ones you don’t see will still multiply. And then there’s the next generation of roaches that will be born. Even insecticides with residual action won’t kill long enough to completely eliminate roaches, which will also grow more resistant to the toxins you are using

Poison Bait

Poison baits work better than spray insecticides. Roaches eat the bait, which will kill them, but not right away, and go back to their homes. As these roaches defecate, other roaches eat their feces and get poisoned.

Reasons To Go With A Custom Home Builder

Building A New Home On Your Own Lot: What You Need To Know

Before deciding to build a home on your own lot, take our advice on how to choose a homebuilder to help ensure you don’t overlook anything critical.

Building a home on your own land can be one of the most satisfying experiences of your life — as long as you’re prepared. There are a lot of variables to consider, and you’ll need the help of professionals to ensure you don’t overlook the important details before breaking ground.

HIRE A HOMEBUILDER EARLY IN THE PROCESS

Our biggest piece of advice for anyone who wants to build on their own lot is to consult a builder before buying land. Choosing to involve your builder early on in your decision-making has the potential to save you time, and a lot of money in the long-run.

Your home builder will not only help you determine the best placement of the home, but also whether or not you should build on a particular lot at all. You see, it’s easy to get swept up in the vision of your future home on an attractive piece of land, but there’s always a chance there are problems you don’t see right away – more on that a little later.

CHOOSING A BUILD-ON-YOUR-LOT HOMEBUILDER

There’s a lot of work that goes into choosing a trustworthy homebuilder, especially when you want to build on your own lot.

You need to look for a local team with visible experience in build-on-your-lot projects. These teams are more likely to keep your build on budget as well as bring a critical understanding of zoning laws, restrictions, and easements. Hiring locally is especially important if you’re planning to build in a rural area, where the rules are more than likely different than in-city.

What to look for in a builder:

  • Experience – Do they do a lot of build-on-your-own-lot projects? Take time to ask for a reference or two and talk to them about their experiences.
  • Floorplans – If you’re going to purchase your own lot first, it might be in your best interest, financially, to work with your builder to choose a floorplan they’ve done before, or customize any of their existing designs. The important thing to look for is options – do they have them, and are they flexible in delivering what you want?
  • Purchasing-Power – A homebuilder with good connections is more likely to get you a competitive price on building materials, especially if you’re using one of their floorplans.

Starting with the initial inspection of your lot, your builder should be transparent and up-front about all the things that’ll have to happen BEFORE construction on your home begins. Things like removing earth, bringing dirt in, building a driveway or special foundation work should be discussed and factored into your project’s overall budget.


Tender documents and contracts

Tender documents must clearly identify any sustainability practices or materials certification requirements that are different from business as usual. Attach schedules to the tender documents that tenderers are required to sign.

Allaying builder concerns about the unfamiliar aspects of sustainable practice can reduce the amount they allow for unknown contingencies.

Contingency sums

Areas of unknown risk can be accommodated through contingency sums or allowances that can be called on to cover unexpected costs. They are often used to cover unexpected subsoil and foundation related costs; increasingly they are being used to provide flexibility in choosing innovative sustainable technologies and practices.

Prime cost schedules

Another way to overcome risk aversion on the part of the builder is to ‘nominate’ subcontractors to supply and install innovative technologies and provide the builder with a ‘schedule of allowances’ (or ‘prime cost schedule’) to include in the tender.

Many designers choose and specify the exact make and model of important or high cost items such as windows and doors, solar hot water systems, smart metering and energy control systems, and on-site renewable energy generation. You or your designer can have these items quoted by preferred suppliers and nominated in the contract as prime cost schedule items to avoid substitution of inappropriate or substandard products by competitive tenderers.


SCHEDULE THE FIRST MEETING

Now that you’ve chosen a home builder you want to work with, it’s time to meet with them. The goal of your first meeting should be to establish exactly what styles & customizations you want.

If you already know what floorplans you’re interested in, you can arrive at the meeting ready to discuss these details:

  • Foundation Types: With Reinbrecht, you have three options for your foundation: a slab, basement, or crawlspace. This decision can weigh on your budget and speed of the build.
  • Interior Finishes: Floorcovering, cabinetry, countertops, lighting, plumbing fixtures, fireplaces, and trim packages are all interior finishes that will need to be specified by your preferences.
  • Exterior Finishes: Doors, windows, roofing, brick/vinyl/stone, and decks/porches/patios are exterior factors that you’ll need selections for.
  • Extras & Upgrades: Are you interested in upgrades like fireplaces, smart home technology, and crown molding?

If you don’t have your house plans, don’t worry. Refer back to your list of home necessities to help answer your home builder’s questions on your size, design, and budget needs. Your home builder will help you choose and customize a design that fits those needs from their library of available plans.


Discover How Long it Takes to Build on Your Lot

Building a new home takes four to six months if your home builder has already built your floor plan, but it can take significantly longer if you’re having a completely new design built or if you’re asking for extensive customization. So, if you have a specific time frame for moving, you’re likely to be better off with a semi-custom design rather than a completely custom-designed home.

“If you’re adding space to the house, we can usually turn that around quickly, but something more complicated could take a week or two to price out,” says Schumacher. “We average 122 days from putting in the foundation to finishing our houses, but bigger homes take a little longer.”

Homes builds modular homes, which can be faster to build, as well as less costly than other new homes. The parts are built off-site while the foundation for the home is under construction. Once the parts are delivered, says Rutherford, construction takes 45 to 60 days.


Experts and Professionals You Need for Home Building

Every one of us has that desire to own a house. But not all of us are able to attain such desire because of the lack of resources and money to spend for it. That is why, once we are able to save money for house construction, we would make sure that not a single cent will be wasted. You will be assured that all your savings will grow into a beautiful and cozy house if you pick the right people to work on your home’s building.

Do you know who these people are? We will be giving you a list of those people who can aid you with the construction. Do not just pick anyone who appears to know everything because that person might only need your money. So, before you hire people, know what kind of experts and professionals are really needed for house construction. Tap these people when you are ready to build your dream house:

  1. Architects.

Prior to the construction of your home, you would need an Architect to help you with the design. It would be hard to construct without a guide. That is why Architects are important for they are the ones who will design your house. Aside from the exterior design, they will also help you make good use of your existing space ensuring that there will be good traffic, function and accessibility to the entire home. You can also let the Architects know what you want for a home so that they can design something that would suit your taste. The Architects will provide you the blueprints of your home’s design.

  1. Civil Engineers.

While the Architects are dealing with the design, the Civil Engineers look into the structure of your house. They review the plans if it meets local building codes and check if it is structurally sound. Civil Engineers make sure that your house won’t collapse by checking on the foundation and the materials that you will be using. Engineers will be visiting your construction site from time to time to check if they follow the provisions in attaining a durable and stable house.

  1. Electrical Engineers.

Of course, you will be using electricity in your house. You cannot just let anyone do this because the arrangement and distribution of wires and other electrical items are crucial. You do not want to have a fire in your home due to faulty wirings. You will be seeing Electricians a lot of times during the construction. In the framing stage, they would be preparing the wires and boxes. After the drywall is done, they will now place the cover plates and other items to these boxes. Once that is done, they will be testing the electrical system to make sure it works well.

  1. Master Plumber.

Plumbers deal with water lines, sinks, faucets, drain lines and even gas lines for your cooking equipment. They would help you to have a good water and sewerage system in your house. Plumbers work on your kitchen and bathroom and other area where you need water and drainage.

  1. Contractors.

Contractors are those people who are in charge of building the house. They are the ones who deal with other persons to work on the building. Most of the time, contractors have many crews that are knowledgeable of the construction process. Contractors are the ones who spend a majority of time taking care of the construction, watches laborers and workers on the site and supervise the work. So, make sure to choose a good contractor.

Home Exterior Painting Contractors

Tips on How to Choose the Best Exterior Paint Colors

It is usual that we concentrate more on our interior designs. We want it to symbolize our individuality, but we seldom realize that it’s the exterior that gives the viewer the first impression about your home and your personality. But choosing an exterior wall paint colour for Indian climate is not an easy job as there are a lot of factors depending on it

Combinations

When it comes to the exterior wall paint colours, stick to one or maximum of two exterior home painting colours, as more colours on the exteriors appear cluttered. If you feel that using a single colour will make your house a monotonous sight, then using different shades of the same colour is the best approach. These combinations will also give a good appeal to your house.

Choice of colours

One of the best exterior paint colour idea is to avoid black and other dark colours. These colours absorb dust and make you repaint your exterior wall paint frequently. However, it is better to use a pale shade of the dark colour and mix them with another light colour. Since the dark colours give a sense of dignity to the house, it can also be used to highlight the main features of the house.

Durability

The type of exterior home painting colour used will decide the durability of the paint colour irrespective of the colour. High gloss paints are not befitted for exterior wall paints even though it has the highest durability. For a perfect exterior wall paint finish, satin and eggshell are the best choices as they have high durability and easier to clean. These finishes also enhance your exterior paint colour ideas.

Effect of nature

Whatever colour and finish you use to your exterior walls, it will only look good if it blends with your surroundings. Especially people living in hilly regions and near the sea should spend more time on choosing their exterior wall paint colour. Their exterior wall paint should go with the mood and climate of their surroundings and backdrop. Cool colours are the best house painting ideas for houses in hilly regions as it suits the climate and the greeneries surrounding the house.


How to paint an exterior wall

There’s some things you need to know when preparing and painting an exterior timber weatherboard wall. A splash of paint can make any surface look fantastic, and it doesn’t take very much to do it. We’ll show you how in a few simple steps.

Preparing the exterior wall

The first step is to take a good, thorough look at the wall. If there are any gaps between the boards, use the caulking gun to fill them up with filler and make a weatherproof seal. Use some rubber gloves while doing this so that it doesn’t get all over your hands.

Painting the exterior wall

There’s many different types of exterior paints available at your local Bunnings Warehouse. If you’re not sure about which is best for your place, a Team Member in-store can help you choose.

Make sure you stir the paint in the tin before using it. Then, tip it out into a paint pot and give it another stir. Using the pot is means you don’t need to carry a large tin around with you and risk spilling it unnecessarily.

Other helpful painting tips

If you’re using acrylic paint, it’s water-based, so get your brush wet first and then flick it off so that the paint won’t stick to the top of the brush.

If it’s above 30 degrees or below 10 degrees, don’t start painting as it’s too hot/cold for it to dry.

On a hot day, you’ll notice the brush fills up with paint. To prevent this, clean it out with water every half an hour or so to keep it fresh.

If you’re going to paint a downpipe a different colour to the wall, it’s best to paint it first. Give it two coats and then you can wrap it in newspaper so that you can paint the wall behind it without worrying.

Consider using undercoat to increase the longevity of your wall and paint.


Exterior Painting

To a contractor, painting the exterior of a house is the best way to keep it in good shape. Caulk and paint may be a home’s only weatherproofing, so it’s essential that they be applied with skill. If siding is painted poorly, for example, it can incur very costly damage, especially in a harsh climate. Bottom line: Hiring professionals to paint your exterior may feel like a big expense, but it’s nothing compared to what you’ll pay later if the work isn’t up to snuff

How Does Exterior Paint Stand the Test of Time?

While weather can be unpredictable, some regions offer especially harsh conditions for exterior paint. Subfreezing temperatures, sleet, storms, and punishing heat are just a few of paint’s natural enemies. To make matters worse, no building stays put completely; every structure shifts over time, which can make things hard on an exterior paint job. Houses swell in hot weather and contract when it’s cold, and wood cracks and warps all the time.

The amount of skill that goes into applying exterior paint strongly influences its ability to withstand the elements. Of course, it’s also wise to use first-rate materials. The combination of expert work and top-notch products should minimize future costs for the homeowner. Good paint, well applied, also boosts a house’s value — never a bad thing in the current economy

Painting Outside Surfaces

A successful painting project must proceed step by step. The first step is a scan of the house’s exterior to determine what kinds of paint products will be needed.

Slow But Steady Creates Lasting Work

Every home exterior is unique. This means that your project may call for techniques and types of paint that your neighbor’s didn’t require. Stained wood exteriors demand the proper stain; cedar siding and redwood trim are common, but many other varieties exist. If outside surfaces are to hold stain for a long time, they must be permeable. In some cases, the prior stain may need to be disposed of. Whether a home is painted or stained, surface preparation should not be given short shift.


Tips for painting a brick home exterior

Looking for a quick, easy and affordable way to transform your dated brick home exterior? Painted brick is one of the hottest home exterior trends right now, favoured for its cost-effective and totally transformative results

Updating the exterior of your home is a sure-fire way to up your street appeal and increase the value of your property, but at what cost? Rendering or cladding the exterior of your home can prove to be an expensive exercise that may not entirely pay itself off when it comes to calculating the resale value.

That’s where the power of paint comes into play. Paint is a DIY renovator’s best friend. It’s easy to use, affordable and can transform a tired looking space, piece of furniture or in this case, a brick home exterior, quickly and effectively.

TIPS FOR PAINTING OVER BRICK

“Painting exposed bricks is an effective way of refreshing any room or home exterior,” says Fiona King, Taubmans Colour Expert. “Walls offer a canvas for artistic vision and injecting much needed colour – this inexpensive updating process can transform the style and feel of a home.”

A wall that has been properly prepared will not only make painting easier, but will help achieve a vibrant, long-lasting finish. Prior to painting, ensure to remove any lingering dust and dirt by thoroughly washing the brick wall with a mild soap solution of household detergent and water. Once clean of containments, rinse the wall and ensure it is dry before proceeding.

For good adhesion and a smoother, more professional looking top coat, ensure to prime your surface and leave to dry thoroughly before painting. A second coat of primer is important when dramatically changing the colour of the brick wall, as it aids in effectively blocking out dark brick colour when painting with a lighter paint colour.

To ensure the best finish from your paint job, use a minimum of two – three coats of paint.


PAINTING TIPS & FREQUENTLY ASKED QUESTIONS

How to select interior color

Light colors will help lighten a dark or poorly-lighted room, and provide a psychological lift. Light colors also make walls and ceilings appear to be further away, and can be used to make small rooms appear larger and more open.

Dark colors can give a room a dramatic look, and create a sense of intimacy. They can also make walls and ceilings appear to be closer, and can be used to make a large room appear smaller and more cozy.

Bright, vibrant colors will give the room a cheerful feel, and a sense of excitement.

Reds, yellows and oranges are warm colors. When these colors are used in a room, they make the walls appear closer, creating the illusion of a smaller room.

Violets, blues and greens are cool colors. When these colors are used in a room, they make the walls appear farther away, creating the illusion of a larger room.

Tans, greys, and off-whites tend not to attract attention, and can be used to create a restful, relaxing atmosphere. They are also easier to coordinate with other colors in the room.

For long, narrow rooms, paint the shorter walls a darker color. This will make these walls appear closer together, so the room will seem less like a tunnel.

For square rooms, paint one wall a different color, preferably the wall first seen when entering the room. This will give the room a more dramatic look and make it seem less ‘boxy’.


To decide which paint sheen is best for your project, ask yourself the following questions:

What room, area, or surface is being painted?

Will the painted surface be handled frequently, or subjected to abrasion or excessive wear?

Will the painted surface be washed or scrubbed frequently?

Will the painted surface be regularly exposed to moisture or high humidity?

Does the surface being painted have any nicks, dents, or surface flaws present?

How to select exterior color

When selecting exterior paint colors, take the fixed colors into account (like the roof, brick, stonework or any stained wood), and make sure all the colors look good together.

Light colors will make a small house seem larger, and dark colors will make a large house seem smaller.

A large, boxy house can be broken up by using a trim color that contrasts the body color.

A small house will appear larger if the trim is painted the same color as the body of the house.

Light colors will help keep a home cooler in warmer climates, because they absorb less heat. Dark colors will help keep a home warmer in cooler climates, because they absorb more heat.

Because light colored paint films absorb less heat, they will generally last longer than darker colored paint films.

Some communities have restrictions on what colors can be used on house exteriors, so check this out before you make your choice.

Factors To Consider When Buying Kitchen Faucet

Best Kitchen Faucet

Choosing The Best Kitchen Faucet 2018 – Buyer’s Guide

To purchase the best kitchen faucet, you should be very keen so as to find something that will suit your needs.

The first thing you should do when you’re out looking for kitchen sink faucets is that you find the ones that’ll last for long. They are often created form quite strong material, which ensures you use them for long without the need to replace them.

It will help you save on costs since once you purchase the faucet you can to relax and not concern yourself with replacements or repairs. The faucet that you buy will need to remain in great condition, and it shouldn’t change color.

This will ensure that your kitchen stays in great condition and they won’t look out of place. It is important to get a good faucet that goes well with your kitchen decor and other kitchen appliances so as to get a complete look in your house

The items should not drip in order to serve you without any issue. It will make sure that your kitchen stays dry you will be able to continue with your day-to-day activities with no disruption.


Choose the right kitchen sink, faucet and hardware

Once you’ve selected your cabinets, appliances and countertops you’ll need to select your sink, faucet and hardware. While these kitchen features add stylish decor to your kitchen, they are also essential tools for making your kitchen function properly. Problem is the price for these items is across the board, meaning you could save thousands by going with base or cheaper models. The question is do you really save if the product sacrifices quality.

did a side-by-side comparison of a luxury and a bargain pull-down kitchen faucet. Why a faucet? Because a pull-down sprayer is the most useful and used kitchen faucet type. It’s high enough to accommodate high stock pots and to rinse off larger cookie sheets, and its style works in both traditional and contemporary kitchens

The expensive faucet was designed using simple, sleek lines and a hefty solid-brass spray head. The three-layer electroplated nickel finish over brass gives the faucet a warmer look than chrome, while the spray nozzle is corrosion-resistant and easily clicks into place. The pull-down component is a smooth braided-nylon hose that extends out 18 inches. The handle uses ceramic discs on the inside to ensure easy use over extended periods of time, while the leak-resistant braided steel hoses come ready for the DIYer to hook up the cold and hot water supply lines. But all this will set you back US$1,170.

The bargain faucet was priced at US$220 and was constructed of plastic with a painted chrome finish. This material choice makes the faucet less durable than its more expensive brass counterpart, but also lighter. There was no water-flow pause button (which is included with the more expensive options) and the handle is also equipped with ceramic discs on the inside. Keep in mind that the steel hoses used for the water-supply connection are not included and must be sold separately.

The good news is that on all but the cheapest faucets, you’re bound to find top-notch valves and tough, ready-to-work finishes. Also, most brand-name options come with lifetime warranties (for the original buyer) that covers defects and even fading and peeling of the faucet finish.


Best Smart Kitchen Faucets to Make Your Kitchen Experience Less Stupid

If you’re setting up a smart kitchen, then one area to look at is your faucet. A smart kitchen faucet lets you easily turn on the water, even when your hands are full. Some are even voice-activated!

In many ways, the kitchen faucet is a cornerstone of the kitchen itself. When it’s time to cook, clean, or even make a pitcher of lemonade, you need the kitchen faucet. But you might think there’s no point in getting a smart version of your kitchen faucet—after all, it works well already. But think about all the times your hands were dirty or full and turning the faucet on wasn’t convenient. A smart faucet can help with that, and some can help with cooking duties by pouring a set amount of water when you ask, like a cup of water for instance. But you’ll want to keep a few things in mind before you buy one.

What to Look for in a Smart Faucet

Not every smart faucet is the same, nor do they all offer the same features. The one feature nearly every smart faucet has in common is a pull-out sprayer as opposed to a separate spray hose.

For space requirements, you’ll want to keep that and a few other things in mind:

Activation features: Smart faucets are typically either touch, gesture, or voice-controlled. You don’t have to pull the included handle, but that’s an option, too.

Power supply: Smart Faucets require either batteries or an outlet for power. Batteries require occasional changing, but an outlet requires convenient plugs that aren’t controlled by a light switch.

Finish: You want your faucet to look good in your kitchen. We’ve linked to traditional options like brushed nickel or stainless steel, but nearly every smart faucet comes in multiple finish options. You might need to search for a separate listing to find the finish you want.


How To Get Your Kitchen Faucet Clean

Your kitchen faucet is what you most likely use to clean your dishes, fill cups with drinking water and use for water when cooking or cleaning. How many times have you thought to look at the underside of your kitchen faucet though? Is it a spot that you remember to clean often? If not, it definitely should be. Kitchen faucets are a breeding ground for mold, mildew and lime buildup, and should be cleaned at least once every couple of weeks. I’m going to show you a super easy way to clean a kitchen faucet so you can feel good about the water you are using on a daily basis.

To clean your kitchen faucet, all you need is distilled white vinegar, a baggie and a rubber band or elastic hair tie.

Any white vinegar will do. Vinegar is an amazing disinfectant and will help kill any germs and bacteria

Pull the baggie of vinegar up over your kitchen faucet and secure it with your rubber band or hair tie and let sit for 20-30 minutes

Remove the baggie and discard. Use a dish brush to remove any bits that are left on the faucet head and rinse with warm water.


Kitchen Faucets: A Buying Guide

Anyone who has struggled to work with and use a substandard or ill-fitting kitchen faucet knows the importance of buying the right choice. It has to function well in the space, be appropriately sized for everything from pots and pans to tall vases to fit easily beneath, and yet it has to look good, too. In this buying guide, we are going to consider the factors necessary for choosing the ideal kitchen faucet.

How a Faucet Is Used

Choosing the right kitchen faucet begins with a few questions about how the faucet or sink is to be used. For example, if you find yourself frequently washing oversized pots and pans, a bar faucet (something discussed shortly) is not an ideal answer unless the sink is deep, and the faucet mounted properly. Alternately, a tall faucet with a curved neck and perhaps even a pull-down sprayer may be best for shallow sinks and basins.

Naturally, the way the faucet is to be used will also determine the number of handles. After all, a faucet is not just the component from which water emanates. It also has the handles or taps that are turned to generate hot or cold flow.

Depending upon the number of handles, you will need to also make the appropriate number of holes in the countertop. Currently, home and property owners can find faucets with:

Single Handles – These feature a lever-like faucet or handle that will turn towards the user for hot or cold water and a way for hot or cold water. They are ideal when paired with sprayer heads or pull-down faucet types (detailed below).

Double Handles – These are familiar to most and feature a single tap or handle for hot, and a single handle or tap for cold. Depending upon the design of the faucet set, there may need to be two holes in the counter for each supply as well as a third for the faucet head

When thinking about the number of handles you want or require, don’t overlook the general functionality of the kitchen faucet. For example, there are options for:

Single lever functionality

Sprayer functionality

One-touch on/off

Benefits Of A Home Electrical Safety Inspection

Basic Home Electrical: Resetting Your Tripped Breaker

One of the simplest forms of home electrical repair is resetting a tripped circuit breaker. Believe it or not, knowing how to do this single thing can help you solve the majority of all home electrical problems. That way, rather than calling an electrician out for a cost service call, you can begin the troubleshooting process yourself. If you are able to fix the problem with this simple repair, that’s great. If not, then you know that you’ve done your best, but it’s time to call out the electrician.

Circuit breakers are designed to trip to the off position whenever they become overloaded. In order to restore power to that circuit, you must reset the breaker. All of your circuit breakers can be found in your electrical panel, which is typically located in your garage, basement or near your water heater. After you have found your breaker panel, determine which breaker has been tripped. This is pretty easy to do. Simply inspect your breakers to see which one is in the “off” position, or somewhere in between on and off. To reset it, simply push it to the off position, and then flip it back to the on position. If all goes well, this should restore your power.

Circuit breakers will shut off the flow of power to a circuit under the following circumstances:

Ground Fault

A ground fault occurs whenever a ground wire comes into contact with the sides of the metal box that it is housed in, or a hot wire. It is a form of short circuit, and requires repair if it is the culprit.

Overloaded Circuit

Whenever you plug more appliances and devices into a circuit than it can handle, it will cause the circuit to become overloaded. Whenever this happens, the circuit breaker is designed to detect the excess electricity flowing through and cut off the flow of power. This helps to ensure your safety by stopping a potentially dangerous amount of electricity from entering a single circuit.

Short Circuit

Whenever a hot wire comes into contact with a neutral wire, or any other conductive surface, it will cause the circuit to short. This type of electrical issue can be very troublesome, as it is often difficult to identify the exact place that the short occurred. In most cases, a short will be marked by a burning smell, charred or melted wires, or discoloration. When this happens, the wiring must be replaced in order to prevent future issues.

Regardless of what has caused your breaker to flip, knowing how to perform this simple home repair repair is an important part of being a homeowner. This is the first step to solving almost any electrical problem. Before resetting the breaker, always think about what may have caused the breaker to flip in the first place. If an appliance could have caused it, unplug the appliance before resetting your breaker. Otherwise, try and identify what the issue could have been. If you are unable to determine the cause, or the breaker trips frequently, call your local electrician for more assistance.


How to Check and Reset a Tripped Breaker

When your breaker gets overloaded, it shuts off to prevent the circuit from receiving any additional electrical flow that could cause damage or fire. It may seem like a hassle to have to check the panel, but this switch off can prevent a lot of potential damage from happening. Follow these simple steps to restore power and get your electronics up and running again.

  1. Turn off anything you had plugged in and running. Especially the last thing you plugged in because that was likely the culprit of your outage.
  2. Locate your electrical panel. Depending on your home it could be in a few different places, like the basement, utility closet or kitchen. It could be somewhere dark, so grab a flashlight or use your cell phone.
  3. Don’t be worried to open the panel. A second layer of steel covers any of the dangerous stuff. But don’t start flipping switches willy-nilly. Some breakers could be mislabeled, and flipping switches haphazardly could damage delicate electronics. If you don’t feel comfortable, contact a professional to help.
  4. Look at your panel for a breaker that is now in the “off” position or between “on” and “off.” Some breakers even have a light that will show up if your breaker has been tripped. If it’s placed in between, move the breaker to the “off” position before returning it to the “on” position. If it’s already over to the “off” side, switch it on, off, then back on to fully reset it. This will restore power. If it doesn’t, you may want to flip your breaker an additional time.
  5. Plug one or two devices into your outlet and turn one on to test the reset breaker. If your outlet loses power again, you may be overloading the switch. Move a plug or two over to another outlet to redistribute power. Read more about the benefits of using whole home surge protectors for added safety.

If the breaker shuts off again, you might have a short in the panel. Still unable to restore power? A backup generator can be a cost-effective, temporary solution until you can contact an electrician.


HOW TO TROUBLESHOOT BREAKER RE-TRIPS

  • Check for a short by switching on each light. If the breaker stays on, carefully plug in each device. If the circuit breaker trips when you plug something in, you found the source of the problem. Unplug the device and reset the breaker. You can verify a suspected short by examining the power cord for melted insulation. Also, check the plug and outlet for a burnt smell or charring.
  • Check for an overload by plugging everything in and switching everything on. If the breaker trips, either switch off some power guzzlers, like the air conditioner or heaters, or plug them into an outlet on different circuit


How a Circuit Breaker Works

A circuit breaker is a type of electrical switch that controls and protects the wiring circuits that feed outlets, fixtures, and appliances in your home. These special switches can be used as simple ON/OFF switches to turn off circuits to make repairs and improvements, but they also have a special design that allows them to shut off automatically when too much current is flowing through the wires, or when there is a dangerous circuit interruption known as a short circuit. They also shut off the power in the event of electrical surges, such as if a lightning strike suddenly overwhelms the household wiring with too much voltage. The automatic function of circuit breakers offers critical safety protection to the wiring system in your home since the excessive voltage can cause fires or ruin appliances.

Safety Considerations

Never handle circuit breakers or even approach the main circuit breaker box if the floor is damp or wet. Under such conditions, call an electrician or make sure to wait until the floor is dry before opening the breaker box. If a short circuit condition exists, a damp floor can be very dangerous.


The Do’s and Don’t of Resetting a Tripped Breaker

Don’t take your breaker panel apart. Although it may seem simple, your breaker panel is flowing with a lot of power, and many parts inside of the box can cause electrocution when simply touched. If you ever have problems that cannot be solved by flipping a breaker switch, it is best to call the professionals rather than take apart a breaker panel yourself and risk electrocution.

Do turn off lights and unplug your appliances before resetting. It’s always best to ease your house back into power rather than turning on many power-suckers at once. Unplugging your appliances and plugging them back in one-by-one after a reset can help you gradually restore power in your house, and also identify any appliance that may be overloading the circuit

Don’t touch exposed wire or metal parts, only touch plastic switches. There are actually several parts inside your breaker box that are uninsulated and running with a high voltage electrical current. To avoid electric shock, don’t touch anything other than the breaker switches inside your electrical panel.

Do stand to the side of the panel when resetting a breaker switch. Sometimes your breaker box can and will spark when you reset a switch, so it is best to stand to the side when resetting and, when possible, wear safety glasses to protect your face and eyes from potential sparking.

Veterinarian Provide TLC For All Animals

Taking Care of Animals: Pro Tips for Pet Owners

Bringing a new pet into your house can be as intimidating as it is exciting. Even if you have an animal or two at home, a new pet can lead to plenty of unanswered questions.

We dove into some research to dig up tips for taking care of animals, focusing on the most common household pets. Whether you’re becoming a first-time pet owner or have had multiple animal companions, this guide can help your new family member feel right at home.

YOUR GUIDE TO TAKING CARE OF ANIMALS

No matter what type of furry friend you’re welcoming into your family, there are some basic animal care guidelines you should follow. Scan the article to find your species and see your personalized tips.

Basics: Make sure to stock up on high-quality dog food, especially if you’re bringing home a puppy. As the American Society for the Prevention of Cruelty to Animals (ASPCA) points out, puppies typically need three to four meals per day. Fresh, clean water should be available at all times also

It’s important to maintain a safe environment. If your pooch will be staying outdoors, you’ll need some sort of temperature control system to ensure they remain comfortable. That may include a heated shelter during winter and access to cool water during the summer. A microchip or some sort of collar identification is a must for both indoor and outdoor dogs.


Tips to Prepare You for Owning a Veterinary Practice

According to a recent survey by the American Veterinary Medical Association (AVMA), the average graduate has $162,113 in student loan debt. A recent graduate can expect to make a salary of between $60,000 and $80,000 a year. That seems like a good living for someone just out of school – until you take into account all of your expenses: a roof over your head, food on the table and, oh yes, those student loans.

Pay attention to non-compete agreements

Imagine that your friend comes running into the lab room 3 days before graduation. She just landed a job at a large practice that will produce $500,000 to $600,000 in production right away, which translates into a salary of $100,000 to $120,000 a year. You’re working for a small clinic that is privately owned and you’ll be lucky to make $85,000 a year between production and bonus. Did you make the wrong career decision?

Consider home ownership and proximity to available practices

Imagine that you’ve landed a well-paying job at a great clinic. You’re building your savings, settling down and even thinking about starting a family. You’re setting yourself up to buy a practice in the next year or so – and you’re thinking now is the time to buy your dream home.

Jobs, continuing education and relief work

Most veterinary associates who buy a practice do so within 5 to 10 years of graduation. This may seem like a long time, but it can go by in a heartbeat – think about being a freshman in college and being where you are today.

Find a good mentor

Very few people become successful without some help and guidance. That’s why it’s wise to seek out a mentor, someone who can help you grow as a doctor and a professional. Find someone who can be both your cheerleader and your coach. Your mentor needs to have time for you and be committed to providing guidance, feedback and support. Finding a mentor outside of your employer can give you a fresh perspective on daily situations; that person can also stay with you as you move forward to another clinic and eventually open your own.


Tips For Your Trip to the Veterinarian

Taking your cat to the veterinary office can be stressful for your cat and for you. Wellness visits are just as important for cats as for dogs, and cats are so good at hiding illness that routine exams are vital to maintaining their health and catching diseases early.  Once the carrier comes out or our routine for the day changes, they pick up on these cues and disappear. If you manage to get them into the carrier, it can be a stressful journey to the office for both parties.

Providing your cat with good health care, especially preventive health care, can allow her to live a longer, more comfortable life. However, this cannot happen unless you take your cat to see the veterinarian routinely.

Why is My Cat Fearful of Her Carrier?

Cats are most comfortable with the familiar, and need time to adjust to the unfamiliar. So, if her carrier is not an object in her regular environment, your cat does not have time to become familiar with it.

Your cat probably associates her carrier with visits to the veterinarian’s office which is probably not her favorite place.

Respect your cat’s need for time to become familiar with new situations, people, and places.

Stay calm. Cats can sense our anxiety or frustrations, which may cause them to become fearful or anxious.

Helping Your Cat Become Comfortable with the Carrier

The goal is for your cat to learn to associate the carrier with positive experiences and enter the carrier frequently and voluntarily.

Make the carrier a familiar place at home by leaving it in a room where your cat spends a lot of time.

Place familiar soft bedding inside the carrier. Bedding or clothing with your scent can make your cat feel more secure.

Place treats, catnip, or toys inside the carrier to encourage your cat to go inside. Often, you will first see that treats are removed from the carrier overnight. Cats do not learn from punishment or force. Give rewards to encourage positive behavior.

It may take days or weeks before your cat starts to trust the carrier. Remain calm, patient, and reward desired behaviors.

If you still have trouble, you may need to assess the carrier itself and find a carrier that your cat likes. Your veterinarian can help you with this search.

Clean the carrier thoroughly with a non-noxious cleanser, rinse well, and leave in the sun to dry for a day. This can help remove any previously released stress pheromones.

Getting an Unwilling Cat into the Carrier

If your cat needs to be transported immediately to go to the veterinarian or due to another emergency situation, and she is not yet accustomed to the carrier,


Tips for Applying to Vet School

The popularity of veterinary medicine has created a highly competitive admissions process for the available seats in each vet school class. Most of the 30 vet schools in the United States, as well as several international programs, utilize the Veterinary Medical College Application Service (VMCAS) to streamline the admissions process. This centralized service allows students to submit their information to multiple schools by creating a single application.

The VMCAS application is certainly an important part of the process, but there are several additional things to consider when applying to vet school

Find Out Each School’s Admission Requirements

Make sure you have taken the required courses for each school you are applying to. While most requirements are similar, the specifics do vary somewhat from one school to the next.

Document Your Experience

Keep a log that documents your hours working in a vet clinic as well as all other animal-related internships and volunteer activities. Be sure you gain experience working with both small and large animals if possible. Make yourself a well-rounded candidate.

Don’t Wait Until the Last Minute to Start Your Application

Be well aware of the deadline for applications and be sure to have your application materials completed early. Applications through the VMCAS service are usually accepted beginning in May or June, with the deadline being early October. There are many sections that are required and it can take a significant amount of time to complete all areas.


Tips to Help Your Cat’s Veterinarian Visit Go Smoothly

As any caring cat parent knows, a routine visit to the vet is anything but routine. Regular examinations are the right thing to do, but try telling that to your cat. Stress levels run rampant. Emotions are on high. This can be especially true for senior cats that are showing signs of changes in their behavior. If only there was a way to help tame the entire vet experience. The following steps should help you plan and prepare the next time your senior cat is due for an appointment.

Carrier Tips

Be sure to always use a carrier, or substitute with another safe container for safe transport.

If your senior cat keeps refusing to enter the carrier, help get your cat acclimated to it by placing it among your home’s everyday environment. Place any treats, favorite toys or blankets inside to make it more comfortable and inviting for your cat. And be sure to keep them inside once your cat enters.

Top-loading carriers are less stressful for your senior cat, as they allow for easier removal. And if needed, your cat can be examined while remaining inside the carrier.

Car Ride Tips

Don’t limit car rides strictly for visits to the vet. Start taking your cat on regular rides in the carrier to help your cat get used to the motion and the surroundings of your vehicle.

Avoid feeding your cat for at least one hour before transport to keep your cat from getting carsick.

Office Tips

Give your cat a treat or verbal praise to reward good behavior in both the lobby and veterinarian’s office.

Always speak in a soft voice to help your cat remain calm.

Never resist a trained veterinary professional from handling your cat. This will raise your cat’s anxiety and cause her to bite or scratch.

Be sure to discuss with your veterinarian ways to make your next visit even more comfortable for both you and your senior cat.

Post Construction Cleaning Company Marketing Plan

Construction Cleanup Best Practices

Sooner or later, every building needs renovations. On-site construction requires cleanup during and after the project. The first step is removing large objects and debris, then, due to drywall dust, every surface needs a thorough cleaning. This process includes cleaning hard to reach window frames, light fixtures, walls, and floors. Let’s consider some best practices for construction cleanup.

Communication

There needs to be clear communication between the general contractor and the cleaning crew. Chances are the project won’t commence exactly as scheduled, so the builder needs to let the cleanup crew know when post-construction cleanup can start. Also, the general contractor can instruct the cleaning staff on specific care requirements. For example, grout leaves a haze during construction and requires an acidic cleaner. Furthermore, the building’s janitorial crew will need details about the construction materials. Products like luxury vinyl tile, hardwood, and ceramic tile all have different care requirements.

Safety and Training

The cleaning crew needs specific training on construction site safety. Before doing any potentially hazardous job, workers must have appropriate safety training. Staff members must be able to identify and safely handle potential hazards at the construction site. The U.S. Occupational Safety and Health Administration (OSHA) provides standards and training.

Company culture also plays a role in employee health. Set safety as a top priority. Supervisors can lead by example by always following safety regulations. It’s also essential to develop a system for reporting and to address any potential work site hazards.

Personal Protective Equipment

Construction cleaning poses unique factors for crew safety.  Cleaning crews should be equipped and trained with the correct personal protective equipment (PPE). The goal of PPE is to protect your workers from head to toe.


Post Construction Cleaning

Locks and Keys

As soon as you’ve been handed the house keys you should change all the locks and keys of your new home. Remember, past owners could have extra copies of the key so changing everything will guarantee that you won’t walk into your house to find the past owners there. Apart from this new locks and keys definitely signify a fresh start.

DIY Time

Is there anything in your new house that you’d like to change? The moment you buy your property is most definitely the right time to do it. Painting walls and undertaking D.I.Y project can be quite messy and time consuming, so make sure you have family or friends who are willing to help out to make the hard work easier and moving in quicker. Don’t forget to factor in the post construction cleaning should you have any large DIY tasks to do whether it is a room or the whole house.

Nice and Clean

Speaking of fresh start, nothing says fresh more than a deep clean. Cleaning every nook and cranny will never be easy once you’re settled in so getting it done before you get comfortable is a great way to ensure your home is clean. This is especially true if you’ve just bought a home in a new building which up until recently was still a building site. If you need some extra help the Briiz post construction cleaning team are always ready to clean your home.

Call Pest Control

Even if you haven’t seen any pests and your realtor has assured you that your home is pest free, it’s best not to take any risks. Before you bring furniture into the place make sure you get a pest controller to eliminate any nasty bags or other pests which could also be calling your house home.


Simple Steps To Finding A Great House Cleaning Service

Finding a house cleaning service can be a difficult and frustrating task. If you are like the average homeowner, dealing with work, family, and other priorities can make cleaning your home yourself a challenge and one that you’d sooner avoid. There are hundreds of cleaning services that serve the Atlanta area, specifically the Johns Creek Georgia area and surrounding suburbs. They are ready and willing to do the work for you. Because there are so many companies available, knowing how to choose and hire a house cleaning service can seem like an overwhelming task, but if you follow the 8 Step Guide that I have prepared for you, you can pick the best option.

Decide What Needs To Be Cleaned

Decide what areas of your home need to be cleaned before choosing a cleaning service. For example, are there rooms that are off-limits or specific areas that are more important for the service to focus on? Do you want them to do windows and laundry too or only standard cleaning, such as dusting and mopping? Once you know what you need, you can build a list of requirements to narrow down candidates, as some companies don’t offer a full range of services

Gather A List Of Cleaning Companies

Ask family, friends, or neighbors for referrals. Many customers may be happy to share a positive experience with you, and they may even be eligible for a bonus through the cleaning company if you choose its service. Check out the Internet and do searches for cleaning companies that service your area. For instance, you might Google the term and look at the websites of the first couple or three pages of listings

You should use several criteria to do this:

Eliminate any companies that are not bonded and insured. Should any accidents happen during cleaning or any theft occur while the service is there, a bonded and insured service will take responsibility. If you choose a service that doesn’t have these, the responsibility will be yours as the homeowner.

Eliminate companies that don’t have a website, or whose website doesn’t look good, work properly and provide complete information about their services and have customer feedback and testimonials. If the company doesn’t have the resources to produce a good website and do a great job on their own website, then they may disappoint you with the quality of work they do in your home.


How To Deep Clean Your Home Like an Expert

Keeping your house spotless is more than just a matter of aesthetics. A clean and germ-free home is crucial for both your mental and physical wellbeing, and during these scary times it’s your best defense against COVID-19.

Unfortunately, there are many areas in your home that a weekly cleaning and disinfection simply can’t deal with properly. These difficult-to-reach surfaces and deeply ingrained stains are not only more likely to contain allergens and germs, they may also attract insects and other pests.

How often should you clean everything in your house?

Under normal circumstances, a regular home only really needs to be deep cleaned a few times a year, usually at the start of spring or at the end of summer. However, the COVID-19 epidemic has increased the need for frequent cleanings.

If you haven’t already given your place a deep cleaning since the coronavirus outbreak began, we urge you to do so as soon as possible. Depending on how many people live in your household, and how often they go outside during the pandemic, you should consider spring cleaning your place at least on a monthly or bi-monthly basis.

How do I deep clean my home like a pro?

A spring cleaning is much more thorough than a standard cleaning, so it’s best to do it over the weekend or even overnight. Since a deep cleaning usually includes moving furniture, you’re likely going to need help from a family member or a friend.


How To Perform A Walkthrough and Create Post Construction Clean Up Bids

In the world of commercial cleaning, some of the most important bids you will make will be in places that haven’t even seen foot traffic yet. What we are referring to is post construction cleaning – a necessary service in the final phase of any large-scale construction project.

As a post construction cleaning service, your job is to tidy up any loose ends on the construction site and get the location ready for the big reveal to the owner. This is an incredibly important job, and when done well, will set you apart from your competition by many standards of excellence

Getting Started

When performing a post construction cleaning walkthrough, you need to be precise, efficient, and thorough. If you can remember these three things with the acronym PET, you can mentally check your work as you go. Let’s break down each of these qualities further to show how they are important to your post construction cleaning process.

Precision

Being precise in your work as a commercial janitorial cleaner is paramount to maintaining your reputation. This means recording as much detail as you can on your initial walkthrough with the prospect. Much like a standard commercial cleaning bid, you will meet with your client ahead of time and tour the location to capture details about the scope of the work.

This is where tools like Route’s Walkthrough Builder can be extremely helpful. Route’s digitized workflow allows you to take notes about the location while also utilizing real-world performance data to help you come up with a highly accurate post construction cleaning bid of the time and money it will take you to do the job. Using an app for post construction cleaning walkthroughs is a great way to be more precise in your services by giving you more data and information than you can capture by hand.

Time For Kitchen Remodelling

Things to Think About When Remodeling Your Kitchen

Remodeling kitchen designed to complement you and your family’s needs. If you plan on staying in your home, a kitchen remodel can improve your quality of life

Choosing Quality Cabinets

You know that old saying, “Quality over quantity”? When shopping for kitchen cabinets, always choose quality over the cheaper price. Cheap, low-quality cabinets don’t hold up well over time. As a result, you may have to replace them sooner rather than later

Defining Your Goals

Even a small kitchen remodel can give you a good return on investment. Yet, it’s important to think about what you want to get out of your kitchen remodel. Do you plan on selling your house soon? Or do you plan on staying in the same neighborhood for years to come? The answer will determine what type of value you’re looking to get from a kitchen remodel

Exploring Your Options

There are tons of choices that will affect the appearance and function of your kitchen. This is why it’s important to take advantage of our interior design services. One of our kitchen designers will walk you through all the details so you can stay within budget. Working with one of our interior designers can also help you get a good return on investment

Creating an Environment

A thoughtful design means creating an environment both you and your family will love. While anyone can sell you new kitchen cabinets, our designers see the whole picture. They think about how you’ll use your kitchen on a daily basis and what features would offer the most value. For example, our innovative cabinetry designs can help you free up kitchen countertops.


What It Costs To Remodel A Kitchen In 2017

The kitchen is the most popular room of the home to renovate, according to Houzz research, and those who choose to remodel the heart of their home have some definite preferences. After all, the No. 1 reason they choose to renovate this area is no longer being able to stand the old kitchen — can anyone out there relate?

The 2017 U.S. Houzz Kitchen Trends Study, from a research team led by Nino Sitchinava, Houzz’s principal economist, reveals that homeowners updating their kitchens prioritize changing out countertops, backsplashes and sinks. A majority of kitchen renovators are also choosing a more open feel for this room.

How much does it cost? The most common budget — as well as actual spend — on a kitchen renovation remains $25,001 to $50,000, according to the survey. Only 9 percent of kitchen renovators spend more than $100,000; just 4 percent spend less than $5,000. We hope the numbers help give your own project some dollars-and-cents context.

If I see that backsplash one more time … The top motivator for renovating a kitchen continues to be that owners can no longer stand the old kitchen. An increasingly popular reason is finally having the financial means, the triggering factor for 40 percent of renovators, compared with 37 percent the year before.

Countertops before electronics. Countertops are the most popular feature to upgrade, followed closely by backsplashes and kitchen sinks. Notably, a majority of kitchen renovations (51 percent) open the space more to a nearby room, reflecting the ongoing popularity of the great-room concept


Why Choose Kitchen Remodeling?

With a new kitchen space, your family will be happy to spend more bonding time here. Besides, there are endless possibilities of beautifying this area. Most of all, remodeling your kitchen gives a very high return on investment. You can choose to do a complete kitchen renovation or just focus on repairing some of its parts. Whichever you choose, kitchen cabinets are a good starting point since they make up the basic structure of a kitchen.

Readymade or custom built kitchen cabinets

You can choose between customized or readymade kitchen cabinets, depending on your specific needs. If your kitchen has a standard size of kitchen cabinets and you want to replace them, buying new ones will not be a problem. Besides being more affordable, these kitchen cabinets are readily available in home improvement and hardware stores.

If you are planning to change your entire kitchen and you want something more unique, you can go for custom built kitchen cabinets. Though they tend to be more expensive and take longer to make, these kitchen cabinets can offer a unique look and can be designed according to your given specifications. An expert contractor will involve you in every part of the process so everything you want will be followed, from the material of the kitchen cabinets to where they will be positioned.

Base or wall kitchen cabinets

In general, there are two categories of kitchen cabinets. There are base and wall cabinets. Base or floor cabinets are installed on the kitchen floor. Usually, these cabinets come with a tabletop above them. These kitchen cabinets are used in preparing food and to store small appliances like a mixer, blender, oven toaster, and microwave oven. They are usually built around the plumbing to hide their unsightliness. There are some base cabinets that are built under the kitchen sink to keep household cleansers and cleaning supplies. Other base cabinets have drawers built into their top half to house kitchen utensils. This makes it more convenient to get them whenever needed.


Kitchen Remodeling in Chicagoland

Whether you want to update a few key details to modernize your kitchen or need a total remodel to increase your kitchen’s functionality, our team has your back—and more than 100 years of experience. Add the storage and counter space you need to improve organization, create more accessibility to your appliances, or transform your space into an open concept that works for your lifestyle.

Kitchen Cabinets

Cabinets can drastically change the aesthetics of your kitchen and provide needed functionality. You’ll want to consider the material, finish, storage solutions, and surface styles to find the cabinets that best fit your style and needs. Whether you’re going for a sleek, modern look or want to showcase your china,

Kitchen Countertops

Quality surfaces don’t only transform the mood of your kitchen—they can increase the value of your home, too. The kitchen is one of a home’s biggest selling points and countertops can improve functionality, giving you a more durable space for prepping meals or added style for hosting family and friends.

Kitchen Backsplashes

It’s the details that add practicality and style to any room. Backsplashes bring texture and color to your kitchen. Our backsplashes come in a range of designs and materials to fit your space and style. Or you can work with our designers to create a one-of-a-kind custom backsplash.

Finishing Touches

Details like cabinet hardware, lighting, and plumbing fixtures can subtly transform your space from country to contemporary to coastal. These elements also offer improved functionality. For example, replacing an ancient faucet may reveal installation issues that you can solve at the same time as your remodel, ensuring proper functionality moving forward.


What is the average cost to remodel a kitchen?

The average kitchen remodel cost can range from $18,000 to $58,000, depending on the size of the renovated space and where you live. It also varies according to the cost of materials, the scope of the project and labor charges.

Keep in mind that an extensive kitchen renovation is an expensive task as you’re dealing with components such as kitchen cabinets (one of the most expensive elements of any kitchen remodel) and countertops. You will probably also want to replace an array of kitchen appliances — all of which cost big bucks.

How do average kitchen remodel costs vary?

Your complete cost takes a number of factors into consideration, such as the total square footage of the space, the scope of renovation, your zip code, local labor costs and the finishing details – just to name a few.

How much does it cost to remodel a kitchen?

Your kitchen improvement project can be broken down into several components that the total price will take into account.

Should you opt for hiring professionals vs DIY?

Your average kitchen remodel cost also depends on whether you’ve decided to go ahead with a DIY project or want to hire certified contractors for the kitchen upgrades. Although the former will help you save money, it’s best to have kitchen experts working on your kitchen project. They will definitely make your kitchen renovation easier, quicker, and hassle-free.

Scorpion Can Have FIVE Sets Of Eyes!

How to Scorpion-Proof Your Home

You may have some scorpion roommates you don’t know about. Our homes are a scorpion’s ideal climate, and many hunker down to hibernate in the winter right under our noses!

Bark scorpions hibernate in groups of up to 30, and they often hide in warm, dark places. These unexpected houseguests won’t show themselves until the temperatures begin to heat up. These tips will help you scorpion-proof your home:

  • Seal off all potential entry points. Scorpions can enter through the tiniest crack! Seal off the spots where waterlines, electrical or phone lines enter your house. Many pest control services can do this for you.
  • Don’t overwater your plants. You’re providing a water source for scorpions and other pests if you do. Scorpions can live for months without food if they have a reliable water source. For plants with sprinkler systems, be sure to fix leaks quickly.
  • Trim plants away from your home. Scorpions can gain access to your home by climbing over from surrounding vegetation.
  • Remove sheltering areas around your yard. Scorpions love the shelter that large rocks, logs, dead or decaying shrubs and untrimmed palm trees provide. They also enjoy woodpiles, and clothing or shoes left out.
  • Place potted plants on stands. Scorpions like to hide under pots, and stands eliminate this option.


What Attracts Scorpions to My Home?

The more you know about these arachnids, the more equipped you are to know where and when to spot them, how to know they have made it inside of your home, and most importantly, how to get them out—for good.

Scorpions have lived on Earth for over 400 million years. Found on every continent—except Antarctica—these eight-legged creatures are related to ticks, mites and spiders. There are 1,500 scorpion species found worldwide, 90 of which live in the United States and 18 that make their home in Texas. Over a dozen species of scorpions are found in Big Bend National Park alone.

During most of the day, scorpions remain hidden in the wild in burrows or crevices to avoid exposure to sunlight and heat. At night, they feed on a variety of insects, centipedes, arachnids, other scorpions and larger species even feast on lizards, snakes and mice. All species of scorpions use venom to defend themselves against predators and to immobilize and kill their prey. The arachnid’s tail includes a barb which works like a hypodermic needle to inject venom into its prey. The impact of the venom varies from mild pain to a lethal cocktail, although when humans get stung, in most cases pain and swelling goes away after an hour or two. The most dangerous scorpion, the Arizona bark scorpion, does not live in Texas. The species of scorpion Texas homeowners is most likely to encounter is the striped bark scorpion.

In the wild, the striped bark scorpion lives under rocks, in dead vegetation and inside of logs. This species of scorpion does not burrow, and can often be seen climbing, so they can make their way into your home through your attic. Scorpions often find their way inside our homes as they search for moisture, shelter and food. When temperatures climb, striped bark scorpions may descend to escape the heat.


How to prevent scorpions from getting in your bed.

If professional scorpion control is not an option where you live, you can prevent scorpions from getting in your bed with a few items and a little elbow grease. This is a good 5 step process to keep scorpions out of your bed… Sleep tight!

Step 1 – Your Bed

Move your bed away from the wall a couple inches and put the feet of your bed frame in glass mason jars! Scorpions can climb walls, but can’t climb smooth glass and won’t be able to climb from the floor onto your bed using glass jars this way!

Step 2 – Bedding

Make sure you keep all bedding up off the floor night and day. Scorpions like beds because they often seek shelter of bedding. There should never be anything left hanging from your bed onto the floor. Bark Scorpions love to climb, and can climb clothes, blankets, sheets, etc. from the floor into bed.

Step 3 – Hang a SMOOTH Surface

Get a piece of smooth glass or plastic a few inches longer and wider than your bed. Don’t use cardboard because it’s not a smooth surface and scorpions can climb upside-down on it. They key word here is smooth. Scorpions are great climbers as long as the surface has a little texture for them to hold onto.

Using strong fishing line or wire, hang your smooth surface from all four corners on the ceiling above your bed. The smooth surface should hang exactly over your bed but a few inches wider and longer than the bed on all sides. This will keep scorpions that are climbing on the ceiling from dropping into your bed. The smooth surface will catch any scorpions that drop, and because it’s wider and longer than your bed, scorpions falling from the ceiling fall on the floor instead of into your bed.

If you use a surface that is NOT smooth, scorpions will fall onto it then climb upside down on it above your bed and can still drop into your bed.

Step 4 – Seal Your Home

Sealing your home is another method to keep scorpions out of your home and thus out of your bed. However, scorpions easily enter homes through cracks as small as one sixteenth of an inch… That’s as thin as a credit card. This is best done by a professional contractor who knows everything about how your home is build and all the possible entry points. We like David Berrara and the professionals at We Seal It.

Step 5 – Black Lighting

Black-light scorpion inspections in the dark allow you to see any scorpions in your home or yard and then manually remove them. This will not prevent future scorpion problems, but is another way for you to sleep better at night. Mature scorpions glow a bright yellow/green under a blacklight in the dark. Scorpions can be collected using pliers and a glass jar that they can’t climb out of.


Tips

To help avoid encounters with scorpions in and around your home follow these prevention tips:

  • Eliminate standing water
  • Seal cracks and crevices, especially around doors and windows where they can gain access to your home
  • Inspect cabinets, closets, and other dark places on a regular basis
  • Clear away brush, debris, and woodpiles from the perimeter of your home. Keep firewood about 30 feet away
  • Scorpions feed on other insects such as crickets. You can help eliminate crickets by turning outdoor lights off at night


Clean Inside Your Home

Just as crucial as de-cluttering your yard is keeping your home clean and organized. Clean—because crumbs attract bugs which in turn attract predators like scorpions. Organized—because scorpions will use everything from shoes to boxes to piles of clothing to hide. Traditionally cluttered spaces like closets and underneath beds will require attention, too.

Maintain Your Yard

Keeping a clean and well-organized yard will go along way toward safeguarding your home against scorpions. Vulnerable to dehydration—and therefore extreme heat and sun exposure—scorpions require shady, cool places to hide during the daytime before emerging to hunt at night. Make sure to do the following:

  • Keep bushes and small trees landscaped. Do not allow them to overgrow and touch the outside walls of your home—scorpions use these as bridges to enter through windows or other small openings.
  • Keep grass & other vegetation short and trim.
  • De-clutter your yard, removing all unnecessary items: including brush, debris, decorative rocks, woodpiles, lawn equipment, etc.

Choosing The Right Event Videographer

Videography Tips for More Professional-Looking Videos

Many of these tips and techniques are timeless, which means you can still refer to these as your guide when you decide to pursue a career in videography and become a cinematographer. Try them out and learn them by heart. Along the way, not only would these help you produce more professional-looking videos that will impress your audience but they will also help you realize your potential and own creative filmmaking style.

Gather Your Equipment

Fortunately for beginners, we live in a time where high-quality digital cameras are made to be affordable for personal and recreational use. You can practice videography with gadgets that you may already have, like your smartphone, as long as you keep these simple things in mind:

  • Use the back camera for better quality footage
  • Shoot in landscape mode (horizontally instead of vertically)
  • Turn on the overlay grid on your screen, if you have it, so you have a guide for keeping your phone level

If you have the budget for it, we definitely recommend purchasing a gimbal stabilizer for your camera for steadier handheld shots, an external microphone for better audio, and a reliable video tripod.

Plan Your Shoot

If you’re going to shoot a music video, commercial, or short film, you’ll have much more freedom to plan it from start to finish. To really do it like the pros, create your own storyboard with illustrations of your scenes in sequence. This will help you pre-visualize your final footage and outline your desired shots. It will serve as your guide during shooting and editing, plus it can help you determine the perfect time of day for shooting, your desired venues, and the right cameras to be used (in case you have several options) prior to filming.

On the other hand, if you’re covering an event, you’re going to want to be as ready as you possibly you can. For instance, in wedding videography, the wedding videographer should have a good idea about when and how to take videos of the bride, groom, and the wedding party.

A few helpful wedding videography tips to remember:

  • Make sure that you know the timeline for the entire wedding day like the back of your hand — from the ceremony to reception program.
  • Have a shot list prepared. This list should include the first kiss, the cake cutting, and other key moments that the couple would want to be immortalized.
  • Just as there are wedding photography styles, there are also certain shooting styles for wedding videography. Stick to a specific style. Be consistent and use the right one that fits the couple and their event for the perfect cinematic wedding video.


Map Your Setup Locations and Times

Depending on the venue, you may have to do a bit of walking to get from one position to another in time to capture key events. If you know you’re going to be on the move, make sure you allow time to get from one spot to the next and with the right crew and equipment. Make sure you’re in the right place at the right time – all the time.

Prepare for the Worst – Bring Extra Everything

You never know when a problem will arise. At some events your entire job might have you sitting in a chair while your camera records right next to you and nothing will go wrong. Other times you might have cables go bad, camera failures, missing media, broken adaptors, accidents with gear, spills, and other various problems. Adapting becomes key, and to do that, you may need extra equipment.

Know Your Gear

If you’re shooting tapeless, do you get a blip in your recording when your camera software automatically breaks up your video file at 4GB to conform to your FAT32 memory card? Do you know how to change audio channels and fend off interference with your wireless microphones in an environment full of wireless signals? Do you know how to change the settings on your camera for different microphones, or how to set the camera to output to a screen via HDMI or SDI properly?

Factors that often only show themselves in event environments are definitely worth preparing for. Create test scenarios at your home or office – try leaving your camera recording all day then review the footage for issues. Test your audio in different locations, (busy apartment buildings or malls might simulate Wi-Fi saturated environments), and play with the video output settings and see what works best with your hardware.


Shots spanning a crowd or showing your venue/environment

You’re looking for images that capture the feeling of your event, while also creating a fear of missing out. A shot that shows the scale of your event, including the venue and environment, is enticing and helps people imagine what it’d be like to attend.

Short video clips and soundbites from attendees

92% of consumers trust peer recommendations over advertising, which is one of the reasons why testimonials are so powerful. People are usually more than happy to say a few words about why they love something, so make sure to interview attendees about your event.

Aerial shots using drones

Drones have made it super easy to get footage from unusual vantage points and perspectives of events. Doing so reinforces the scale of your conference or festival, and emphasizes the points of interest about your location (like a big city, or over-seas destination). If you don’t have access to a drone, not to worry. You can search for stock footage in the city where you’re holding your event.


Manually Set Your Camera’s White Balance

Now we know that different light sources have different temperatures, we need to account for these temperature ranges by manually setting the camera’s white balance – a process that basically tells the camera what “true white” looks like in an environment to avoid color casting. In the image above, the shot on the left has a blue color cast caused by the natural temperature of the daylight in the shot. The white balance of the shot on the right has been set correctly, capturing the true colors of the image.

Many cameras have an auto-white balance feature, but I strongly recommend learning how to set it manually. This avoids relying on your camera to achieve a correctly color balanced shot. You can learn how to do this by referring to the instruction manual of your camera. Even if the color casting in the example above is the effect you’re trying to achieve, film the shot using the correct white balance and adjust the color in post-production – don’t rely on lazy camerawork to achieve a particular effect.


How to Manage Your Client’s Expectations and Needs

This is a fundamental skill for all professional photographers. Having an open dialogue between yourself and your client is key to getting the best shots.

You need to ask your clients important questions such as these:

  • What event is this?
  • What kind of images do you want from this event? Are you looking for headshots?
  • What are the most important moments?
  • What style of photography do you like?
  • What do you not like?

No one wants a disappointing event photography shoot because there was miscommunication. By speaking to your client, you can make sure that your client is well aware of the limits of the photo session. Make sure that they understand what to expect from your services. If your client has hired an event organizer, speak to them about expectations.